
Smart Blenders and High-Powered Kitchen Tech: Elevating Smoothies, Sauces, and Protein Creations
Last updated: June 5, 2026
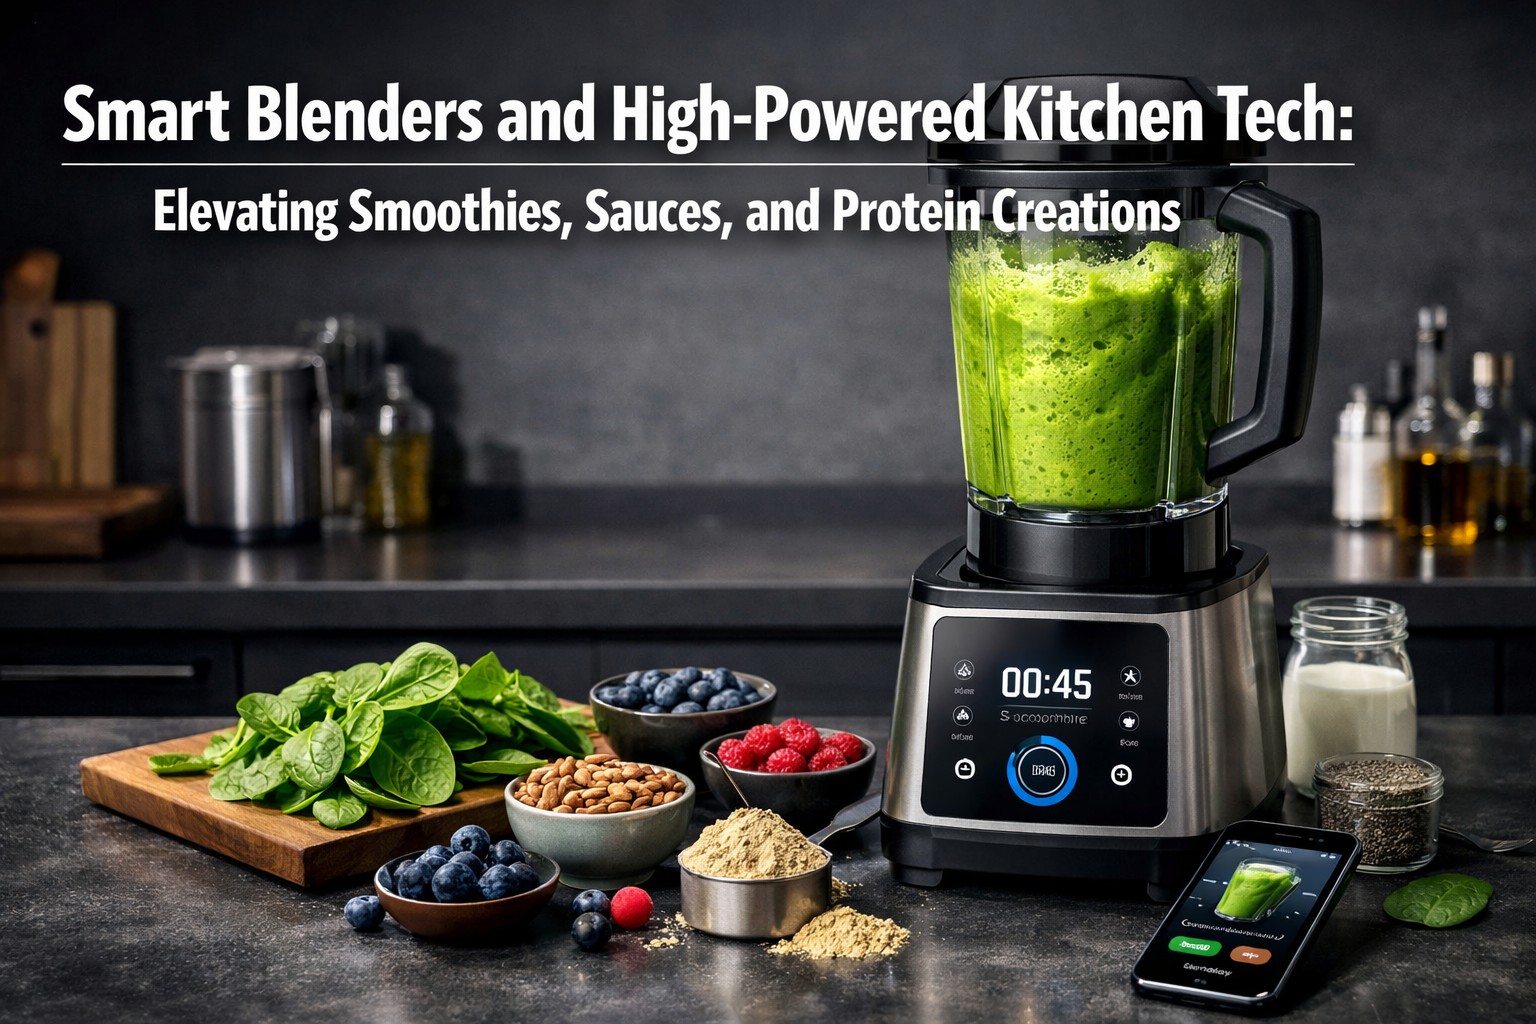
Next-generation smart blenders combine motors exceeding 1,000 watts with app-connected preset programs that automatically adjust speed and duration for specific recipes. These devices enable home cooks to create restaurant-quality smoothies, nut butters, and protein-packed desserts without guesswork, while high-powered kitchen tech delivers the torque needed to pulverize frozen ingredients and tough nuts that traditional blenders can’t handle.
Key Takeaways
- Smart blenders feature app connectivity, preset programs, and automatic speed adjustments, while traditional blenders require manual control
- High-powered models (1,200+ watts) handle frozen fruit, ice crushing, and nut butter creation that standard blenders struggle with
- Price ranges span from $200 budget options to $600+ professional-grade machines, with mid-range models ($300-400) offering the best value for daily use
- Vitamix and Blendtec lead the market but alternatives like Ninja and Cleanblend deliver comparable power at lower prices
- Common mistakes include overloading containers, skipping liquid bases, and running motors too long without breaks
- Tamper tools become essential when blending thick mixtures like nut butters or frozen desserts
- Smart features provide genuine value for recipe experimentation but aren’t necessary for basic smoothie making
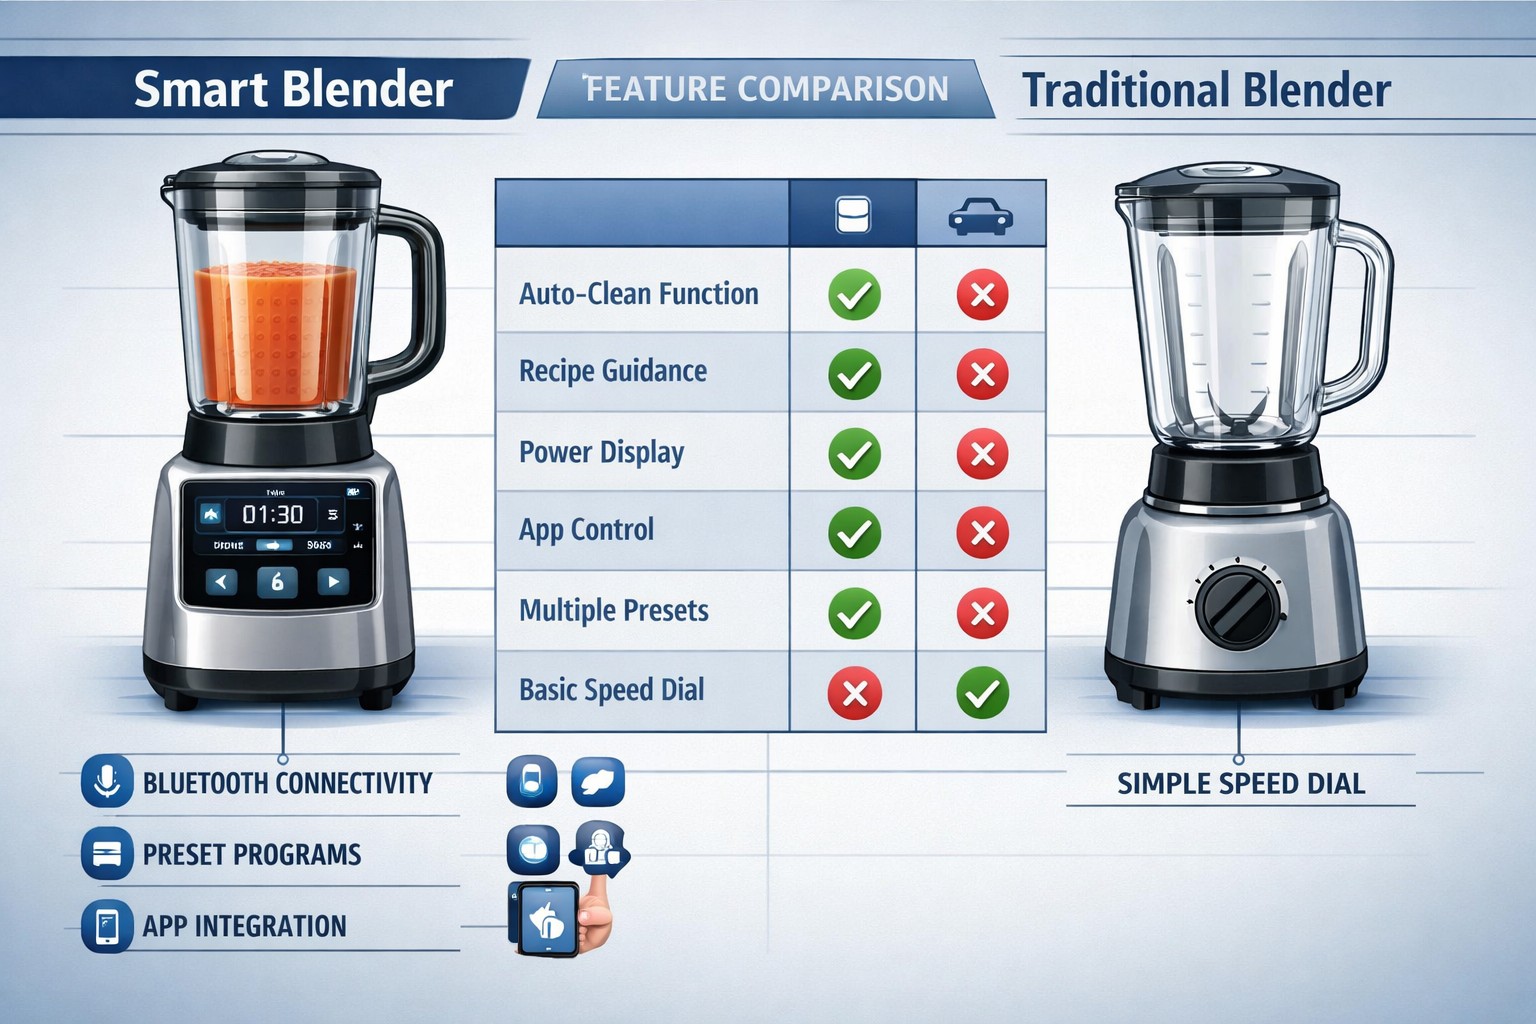
What Makes a Blender Smart vs Regular Blender
Smart blenders include digital connectivity features like Bluetooth or Wi-Fi, touchscreen interfaces, and companion apps that guide users through recipes with automatic speed and time adjustments. Regular blenders rely on manual speed dials or buttons without connectivity, requiring users to control blending duration and intensity themselves.
The key differences break down into several categories:
Connectivity and Control
- Smart models sync with smartphone apps for recipe libraries and step-by-step guidance
- Traditional blenders use physical dials or buttons with 3-10 speed settings
- Smart versions often include preset programs (smoothie, soup, nut butter, ice cream)
- Regular models require manual timing and speed adjustments
Automation Features
- Smart blenders detect container size and ingredient density to adjust programs
- Some models include self-cleaning cycles activated through the app
- Traditional blenders need manual monitoring to prevent over-blending
- Smart versions can save custom programs for frequently made recipes
User Experience
- Apps provide nutritional information and ingredient substitution suggestions
- Smart models send notifications when blending cycles complete
- Regular blenders offer simpler operation without learning curves
- Traditional versions don’t require software updates or app downloads
Choose a smart blender if you experiment with diverse recipes and value guided assistance. Stick with a regular high-powered model if you primarily make the same few items and prefer straightforward controls.
Best High Powered Blender for Protein Shakes and Smoothies
For protein shakes and smoothies, look for blenders with 1,200-1,400 watts of power, container sizes between 48-64 ounces, and blade designs optimized for vortex creation that pulls ingredients downward. The Vitamix 5200, Blendtec Designer 725, and Ninja Professional Plus all excel at creating smooth, lump-free protein drinks with frozen fruit.
Top Features for Protein Drinks
- Motor power: 1,200+ watts ensures frozen berries blend completely
- Container shape: Tall, narrow designs create better vortex action than wide containers
- Blade configuration: Multi-level blades catch ingredients at different heights
- Speed range: Variable speeds let you start slow for powders, then increase for frozen items
Performance Considerations
When blending protein shakes, the blender must handle both fine powders (which can clump) and frozen ingredients (which resist blending). Models with tamper tools help push thick mixtures toward blades without stopping the motor.
For daily smoothie makers, prioritize:
- Easy-to-clean containers (wide mouths or self-clean cycles)
- Durable blade assemblies that won’t dull from ice
- Quiet operation if blending early mornings
- Warranty coverage of 5+ years for motor protection
The Vitamix 5200 remains the gold standard for smoothie consistency but runs louder than competitors. Blendtec models operate more quietly and include preset smoothie cycles. Ninja alternatives cost 40-50% less while delivering comparable results for basic protein shakes, though they may struggle with tougher tasks like nut butters.
If you’re focused on maximizing protein intake, check out our guide on which is better: chicken breast or whey protein for comparing whole food versus supplement options.
Vitamix vs Blendtec: Which One Is Better for Daily Use
Vitamix offers variable speed control and tamper tools that give users more hands-on control, while Blendtec features pre-programmed cycles and wider blade designs that often eliminate the need for tampers. For daily use, Vitamix suits those who want precise control over texture, while Blendtec works better for set-it-and-forget-it convenience.
Vitamix Advantages
- Variable speed dial allows gradual acceleration from 1-10
- Tamper tool included for thick mixtures and frozen desserts
- Taller, narrower containers create stronger vortex action
- Longer warranties (7-10 years) on most models
- Quieter operation at lower speeds
Blendtec Advantages
- Pre-programmed cycles (smoothie, soup, ice cream) run automatically
- Wider, shorter containers fit under more cabinets
- Blunt blade design rarely needs tamper assistance
- Touchscreen interfaces on higher-end models
- Slightly more powerful motors (1,560 watts vs 1,380 watts)
Daily Use Scenarios
Choose Vitamix if you:
- Make thick nut butters or frozen desserts regularly
- Prefer controlling blend texture manually
- Value quieter operation for early morning smoothies
- Want the longest possible warranty coverage
Choose Blendtec if you:
- Prefer one-touch preset programs
- Have limited counter or cabinet space
- Blend mostly liquids and soft ingredients
- Want the most powerful motor available
Both brands handle daily smoothies, soups, and sauces exceptionally well. The decision comes down to whether you value manual control (Vitamix) or automated convenience (Blendtec). Neither choice will disappoint for standard daily blending tasks.
How Much Should I Spend on a Good High Powered Blender
Expect to spend $300-400 for a reliable high-powered blender that handles daily smoothies, frozen fruit, and occasional nut butters. Budget models ($150-250) work for basic smoothies but may overheat with tough ingredients, while premium options ($500-600) offer longer warranties and more durable components but don’t necessarily blend better for most home cooks.
Price Tier Breakdown
| Price Range | What You Get | Best For |
|---|---|---|
| $150-250 | 900-1,100 watts, plastic gears, 1-3 year warranty | Occasional smoothie makers, soft ingredients only |
| $300-400 | 1,200-1,400 watts, metal drive systems, 5-7 year warranty | Daily users, frozen fruit, basic nut butters |
| $500-600+ | 1,400+ watts, commercial-grade components, 7-10 year warranty | Heavy daily use, professional-level tasks, maximum durability |
Value Calculation
Consider your usage frequency:
- 1-2 times per week: Budget models ($200-250) provide adequate performance
- Daily use: Mid-range models ($300-400) offer best cost-per-blend value
- Multiple times daily: Premium models ($500+) justify the investment through longevity
A $350 blender used daily for five years costs roughly $0.19 per day. A $150 model that fails after two years costs $0.21 per day, making the higher initial investment more economical long-term.
Hidden Costs to Consider
- Replacement containers ($50-100)
- Additional blade assemblies ($40-80)
- Extended warranties (typically 10-15% of purchase price)
- Electricity usage (high-powered models draw more energy)
For most home cooks making daily smoothies and occasional sauces, the $300-400 range delivers the best balance of power, durability, and features without paying for commercial-grade components you won’t fully utilize.
Why Is My Blender Not Blending Frozen Fruit Smoothly
Frozen fruit won’t blend smoothly when there’s insufficient liquid to create a vortex, ingredients are loaded in the wrong order, or the motor lacks enough power (below 1,000 watts) to break down frozen chunks. Adding liquid first, using smaller frozen pieces, and pulsing before continuous blending solves most frozen fruit problems.
Common Causes and Fixes
Insufficient Liquid
- Problem: Frozen fruit creates air pockets that prevent blade contact
- Solution: Add at least 1/2 cup liquid per 2 cups frozen fruit
- Best liquids: Water, milk, juice, or yogurt as base layer
Incorrect Loading Order
- Problem: Frozen items on bottom can’t reach spinning blades
- Solution: Layer ingredients with liquids first, then soft items, frozen pieces last
- Exception: Some high-powered blenders work better with frozen items on bottom
Oversized Frozen Chunks
- Problem: Large frozen pieces overwhelm blade momentum
- Solution: Break frozen fruit into 1-2 inch pieces before adding
- Alternative: Let frozen items thaw 5-10 minutes before blending
Inadequate Motor Power
- Problem: Motors under 1,000 watts stall when hitting frozen resistance
- Solution: Pulse 10-15 times before switching to continuous blend
- Upgrade consideration: If this happens regularly, your blender may be underpowered
Technique Tips
Start with the pulse function to break up frozen chunks without straining the motor. Once pieces are smaller, switch to continuous blending at gradually increasing speeds. If ingredients stick to container sides, stop the blender and use a spatula or tamper to push them toward the blades.
For stubborn frozen fruit, try the “reverse blend” method: blend liquid and soft ingredients first until smooth, then add frozen items gradually through the lid opening while blending continues.
Do Smart Blenders With Apps Actually Work or Just Gimmicks
Smart blender apps provide genuine value for recipe discovery, guided blending programs, and nutritional tracking, but the core blending performance depends on motor power and blade design, not connectivity features. Apps work best for users who experiment with diverse recipes and want step-by-step guidance, while experienced blender users may find them unnecessary.
Useful App Features
- Recipe libraries: Access to hundreds of tested recipes with ingredient lists
- Guided programs: Step-by-step instructions with automatic speed adjustments
- Nutritional tracking: Automatic calculation of calories, protein, and macros
- Custom programs: Save your own blending sequences for repeated use
- Maintenance reminders: Alerts for blade sharpening or deep cleaning
Gimmicky Elements
- Social sharing: Posting blend creations rarely adds practical value
- Voice control: Often slower than pressing a button
- Firmware updates: Occasionally required but infrequent
- Bluetooth connectivity issues: Can frustrate when pairing fails
Real-World Performance
The Vitamix Perfect Blend app includes over 500 recipes with automatic blending programs that adjust speed and duration. Users report that guided soup programs (which heat ingredients through friction) and nut butter cycles (which require specific pulsing patterns) deliver more consistent results than manual attempts.
However, for basic smoothies and protein shakes, the app adds minimal value. Experienced users typically create their own routines and rarely reference app guidance after the first few weeks.
Decision Criteria
Apps justify the extra cost ($50-100 premium) if you:
- Regularly try new recipes beyond basic smoothies
- Want nutritional tracking without manual calculation
- Appreciate guided assistance for complex tasks
- Plan to explore soups, nut butters, and frozen desserts
Skip smart features if you:
- Make the same 3-5 recipes repeatedly
- Prefer tactile controls over touchscreens
- Don’t want to manage another app on your phone
- Prioritize simplicity over connectivity
Are Expensive Blenders Worth It for Someone Who Just Makes Smoothies
For basic smoothie making, expensive blenders ($500+) aren’t necessary since mid-range models ($250-350) blend frozen fruit and leafy greens just as smoothly. Premium blenders justify their cost through longer warranties (7-10 years vs 3-5 years), quieter operation, and durability for daily heavy use, but they don’t create noticeably better smoothies than quality mid-tier options.
When Premium Blenders Make Sense
- You blend 2+ times daily for a large household
- You plan to make nut butters, frozen desserts, and hot soups regularly
- Noise level matters (you blend early mornings or late nights)
- You want a 10-year warranty and commercial-grade durability
- You value customer service and easy replacement parts
When Mid-Range Blenders Suffice
- Smoothies represent 80%+ of your blending tasks
- You blend once daily or a few times per week
- Budget constraints make $500+ difficult to justify
- You’re willing to replace the unit after 5-7 years
- Standard noise levels don’t bother you
Smoothie-Specific Performance
In blind taste tests, smoothies made in $300 Ninja blenders versus $600 Vitamix models show no detectable difference in texture or consistency when using the same ingredients. Both pulverize frozen berries, blend leafy greens completely, and create smooth, lump-free results.
The performance gap widens with tougher tasks:
- Nut butters: Premium blenders complete the task in 60-90 seconds; mid-range models take 3-5 minutes with frequent stops
- Hot soups: High-end models heat ingredients to 140°F through friction; budget models can’t generate enough heat
- Frozen desserts: Premium tamper tools and motor power create ice cream texture; mid-range models produce more granular results
For smoothie-focused users, invest in a quality mid-range blender ($300-350) and allocate the $200-300 savings toward high-quality ingredients like organic produce or premium protein powders. The ingredient quality will impact your smoothies more than the blender brand.
If you’re adding protein to your smoothies, learn more about why chicken breast has so much protein as a whole-food alternative to powders.
Can High Powered Blenders Replace Food Processors for Sauces
High-powered blenders excel at smooth, pourable sauces like marinara, pesto, and salad dressings but struggle with chunky salsas, thick dips, and tasks requiring precise chopping control. Blenders create smoother textures than food processors due to faster blade speeds (20,000+ RPM vs 1,500 RPM), making them ideal for emulsified sauces but less suitable for textured preparations.
Blenders Win For:
- Smooth sauces: Marinara, enchilada sauce, curry bases
- Emulsified dressings: Vinaigrettes, Caesar dressing, mayonnaise
- Nut-based sauces: Pesto, romesco, tahini sauce
- Hot sauces: Blending creates friction heat for warm soups and sauces
- Smooth purees: Hummus, bean dips (though very thick)
Food Processors Win For:
- Chunky salsas: Controlled pulsing maintains texture
- Thick dips: Wider bowls prevent air pockets
- Chopping tasks: Onions, garlic, herbs for sauce bases
- Dough preparation: Pizza sauce ingredients need chopping first
- Large batches: Wider containers hold more volume
Technique Differences
Blenders work from bottom-up, pulling ingredients down into a vortex that creates ultra-smooth consistency. This makes them perfect for sauces where you want zero chunks or texture variation.
Food processors work from top-down with wider, slower blades that chop rather than pulverize. This preserves some texture and gives you more control over the final consistency through pulsing.
Practical Workarounds
If using a blender for sauces:
- Cut ingredients into 1-inch pieces before adding
- Add liquid first to create initial vortex
- Use tamper to push thick mixtures toward blades
- Blend in smaller batches (fill container only halfway)
- Expect smoother results than you might want for rustic sauces
For most home cooks, a high-powered blender handles 70-80% of sauce needs. Keep a food processor if you regularly make chunky salsas, thick dips, or need precise chopping control. If choosing only one appliance, the blender offers more versatility across smoothies, soups, and smooth sauces.
Common Mistakes People Make When Using High Powered Blenders
The most common mistakes include overloading containers beyond the max-fill line, running motors continuously for too long without breaks, and adding ingredients in the wrong order. These errors cause motor overheating, poor blending results, and premature wear on blade assemblies and drive systems.
Critical Mistakes and Solutions
Overloading the Container
- Mistake: Filling past the max-fill line or packing too many frozen items
- Result: Motor strain, incomplete blending, ingredients stuck above blades
- Solution: Fill only to 2/3 capacity for thick mixtures, max-fill line for liquids
- Rule: If you need to force the lid closed, you’ve added too much
Skipping Liquid Base
- Mistake: Adding only frozen fruit or ice without liquid
- Result: Air pockets form, blades spin without contacting ingredients
- Solution: Always add at least 1/2 cup liquid as the first ingredient
- Exception: Some high-powered models can crush ice dry, but it strains the motor
Wrong Ingredient Order
- Mistake: Loading frozen items first, then liquids on top
- Result: Frozen pieces can’t reach blades, liquid sits on top
- Solution: Liquids first, soft ingredients second, frozen/hard items last
- Alternative: Some blenders work better with reverse order—check your manual
Continuous Running Without Breaks
- Mistake: Blending for 3-5 minutes straight on high speed
- Result: Motor overheating, burnt smell, automatic shutoff
- Solution: Blend in 60-second intervals with 30-second rest periods
- Watch for: Burning smell or housing getting hot to touch
Ignoring Speed Progression
- Mistake: Starting on high speed immediately
- Result: Ingredients fly up container sides, poor blending at bottom
- Solution: Start on low (1-3) for 10 seconds, gradually increase to high
- Benefit: Creates initial vortex that pulls ingredients downward
Not Using the Tamper
- Mistake: Stopping blender repeatedly to scrape sides with spatula
- Result: Interrupts blending momentum, adds time, risks blade contact
- Solution: Use included tamper through lid opening while blender runs
- Safety: Tamper designed to reach ingredients without touching blades
Additional Pitfalls
Avoid blending hot liquids above 140°F in sealed containers—pressure buildup can blow the lid off. Remove the center cap and cover with a towel instead. Don’t blend carbonated beverages, which create excessive foam and pressure. Never run the blender empty, which damages blade bearings.
What Wattage Blender Do I Need for Crushing Ice and Nuts
For crushing ice reliably, choose blenders with at least 1,000 watts of power, while nut processing (especially nut butters) requires 1,200+ watts to generate enough torque without motor strain. Peak horsepower matters less than sustained power output—look for models rated at 1,200-1,400 watts continuous rather than inflated peak ratings.
Power Requirements by Task
| Task | Minimum Watts | Recommended Watts | Why |
|---|---|---|---|
| Ice crushing | 1,000W | 1,200W | Frozen water resists blade impact |
| Chopping nuts | 900W | 1,100W | Requires torque but not sustained power |
| Nut butter | 1,200W | 1,400W+ | Thick paste creates maximum motor load |
| Frozen fruit smoothies | 1,000W | 1,200W | Combination of ice and dense fruit |
| Hot soups (friction heating) | 1,300W | 1,500W+ | Needs sustained high-speed operation |
Understanding Power Ratings
Manufacturers often advertise “peak horsepower” (2.0 HP, 3.0 HP) which measures maximum output during brief bursts. This number can be misleading—a 3.0 peak HP blender might only sustain 1.5 HP during actual blending.
Focus on continuous wattage ratings instead:
- 900-1,100W: Handles soft ingredients, light ice crushing
- 1,200-1,400W: Crushes ice easily, makes nut butters with patience
- 1,500W+: Commercial-grade power for heavy daily use
Ice Crushing Specifics
Ice crushing depends on both power and blade design. A 1,200-watt blender with dull blades performs worse than a 1,000-watt model with sharp, angled blades. Look for:
- Stainless steel blades (not plastic-coated)
- Multi-level blade assemblies that catch ice at different heights
- Blunt blade tips (Blendtec style) that hammer ice rather than slice
Nut Butter Considerations
Making nut butter creates the highest motor load because thick paste prevents cooling airflow around the motor. Even 1,400-watt blenders need breaks every 60 seconds to prevent overheating.
Signs your blender lacks sufficient power for nut butters:
- Motor slows noticeably during blending
- Burning smell develops within 60 seconds
- Automatic thermal shutoff activates
- Manufacturer warns against nut butter in manual
For occasional nut butter making, 1,200 watts suffices if you’re patient and take breaks. For weekly nut butter production, invest in 1,500+ watts with thermal protection and metal drive gears.
Alternatives to Vitamix That Are Cheaper but Still Powerful
Ninja Professional Plus ($100-150), Cleanblend ($200-250), and KitchenAid K400 ($250-300) deliver comparable power to Vitamix at 40-60% lower prices. These alternatives sacrifice warranty length and customer service quality but match Vitamix performance for smoothies, frozen fruit, and basic nut butters.
Top Vitamix Alternatives
Ninja Professional Plus DUO ($130)
- Power: 1,400 watts (matches Vitamix 5200)
- Pros: Includes two containers, excellent ice crushing, dishwasher-safe parts
- Cons: Louder operation, 1-year warranty vs Vitamix’s 7-10 years
- Best for: Budget-conscious users who blend daily but don’t need commercial durability
Cleanblend ($200)
- Power: 1,800 watts (exceeds most Vitamix models)
- Pros: BPA-free container, 5-year warranty, tamper included
- Cons: Less refined controls, smaller recipe community
- Best for: Users wanting Vitamix-level power at half the price
KitchenAid K400 ($280)
- Power: 1,200 watts (slightly less than Vitamix)
- Pros: Quieter operation, 5-year warranty, attractive design options
- Cons: Smaller 56-oz container, less powerful than competitors
- Best for: Users prioritizing aesthetics and quieter blending
Oster Versa Pro ($150)
- Power: 1,400 watts with variable speed control
- Pros: 7-year warranty (matches Vitamix), tamper included
- Cons: Plastic drive components wear faster than metal
- Best for: Users wanting long warranty without premium price
Performance Comparison
In smoothie tests, all four alternatives create results indistinguishable from Vitamix for frozen fruit, leafy greens, and protein shakes. Performance gaps appear in:
- Nut butters: Vitamix completes in 60 seconds; alternatives take 2-4 minutes
- Hot soups: Vitamix heats to 140°F; alternatives reach 100-120°F
- Noise levels: Vitamix runs at 88-92 dB; alternatives range 92-98 dB
- Longevity: Vitamix motors typically last 10+ years; alternatives average 5-7 years
Value Calculation
A $600 Vitamix lasting 12 years costs $50/year. A $200 Cleanblend lasting 6 years costs $33/year. For users who blend daily and want maximum longevity, Vitamix still offers better long-term value. For occasional users or those on tight budgets, alternatives provide 85-90% of the performance at 35-50% of the cost.
Consider alternatives if you’re new to high-powered blending and unsure about long-term usage. You can always upgrade to Vitamix later if you become a power user. Start with a $150-200 model and invest the savings in quality ingredients.
Is a Smart Blender Overkill for a Small Kitchen or Beginner
Smart blenders are overkill for beginners who primarily make basic smoothies and have limited counter space, since the app features and preset programs add complexity and cost without improving simple blending tasks. Beginners benefit more from straightforward high-powered models with manual controls that are easier to learn and don’t require smartphone integration.
When Smart Features Add Unnecessary Complexity
Beginners face a steeper learning curve with smart blenders because they must:
- Download and set up companion apps
- Navigate recipe libraries before understanding basics
- Troubleshoot Bluetooth connectivity issues
- Learn both app interface and physical controls
- Manage software updates and account logins
For someone making their first smoothies, a simple 3-5 speed dial provides faster results and less frustration.
Small Kitchen Considerations
Smart blenders don’t necessarily take more counter space than traditional models, but they do add:
- Need for smartphone nearby during use
- Potential Wi-Fi connectivity requirements
- Additional mental overhead in small, busy kitchens
- More features to learn when space limits practice time
Better Starter Options
For beginners and small kitchens, prioritize:
- Simple controls: 3-5 speed settings plus pulse function
- Compact footprint: Models under 18 inches tall fit under cabinets
- Easy cleaning: Dishwasher-safe containers and removable blades
- Clear manual: Simple instructions without app requirements
- Lower price: $150-250 range reduces commitment anxiety
Graduation Path
Start with a basic high-powered blender ($150-250) for 6-12 months. If you find yourself:
- Making diverse recipes beyond smoothies
- Wishing for guided programs
- Experimenting with nut butters and soups
- Blending multiple times daily
Then consider upgrading to a smart model. You’ll better understand which features you’ll actually use, and the basic blender can become a backup or travel option.
Exception Cases
Smart blenders make sense for beginners who:
- Love technology and enjoy app-based learning
- Have specific dietary goals requiring nutritional tracking
- Plan to follow structured meal prep programs
- Received the blender as a gift (no cost decision needed)
For most beginners, master the fundamentals with a straightforward model before adding smart features. The best blender is the one you’ll actually use consistently, and simplicity encourages regular use more than complexity.
How to Prevent Blender From Overheating When Making Nut Butter
Prevent blender overheating during nut butter making by blending in 60-second intervals with 30-60 second rest periods, using at least 2 cups of nuts to ensure proper blade contact, and adding 1-2 tablespoons of neutral oil to reduce friction. Most blenders need 3-5 blend cycles with breaks to complete nut butter without triggering thermal shutoff.
Step-by-Step Nut Butter Process
- Start with room temperature nuts (2-4 cups minimum)
- Blend for 60 seconds on high speed
- Stop and let motor rest for 30-60 seconds
- Scrape sides and break up any clumps
- Add 1 tablespoon oil if mixture seems dry
- Repeat cycles until smooth and creamy (typically 4-6 cycles)
- Watch for warning signs (burning smell, hot housing)
Why Overheating Occurs
Nut butter creates a thick paste that:
- Blocks cooling airflow around the motor
- Creates maximum resistance against blades
- Generates friction heat throughout the container
- Prevents the motor from cooling between rotations
Even commercial-grade blenders overheat if run continuously for 3+ minutes on thick nut butter.
Cooling Techniques
Mandatory Breaks
- Never blend nut butter for more than 60 seconds continuously
- Rest periods allow motor temperature to drop 20-30°F
- Touch the blender housing—if it’s hot, wait longer
Oil Addition
- Add 1 tablespoon neutral oil (avocado, grapeseed) per 2 cups nuts
- Oil reduces friction and helps blades move through paste
- Don’t exceed 2 tablespoons or butter becomes too thin
Tamper Use
- Push nuts toward blades while blending to maintain contact
- Reduces dead spots where nuts aren’t being processed
- Keeps motor load consistent rather than surging
Batch Size
- Use at least 2 cups nuts (minimum for proper vortex)
- Maximum 4 cups for most home blenders
- Smaller batches create air pockets; larger batches overload motor
Warning Signs
Stop immediately if you notice:
- Burning smell (indicates motor strain)
- Housing extremely hot to touch
- Motor speed noticeably slowing
- Automatic shutoff activation
- Smoke (rare but serious—unplug immediately)
Alternative Approach
If your blender consistently overheats during nut butter:
- Consider a food processor instead (wider bowl dissipates heat better)
- Buy pre-made nut butter and use blender for other tasks
- Upgrade to a commercial-grade model with better thermal protection
- Make smaller batches (1-2 cups) with longer rest periods
For protein-rich meal prep, explore our guide on the best way to cook chicken breast to keep it moist as an alternative protein source.
Do I Need a Tamper Tool With High Powered Blenders
Tamper tools become essential when blending thick mixtures like nut butters, frozen desserts, and thick smoothie bowls where ingredients can’t reach the blades on their own. While not necessary for liquid smoothies or soups, tampers prevent the need to stop and scrape containers repeatedly, saving time and maintaining blending momentum for dense recipes.
When Tampers Are Essential
Nut Butters
- Nuts form thick paste that creates air pockets
- Tamper pushes paste toward blades continuously
- Without tamper: stop every 20 seconds to scrape sides
- With tamper: complete process without stopping
Frozen Desserts
- Frozen fruit becomes ice cream consistency
- Mixture too thick to flow naturally toward blades
- Tamper maintains contact between ingredients and blades
- Creates smooth, scoopable texture
Thick Smoothie Bowls
- Minimal liquid creates dense, spoonable consistency
- Ingredients stick to container sides
- Tamper keeps mixture moving through blades
- Achieves soft-serve texture
When Tampers Aren’t Needed
- Regular smoothies with adequate liquid
- Soups and sauces with high liquid content
- Salad dressings and vinaigrettes
- Protein shakes with milk or water base
- Pureed vegetables with cooking liquid
Tamper Safety
Tampers are designed with specific lengths that prevent blade contact:
- Shaft reaches ingredients but stops 1-2 inches above blades
- Can be used while blender runs at any speed
- Never use spatulas or spoons as substitutes (blade contact risk)
- Only use tamper designed for your specific blender model
Alternatives to Tampers
If your blender didn’t include a tamper:
- Stop-and-scrape method: Turn off, scrape sides, restart (slower but works)
- Add liquid: Extra 1/4 cup helps ingredients flow (changes consistency)
- Smaller batches: Less volume means better blade contact
- Purchase separately: Most manufacturers sell tampers for $15-25
Blender-Specific Considerations
Vitamix: Includes tamper with all models; essential for thick recipes Blendtec: Wider blade design often eliminates tamper need; not included Ninja: Some models include tamper; others rely on wider container design Budget brands: Rarely include tampers; may not have lid opening for tamper use
For users who plan to make nut butters, frozen desserts, or thick smoothie bowls weekly, a tamper-equipped blender saves significant time and frustration. For those focused on liquid smoothies and soups, tampers add minimal value and can be skipped to save cost.
Frequently Asked Questions
How long do high-powered blenders typically last? High-powered blenders last 7-10 years with daily use when properly maintained, while budget models average 3-5 years. Vitamix and Blendtec often exceed 10 years, and commercial-grade models can last 15+ years in home settings with regular blade maintenance and motor care.
Can I put hot liquids in a high-powered blender? Yes, but remove the center lid cap and cover with a towel to allow steam to escape. Most blenders handle liquids up to 170°F safely, though you should start on low speed to prevent pressure buildup. Never fill above halfway when blending hot liquids.
Are glass containers better than plastic for blenders? Glass containers resist staining and scratching better than plastic but add significant weight and break risk. BPA-free plastic (Tritan) offers durability and lighter weight for daily use. Glass makes sense if you blend acidic ingredients frequently or want to avoid all plastics.
How often should I replace blender blades? Blender blades last 3-5 years with regular use before dulling noticeably. Signs you need replacement include longer blend times, chunks remaining in smoothies, and visible nicks or bends in blade edges. Professional sharpening services can extend blade life 1-2 years.
Can high-powered blenders make hot soup from raw ingredients? Yes, blenders with 1,400+ watts can heat raw vegetables to 140-160°F through friction when run on high speed for 5-7 minutes. The blending action creates enough heat for warm soup, though it won’t reach boiling temperature. Add hot broth to start warmer.
Do I need to chop vegetables before adding them to a high-powered blender? Cut vegetables into 1-2 inch pieces for best results, even in high-powered blenders. While these blenders can handle larger chunks, smaller pieces blend faster, create less motor strain, and produce smoother consistency. Leafy greens can be added whole.
What’s the difference between pulse and blend functions? Pulse runs the blender in short bursts (1-2 seconds) with breaks between, giving you control over texture and preventing over-blending. Continuous blend runs at steady speed until you stop it. Use pulse for chunky salsas and initial frozen fruit breaking; use blend for smooth results.
Can I grind coffee beans in a high-powered blender? Yes, but blenders produce less consistent grind than dedicated coffee grinders. Use pulse function in 1-2 second bursts for 10-15 pulses. The result works for French press or cold brew but creates too much fine powder for drip coffee or espresso.
How do I remove stains from my blender container? Fill container halfway with warm water, add 1/2 cup white vinegar and 2 tablespoons baking soda, then blend on high for 60 seconds. For stubborn stains, let the mixture sit 30 minutes before blending. Rinse thoroughly and repeat if needed.
Are refurbished high-powered blenders worth buying? Manufacturer-refurbished blenders (Vitamix, Blendtec) offer 30-50% savings with 5-year warranties, making them excellent value. Avoid third-party refurbished units with shorter warranties. Check that refurbished models include all original accessories like tampers and cookbooks.
Can blenders replace juicers for making juice? Blenders create smoothies with all fiber intact, while juicers extract liquid and discard pulp. You can strain blended mixtures through cheesecloth for juice, but it’s more work than using a juicer. Blenders are better for whole-fruit nutrition; juicers for pure juice.
What causes blender blades to become dull? Ice crushing, hard nuts, and frozen fruit gradually dull blades over years of use. Running the blender empty, blending extremely hot liquids, and dishwasher exposure (if not dishwasher-safe) accelerate dulling. Hand-washing and avoiding unnecessary ice crushing extend blade life.
Conclusion
Smart blenders and high-powered kitchen tech have transformed home cooking by making restaurant-quality smoothies, sauces, and protein creations accessible to everyone. While smart features like app connectivity and preset programs offer genuine value for recipe experimentation, the core performance depends on motor power (1,200+ watts), blade design, and proper technique.
For most home cooks, mid-range models ($300-400) deliver the best balance of power, durability, and features without the premium price of top-tier brands. Vitamix and Blendtec lead the market, but alternatives like Ninja, Cleanblend, and KitchenAid provide comparable performance at lower costs. The key is matching the blender to your actual usage—basic smoothie makers don’t need $600 machines, while daily users making diverse recipes benefit from commercial-grade durability.
Take Action Now:
- Assess your needs: List what you’ll actually blend (smoothies, nut butters, soups, sauces)
- Set your budget: Determine whether $200, $350, or $500+ fits your situation
- Prioritize features: Decide if smart features, tamper tools, and preset programs matter to you
- Read user reviews: Focus on long-term durability reports, not just initial impressions
- Start simple: Master basic techniques before investing in premium models
Remember that proper technique—correct ingredient order, adequate liquid, and rest periods—matters more than brand names for most blending tasks. Whether you choose a smart blender with app integration or a straightforward high-powered model, consistent use and proper maintenance will deliver years of smoothies, sauces, and protein-packed creations that rival any restaurant or juice bar.
For more kitchen tips and protein-rich meal ideas, explore our guides on the best way to make chicken breast and healthy chicken breast preparation methods.
SEO Meta Title: Smart Blenders & High-Powered Kitchen Tech Guide 2026


