
How to Chicken Breast on Stove for Juicy Results
When you search for how to chicken breast on stove, you usually want juicy chicken that is browned outside and cooked through inside. You can get that result with a hot skillet, even thickness, and a little patience.

The key is to sear the chicken well, keep the heat controlled, and let it rest before slicing so the juices stay in the meat. This method works for simple weeknight meals, meal prep, and quick lunches.
If you have ever wondered how to cook chicken on the stove without drying it out, the answer starts before the pan gets hot. You need the right chicken, the right thickness, and the right amount of heat.
What You Need Before the Pan Heats Up
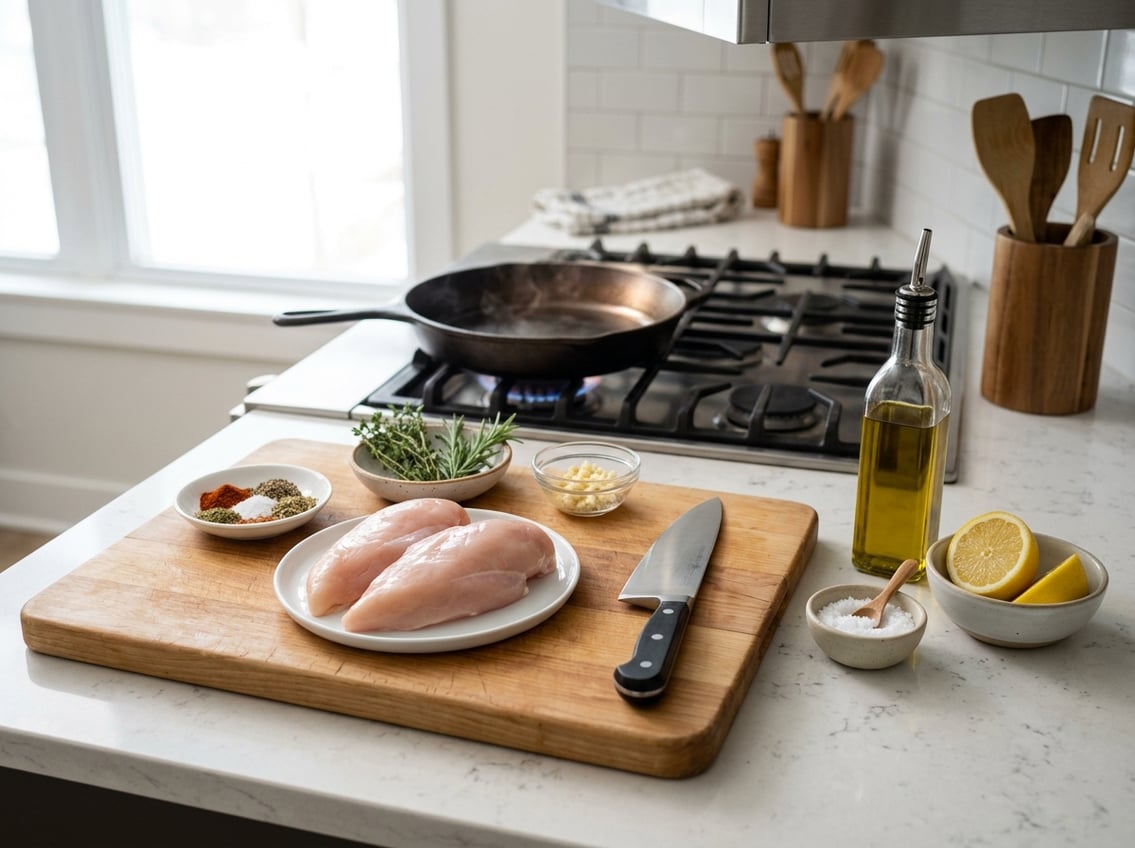
A good stove top chicken recipe does not need many ingredients. What matters most is using boneless skinless chicken breasts that are similar in size, plus a skillet that can hold steady heat.
Good prep helps you get a better crust and a more even finish on your stove top chicken breast.
Best Chicken to Use and Why Thickness Matters
Choose boneless skinless chicken breasts that are about the same size so they cook at the same pace. If one piece is much thicker, pound it gently until the whole breast is even.
Uneven thickness often leads to dry edges and undercooked centers. Pounding the chicken to a consistent thickness helps it cook more evenly and stay tender.
Seasonings, Oil, and Butter for Better Browning
Simple seasoning works well. Salt, pepper, garlic powder, paprika, and a little onion powder give you a solid base without masking the chicken flavor.
Use an oil with a high smoke point so you can get a good sear without burning the pan. Add a small pat of butter near the end to give your seared chicken breast extra flavor and help with browning.
Skillet and Tools That Make the Process Easier
A heavy skillet, like cast iron or stainless steel, holds heat better than a thin pan. You also want tongs, a spatula, and a meat thermometer.
A thermometer takes the guesswork out of timing. If your skillet is crowded, cook in batches so each piece can sear instead of steam.
Cook the Chicken Step by Step
If you want to cook chicken breasts with good color and a juicy center, the order matters. Start with dry chicken, hot oil, and a pan that is not overcrowded.
Let each side cook long enough to brown.
Prep the Chicken for Even Cooking
Pat the chicken dry with paper towels. Moisture on the surface can slow browning, so this step helps you get better color.
Season both sides well and let the chicken sit while the pan heats. If your breasts are thick in the middle, pound them first so you can cook chicken breast in a pan more evenly.
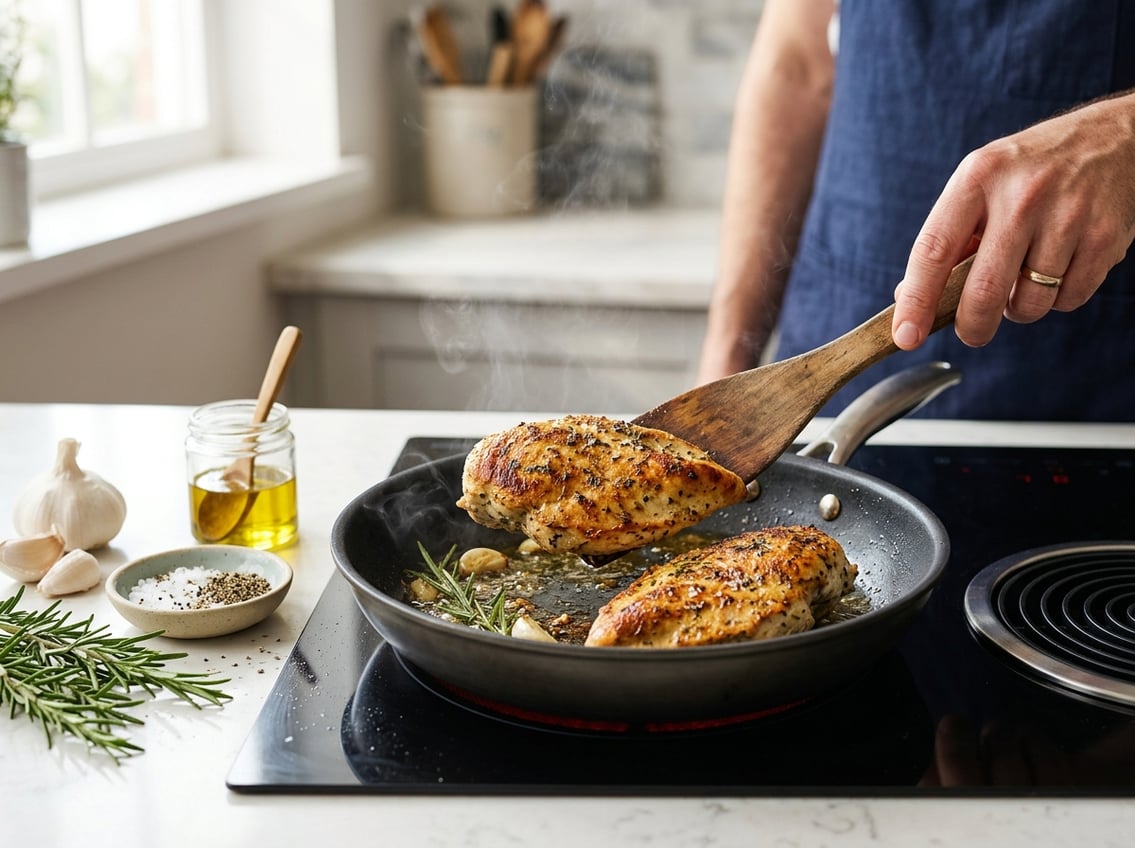
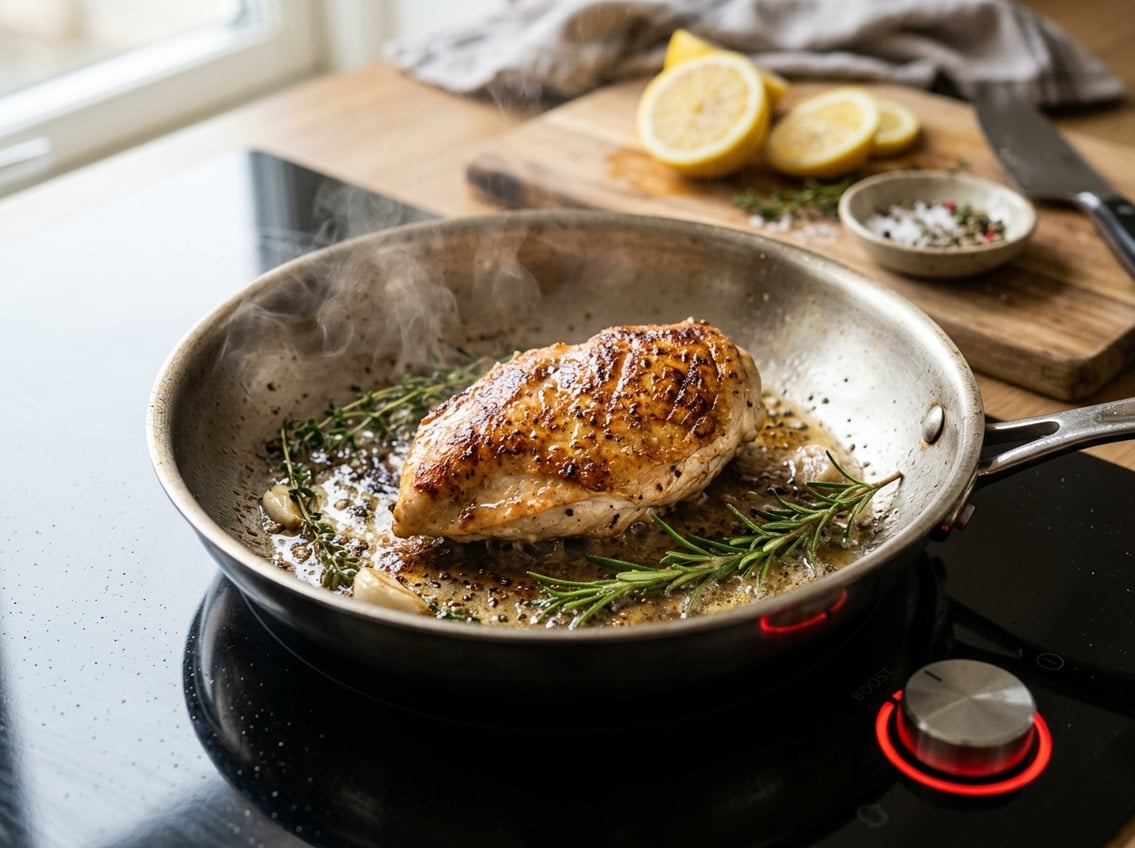
Sear the First Side Without Moving It
Set the skillet over medium-high heat and add oil. When the oil shimmers, place the chicken in the pan and leave it alone.
The first side usually needs several minutes without moving. If the chicken sticks, it is not ready to flip yet.
When it releases easily, it is ready.
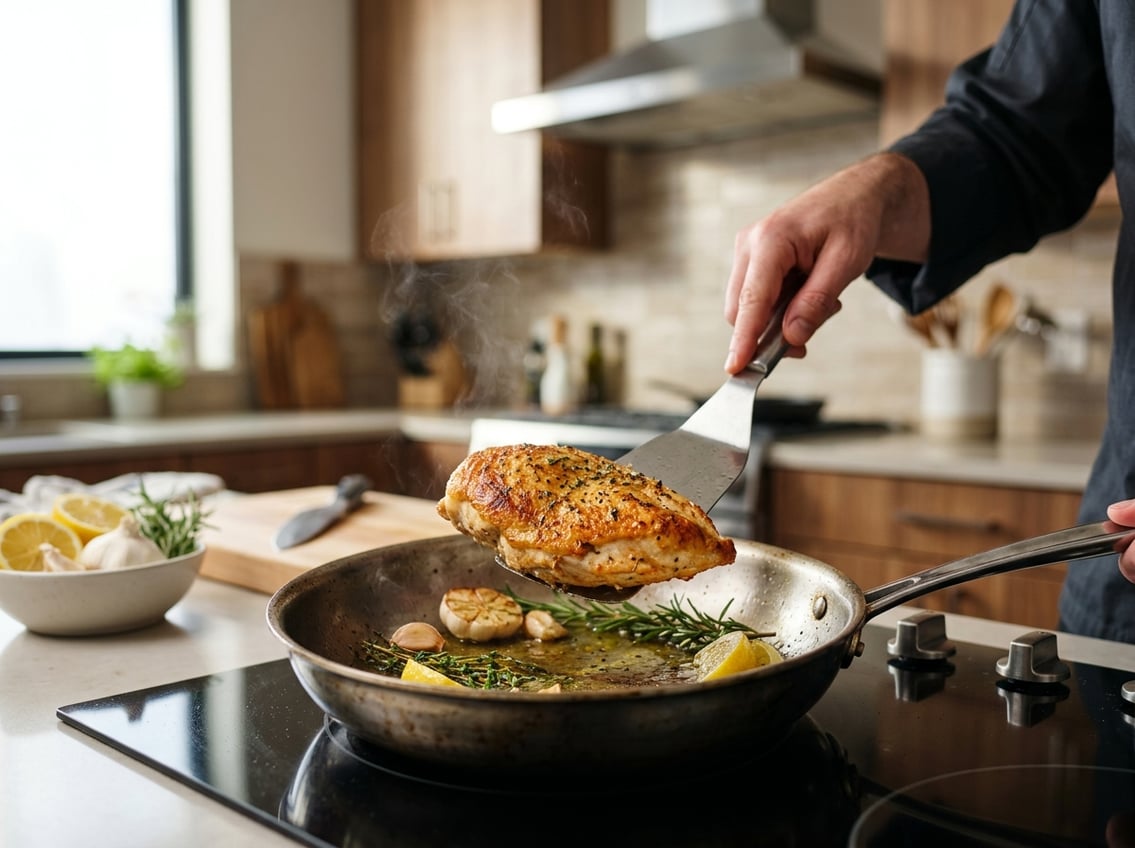
Flip, Finish, and Check for Doneness
Flip the chicken once the first side is deeply golden. Lower the heat a little if the pan starts to smoke too much.
Keep cooking until the center reaches 165°F. If the outside browns too quickly, turn the heat down and let the inside finish more gently.
Rest Before Slicing
Move the chicken to a plate and let it rest for 5 to 10 minutes. This helps the juices settle back into the meat.
Slice only after resting, or the juices will run out onto the cutting board.
Avoid Dry Chicken and Fix Common Mistakes
Dry chicken usually comes from heat that is too high, pieces that are too thick, or cutting too soon. You can fix most stove top chicken breasts by adjusting the pan, the time, and the way you finish the cook.
Why Chicken Breasts Turn Out Tough or Bland
Chicken breasts are lean, so they dry out faster than darker cuts. If you do not season enough or sear long enough, the meat can taste flat and the outside can feel rubbery.
Crowding the pan is another common problem. When too many pieces sit too close together, they steam instead of brown, which weakens both flavor and texture.
How to Adjust Time for Thin or Thick Pieces
Thin chicken breasts cook faster and need less time on each side. Thick pieces need a longer finish, and sometimes a lower heat after the first sear.
If your chicken is very thick, you can start it in the pan and finish it more gently. A lower stovetop finish works well for most home kitchens.
When to Lower Heat, Cover, or Finish Gently
Lower the heat if the outside darkens too fast. You want color, not burnt seasoning.
A lid can help trap heat for thicker pieces, especially if you need the center to cook through without burning the surface. Keep the lid off while searing, then use it only when the chicken needs a gentler finish.
Store, Freeze, and Serve It Well
Cooked chicken stores well, so one pan can give you several meals. Let it cool first, then keep it sealed and chilled so it stays safe and tastes better later.
How to Refrigerate and Reheat Leftovers
Store cooled chicken in an airtight container in the refrigerator for up to 4 days. Reheat it slowly so the meat does not dry out.
A small splash of broth or water helps when reheating on the stove. You can also warm slices gently in the microwave at lower power.
How to Freeze Cooked Chicken Properly
You can freeze cooked chicken in portions for later meals. Wrap it well or use a freezer-safe container, then label the date so you know how long it has been stored.
If you want to freeze cooked chicken for meal prep, slice it first or freeze it whole, depending on how you plan to use it. Thaw it in the refrigerator before reheating for the best texture.
Easy Ways to Use It in Meals
Slice your chicken over salads, pasta, rice bowls, or roasted vegetables.
You can also add it to sandwiches, wraps, tacos, and grain bowls.
If you already make oven baked chicken breasts for meal prep, try this stovetop version for a faster option with similar flexibility.
A simple stove top chicken recipe saves time on busy nights and still gives you a solid base for many meals.


