
What’s the Best Way to Make Chicken Thighs: Crispy, Juicy, and Flavorful Every Time
You want chicken thighs that stay juicy inside and crisp on the outside without guesswork.
Pan-searing skin-on, bone-in thighs to render the fat, then finishing them in the oven gives you a reliable balance of texture and flavor.

If you want a single best approach, sear skin-side down in a hot skillet to crisp the skin. Then, roast in the oven until the internal temperature reaches a safe, tender point.
This method gives you crispy skin, juicy meat, and forgiving results.
This post shows how to pick the right thighs, season and marinate them, compare top cooking methods, walk you through baking step-by-step, and explain the temperatures and timing that produce consistent results.
Choosing the Best Chicken Thighs for Your Recipe
Pick thighs based on cooking method, time, and the texture you want.
Bone-in, skin-on thighs give more flavor and forgiving texture. Boneless or skinless options speed cooking and simplify preparation.
Bone-In vs. Boneless Chicken Thighs
Bone-in chicken thighs keep moisture and add flavor during long cooking. The bone slows heat transfer, so you can cook at higher temperatures or for longer without drying the meat.
This makes them ideal for roasting, braising, or grilling where you want tender, pull-apart meat.
Boneless chicken thighs cook faster and more evenly, which suits stir-fries, pan-frying, and weeknight recipes. They take well to quick marinades and high-heat searing but need closer temperature monitoring to avoid overcooking.
If you need uniform slices for skewers or sandwiches, choose boneless.
Consider portion and plating. Bone-in portions look rustic and hold heat on the plate.
Boneless pieces let you control serving size precisely and speed up prep and eating.
Skin-On vs. Skinless Options
Skin-on chicken thighs deliver the crispiest texture and additional fat for flavor. When you sear skin-on thighs, render the fat slowly over medium-high heat to get a golden, crisp skin without burning.
Finish in the oven for even internal cooking and a contrast between crunchy skin and juicy meat.
Skinless thighs reduce fat and cook slightly faster. This is useful for braises, curries, or any dish where you want the sauce to cling directly to the meat.
They also absorb marinades more directly and reduce flare-ups on the grill.
If you plan to crisp skin, leave it on and start skin-side down. If you want leaner results or quicker prep, choose skinless.
You can also buy skin-on and remove the skin yourself for flexibility.
Tips for Selecting Quality Chicken
Look for thighs that are uniformly pink with firm flesh and no gray spots. Avoid thighs with excessive liquid or a strong odor.
Excess liquid often signals older product or added water. For bone-in cuts, check that the bone ends are clean and not discolored.
Prefer thighs labeled “fresh” if you’ll cook within 1–2 days. For longer storage, choose vacuum-sealed packages or buy frozen thighs.
Freeze within the sell-by window. If you want richer flavor, seek out pasture-raised or air-chilled options when available.
Air-chilled chicken often browns better with less surface water.
Check packaging date, weight, and whether pieces are trimmed. Buying in small batches lets you maintain quality and tailor cuts.
Buy bone-in for slow cooking, boneless for quick meals, and skin-on when crisp skin matters.
Essential Chicken Thigh Seasonings and Marinades

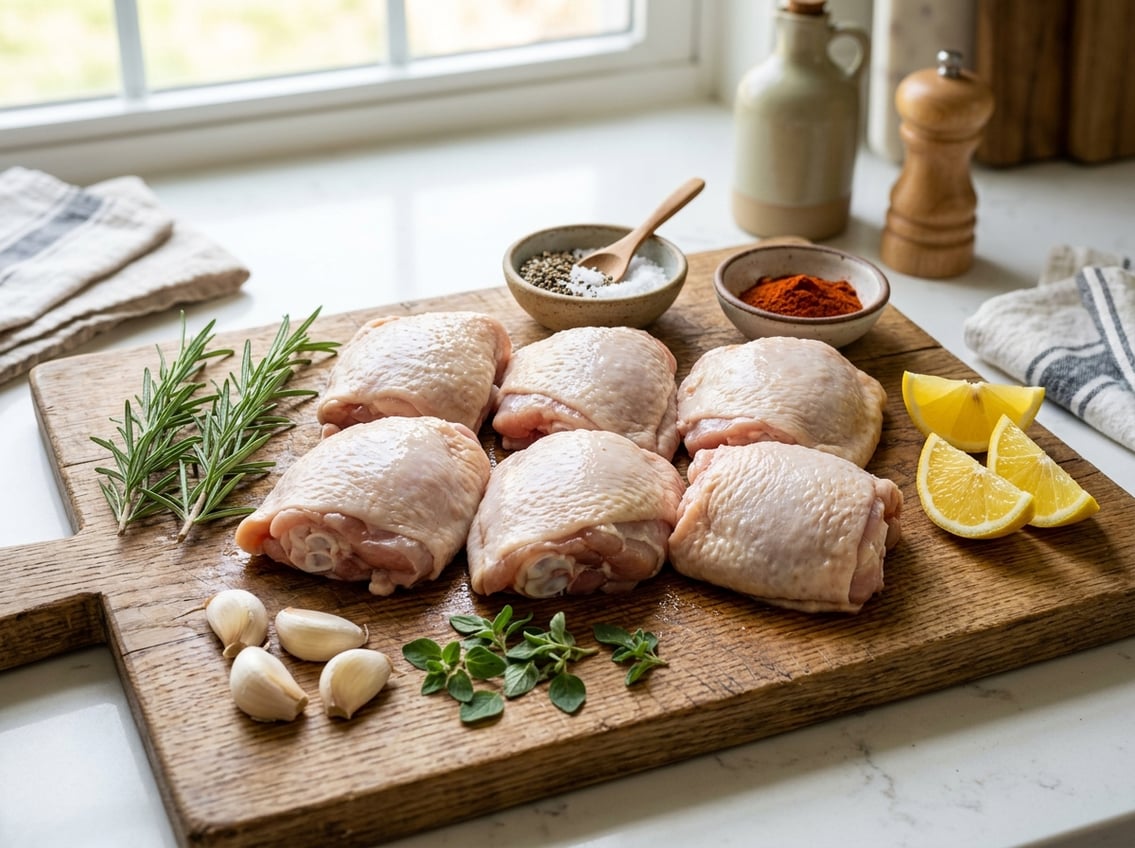
Salt, acidity, fat, and aromatic herbs and spices form the foundation of flavorful chicken thighs. Use salt to season and retain moisture, acid or dairy to tenderize, and oil to carry fat-soluble flavors.
Classic Herbs and Spices
Build a reliable seasoning base with salt, freshly ground black pepper, and paprika. Salt is non-negotiable. Use kosher salt at about 3/4–1 teaspoon per pound of raw thighs.
Black pepper adds heat. Grind it fresh for the best aroma.
Paprika brings color and a sweet-smoky note. Choose sweet, smoked, or hot depending on your profile.
Add dried thyme and oregano for herbal depth. Garlic powder and onion powder round out savory umami without risking burnt fresh aromatics on high heat.
If you want a quick seasoned chicken thigh, rub the dry mix under and over the skin for even flavor. For skin-on thighs, apply seasoning 30 minutes before cooking to let salt start drawing in moisture.
Crafting a Flavorful Chicken Seasoning Blend
Combine measured, complementary spices to create a repeatable blend. Example ratio for 1 batch (seasoning about 2–3 pounds): 1 tbsp kosher salt, 1 tsp black pepper, 1 tbsp paprika, 1 tsp garlic powder, 1 tsp onion powder, 1/2 tsp dried thyme, 1/2 tsp dried oregano.
Mix and store in an airtight jar. Adjust intensity by increasing paprika for sweetness or adding 1/2 tsp cayenne for heat.
For a herb-forward mix, swap 1/2 the paprika for 1 tbsp finely crushed dried herbs. Use about 1–1.5 tablespoons of blend per pound of chicken for well-seasoned thighs.
Label the jar with date and contents. The blend stays best for 3–6 months.
When seasoning, pat thighs dry first so the rub adheres and forms a crust during roasting or grilling.
Marinating and Brining Techniques
Choose a marinade structure: acid (citrus, vinegar), oil, aromatics, and a seasoning element (soy, mustard, or salt). For tenderizing, use yogurt or buttermilk for 2–8 hours.
These dairy options gently break down proteins without turning meat mushy.
For a basic wet marinade for 2 pounds: 1/4 cup acid (lemon juice or vinegar) or 1/2 cup yogurt, 1/4 cup olive oil, 3 cloves minced garlic, 1 tbsp soy or Dijon, 1 tsp salt, 1 tsp paprika, 1/2 tsp black pepper, and 1 tsp chopped fresh thyme or 1/2 tsp dried thyme.
Marinate 2–4 hours in the fridge for best flavor absorption.
If you prefer brining, dissolve 1/4 cup kosher salt and 1/4 cup sugar in 4 cups water. Submerge thighs for 1–2 hours refrigerated.
Rinse and pat dry before cooking. Never reuse raw marinade.
If you want to serve it, boil it for at least one minute or reserve a separate portion before adding raw chicken.
The Most Effective Cooking Methods
You want thighs with crisp skin, tender meat, and reliable doneness. The three methods below focus on controlling temperature, rendering fat, and preserving moisture so you hit those goals.
Pan-Searing and Oven Finishing
Pan-searing then finishing in the oven gives you the best way to cook chicken thighs when you want both crispy skin and juicy interiors. Heat a heavy skillet (cast iron preferred) until very hot, season the skin well, and sear skin-side down without crowding the pan until the fat renders and the skin is deep golden.
This takes about 6–8 minutes for bone-in, skin-on thighs. Flip once to color the other side for 1–2 minutes.
Transfer the whole pan to a 350–400°F oven and roast until the internal temperature reaches 175°F for fall-apart tenderness or 165–170°F if you prefer firmer texture. Rest uncovered for 5 minutes to keep skin crisp.
This method works best with bone-in, skin-on thighs.
Baking for Juicy, Crispy Results
Baking gives you consistent baked chicken thighs with minimal hands-on time. Preheat the oven to 400–425°F for crisp skin or 350°F for extra-tender thighs.
Pat skin dry, season, and place thighs on a wire rack over a rimmed sheet to allow air circulation and even crisping.
For skin-on thighs, roast 30–40 minutes at 400°F until skin is crisp and internal temp reaches 175°F.
For juicier chicken thighs, brine briefly (30 minutes) or marinate for a few hours. Use a light oil coating to promote browning.
Avoid covering the pan. If you want extra browning, finish under the broiler for 1–2 minutes, watching closely.
Air-Frying and Broiling Techniques
Air frying and broiling are fast ways to get crispy chicken thighs with less fat. In an air fryer, arrange thighs skin-side up in a single layer and cook at 375–400°F for 18–25 minutes.
Check for 175°F for tender thighs. Air fryers crisp efficiently thanks to high-velocity hot air.
Broiling works well as a finishing step. Cook at a moderate oven temp first, then move under the broiler for 2–4 minutes to crisp skin.
With broiling alone, keep the rack 6–8 inches from the element and watch constantly to prevent burning.
Both methods suit skin-on thighs best. Boneless thighs cook faster and will need lower temps and shorter times to avoid drying out.
Step-by-Step Guide: How to Bake Chicken Thighs
You will learn precise prep, exact oven temperatures and timing, and the practical steps that produce juicy, flavorful thighs with crispy skin.
Follow the sequence below and use the suggested times and techniques for reliable results.
Preparation and Seasoning
Pat each skin-on chicken thigh completely dry with paper towels. Dry skin reduces moisture that prevents crisping and helps seasonings stick.
Trim excess fat and any loose skin. Lightly score the skin in one direction if pieces are very thick to help render fat during baking.
Season both sides. Use 1 teaspoon kosher salt and 1/2 teaspoon black pepper per pound as a baseline.
Add 1 teaspoon garlic powder, 1 teaspoon smoked paprika, and 1 tablespoon olive oil for a balanced rub. Rub under the skin when possible for more flavor in the meat.
If time allows, season and refrigerate uncovered for 2–24 hours. This dries the skin further and deepens flavor.
Bring thighs to room temperature for 20–30 minutes before baking to promote even cooking.
Baking Temperatures and Times
Preheat your oven to 425°F (220°C) for a balance of crispy skin and juicy meat. Arrange thighs skin-side up on a rimmed baking sheet or in a shallow roasting pan with a wire rack.
Bake bone-in, skin-on thighs 30–40 minutes at 425°F. Internal temperature should reach 165°F (74°C) at the thickest part.
Many cooks pull at 170–175°F for more tender dark meat. For boneless thighs, expect 20–30 minutes at the same temperature.
If you prefer lower-temperature cooking, bake at 375°F for 35–45 minutes. Check temperature earlier to avoid overcooking.
Use an instant-read thermometer to confirm doneness rather than relying on time alone.
Tips for Achieving Crispy Skin
Start with very dry skin and a hot oven. Pat dry, season, and roast at 425°F.
High heat renders fat and browns skin quickly. Use a wire rack over the baking sheet so air circulates under the thighs.
This prevents the skin from steaming and keeps the bottom crisp. Lightly coat skin with a thin layer of oil or a mayonnaise-based spread for extra browning.
Avoid overcrowding the pan. Leave 1–2 inches between thighs so heat reaches all surfaces.
Finish under the broiler for 1–2 minutes if the skin needs additional crisping. Watch closely to prevent burning.
Let the thighs rest 5 minutes before serving so juices redistribute and your meat stays juicy.
Cooking Times and Temperatures for Perfect Thighs
You’ll learn how long to bake different thigh types and the temperatures that produce both safe and juicy results.
Follow the specific times and thermometer targets to avoid dry meat or undercooking.
Bone-In vs. Boneless Baking Times
Bone-in chicken thighs take longer because heat must penetrate around the bone. Roast bone-in, skin-on thighs at 400–425°F (204–218°C) for 30–40 minutes depending on size.
Larger 6–8 oz pieces may need up to 45 minutes. Start on a hot tray or preheated sheet to help the skin crisp.
Boneless, skinless thighs cook faster and benefit from higher heat. Bake them at 425°F (218°C) for 20–30 minutes, checking at 20 minutes for smaller pieces.
Use a rack or tray that allows airflow so the exterior browns without drying the interior.
If you prefer very crispy skin, finish bone-in thighs under the broiler 1–3 minutes. Watch closely to prevent burning.
Temperature Guidelines for Juiciness and Safety
Use internal temperature as the definitive measure. Insert an instant-read thermometer into the thickest part of the thigh, avoiding the bone.
Cook the meat until it reaches at least 165°F (74°C). At that point, the meat is safe and cooked through.
For a more tender, slightly pink-but-safe finish in dark meat, remove thighs at 165°F and let them rest. Carryover heat will even out the temperature.
If you prefer firmer texture, cook to 170–175°F (77–79°C) to break down more collagen and increase tenderness.
Rest the thighs for 5–10 minutes before slicing. This allows juices to redistribute.
When you don’t have a thermometer, check for clear juices and an opaque interior to confirm doneness.
Serving Suggestions and Pro Tips
Serve thighs hot from the pan or oven after a short rest to lock in juices.
Pair crispy-skinned thighs with creamy sides. Sauced thighs go well with starches that soak up flavor.
How to Keep Chicken Thighs Tender and Moist
Pat thighs dry, then season and let them sit 15–30 minutes so the salt can penetrate.
For bone-in, skin-on thighs, start skin-side down in a hot skillet for 6–8 minutes to render fat and crisp the skin. Finish in a 375°F oven until an instant-read thermometer reads 165–170°F.
For boneless, skinless thighs, use medium-high heat and shorter cook times. Remove at 160–165°F and rest 5–10 minutes to reach safe doneness while staying juicy.
Use a marinade with oil and acid, such as yogurt, vinegar, or citrus, for 1–4 hours to tenderize.
Dark meat tolerates higher temps than breast but still dries if exposed to high heat too long, so avoid overcooking.
Side Dishes That Complement Seasoned Thighs
Match intensity: herb-forward, lemony, or miso-glazed thighs work well with simple starches like rice pilaf, buttered couscous, or roasted fingerling potatoes.
Pair crispy-skinned thighs with creamy sides such as potato salad, smashed potatoes, or a garlic-yogurt sauce for a contrast that enhances juiciness.
For barbecue or strongly spiced thighs, choose cooling sides like coleslaw, cucumber salad, or plain grilled corn.
Add quick vegetables like roasted broccoli or charred zucchini for texture and color.
Finish with a bright element, such as lemon wedges, chopped parsley, or a drizzle of vinegar, to cut fat and lift flavors.
How to Use Leftover Baked Chicken Thighs
Shred or slice cooled thighs and place them in an airtight container with a splash of stock or pan juices to keep them moist.
Use the chicken within 3–4 days.
Transform leftovers into tacos, salads, or fried rice. Reheat the chicken gently in a skillet with a little oil or broth to avoid drying.
For sandwiches, toast the bread and add a moist component such as aioli, slaw, or tomato so the chicken stays juicy.
To reheat whole thighs, set the oven to 300°F and warm them, covered with foil, for 10–15 minutes. Remove the foil and heat for another 2–3 minutes to restore some skin crispness.


