
Do You Roast Chicken Breast Side Up? Best Method Explained
Do you roast chicken breast side up? You can, and it is the most common way to finish a roast chicken for browned skin and a familiar presentation.
If you want the juiciest breast meat, you often get the best results by starting breast-side down and ending breast-side up.
The most reliable approach for roasting a chicken is to start breast-side down, then flip it breast-side up near the end for moist meat and crisp skin. That method protects the breast early on, while the skin browns at the end.

The right position depends on whether you want juicy meat, crispy skin, or the easiest workflow.
When you understand how heat moves through the bird, you can make a better choice each time you roast chicken.
Best Position for Juicy Meat and Crisp Skin
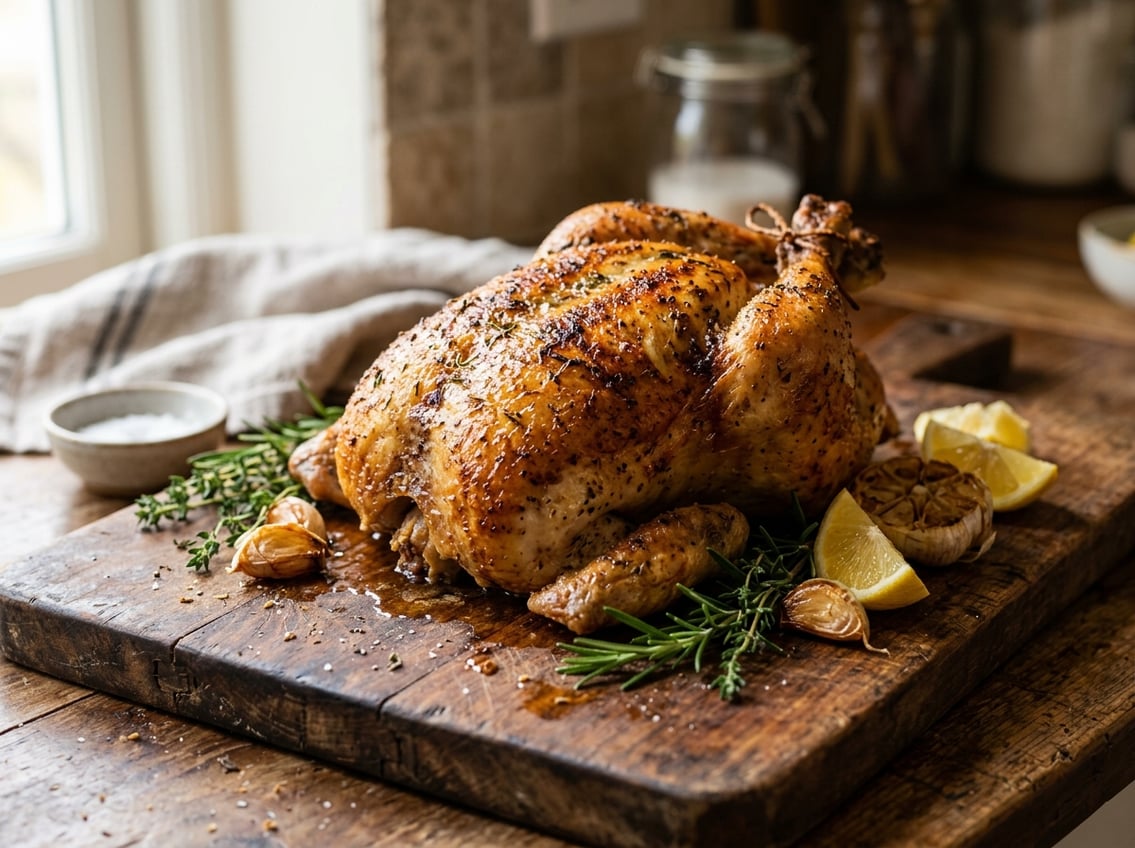
Breast-side up gives you the classic roast chicken look. It is the natural finishing position for browning.
The question is whether to keep it that way the whole time, or only at the end for better moisture.
Why Breast-Side Up Is the Traditional Choice
Cooks choose breast-side up traditionally because it presents the skin to direct heat and makes carving easier.
It also gives you the look most people expect from a roast chicken.
Keeping the bird breast-side up for the full roast can dry out the breast meat, since the breast cooks faster than the thighs and legs.
Many cooks start with breast-side down, then flip the chicken breast-side up near the end for crispy skin and more even cooking.
When Breast-Side Down Works Better
Breast-side down works better when you want more moisture.
The breast sits in a more protected position, and some rendered fat helps self-baste the chicken as it roasts.
This method also helps the thighs and legs, which need more heat and time.
According to Chef’s Resource, starting breast-side down can support juicier breast meat and more even cooking.
The Flip Method for Balancing Moisture and Browning
The flip method gives you both benefits.
Start breast-side down, then flip the chicken breast-side up once the breast is close to done.
That final flip lets the skin brown well without leaving the breast exposed for the whole roast.
It is a practical way to balance self-basting, crispy skin, and even cooking.
How to Roast It the Right Way
The right setup makes a big difference.
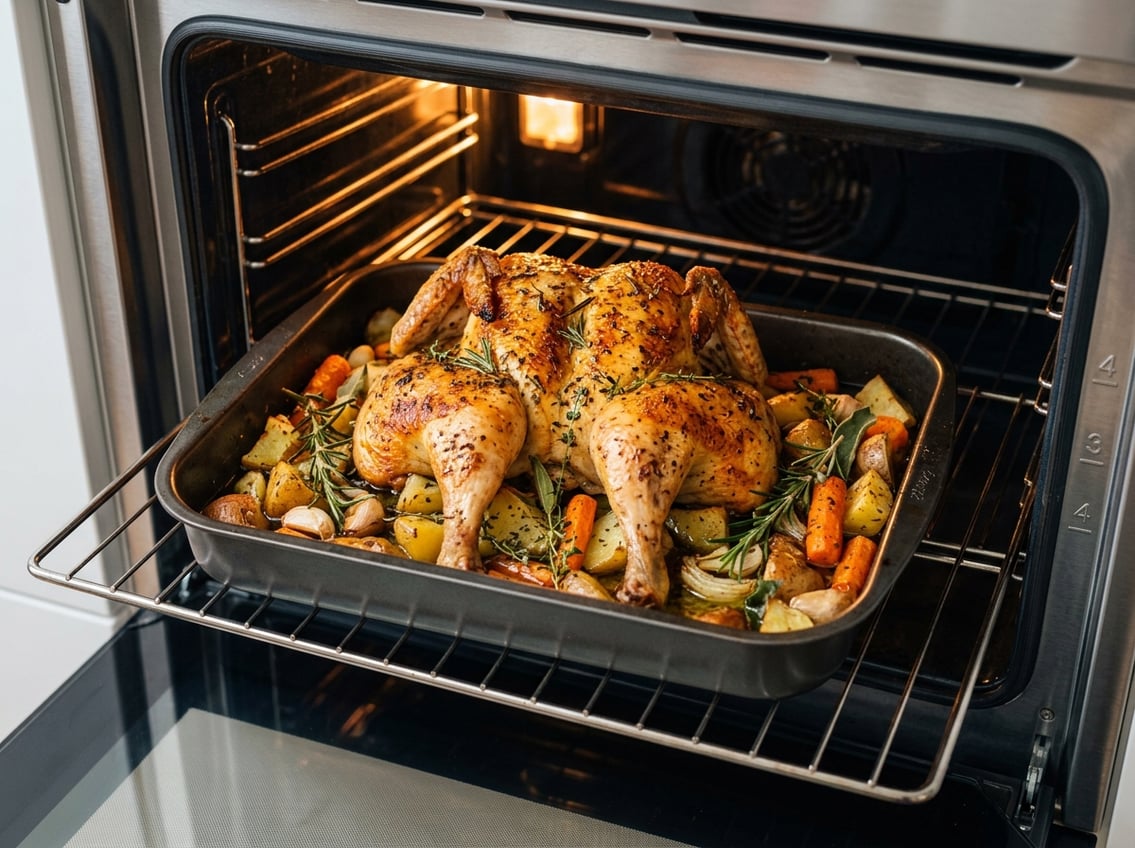
A good pan, a raised rack, and proper seasoning help with airflow, browning, and cleanup.
Choosing a Roasting Pan or Roasting Rack
A sturdy roasting pan gives you room for heat circulation and pan juices.
A roasting rack lifts the chicken so the bottom does not sit in fat, which helps the skin stay crisp.
If you do not have a rack, use thick-cut vegetables like onions, carrots, or celery as a base.
That keeps the chicken elevated and adds flavor to the drippings.
Using Dry Brine for Better Flavor and Texture
A dry brine is one of the best ways to improve roast chicken.
Salt the bird all over and leave it uncovered in the fridge for at least a few hours, or overnight if you can.
This seasons the meat more deeply and dries the skin, which supports better browning.
It is a simple step that makes roast chicken more flavorful.
Whether Basting Helps or Hurts
Basting can add flavor from the pan juices, but it is not always needed.
Opening the oven often lowers the temperature and can slow browning.
If the chicken is already well seasoned and the skin is dry, frequent basting usually adds little benefit.
A light brush with pan juices near the end can help if you want extra color.
Timing, Temperature, and Doneness
Cooking time depends on size, oven heat, and whether you flip the bird during roasting.
Use time as a guide, then rely on a thermometer for the final call.
How Long to Roast Based on Bird Size
A common rule is about 20 minutes per pound at around 400°F.
That gives you a starting point for planning.
Small chickens may finish sooner, while larger birds need more time.
If you roast at a different temperature, or your oven runs hot or cool, the time will change.
When to Flip During Cooking
If you use the flip method, turn the chicken from breast-side down to breast-side up when the breast is nearly done.
Many cooks flip near the last third of the total cook time.
That timing helps the breast stay moist while giving the skin time to brown.
Be gentle when flipping the chicken so you do not tear the skin.
Checking Doneness With a Meat Thermometer
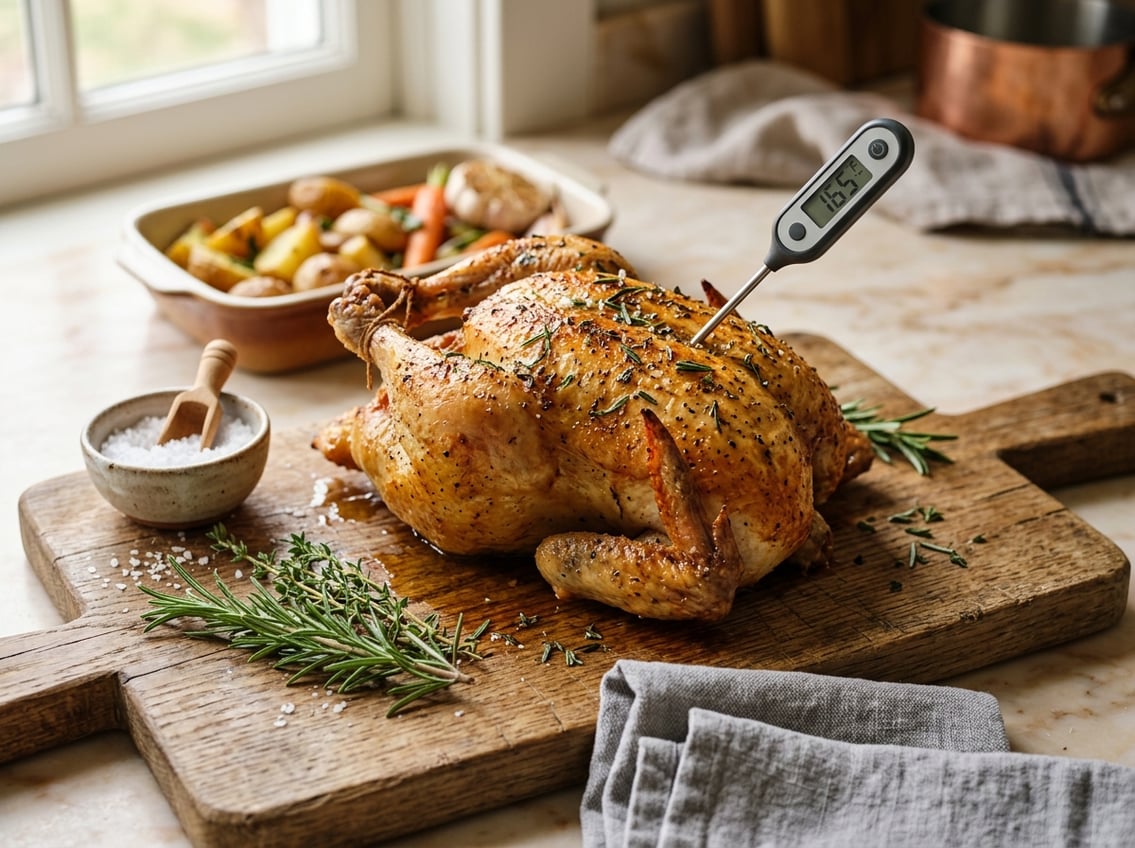
A meat thermometer gives you the most reliable way to check doneness.
Insert it into the thickest part of the breast and the thickest part of the thigh, away from bone.
The breast should reach 165°F. The thigh should reach about 175°F.
If the breast cooks faster, place the chicken breast-side down a little longer.
Then flip it breast-side up to finish the skin without overcooking the meat.


