
How Long Does It Take to Grill Chicken Thighs: Expert Timing & Techniques
Grilling chicken thighs doesn’t have to be guesswork. Boneless thighs usually take about 10–15 minutes total over medium-high heat, while bone-in thighs commonly need 20–30 minutes. Pull them when the thickest part reaches 165°F.

Exact times depend on heat, thickness, and whether you use direct or indirect heat. This guide covers ideal temperatures, prep steps for juicy meat, and grill setups that prevent flare-ups.
Follow tips on timing, thermometer use, and finishing so your grilled chicken thighs come out flavorful and safe every time. You’ll also find variations and serving ideas to match your menu.
Essential Grilling Times and Temperatures
Grill at medium-high heat and aim for specific internal temperatures. Bone-in thighs take longer than boneless, and thickness plus grill temperature change cooking minutes per side.
Bone-In vs. Boneless Cook Times
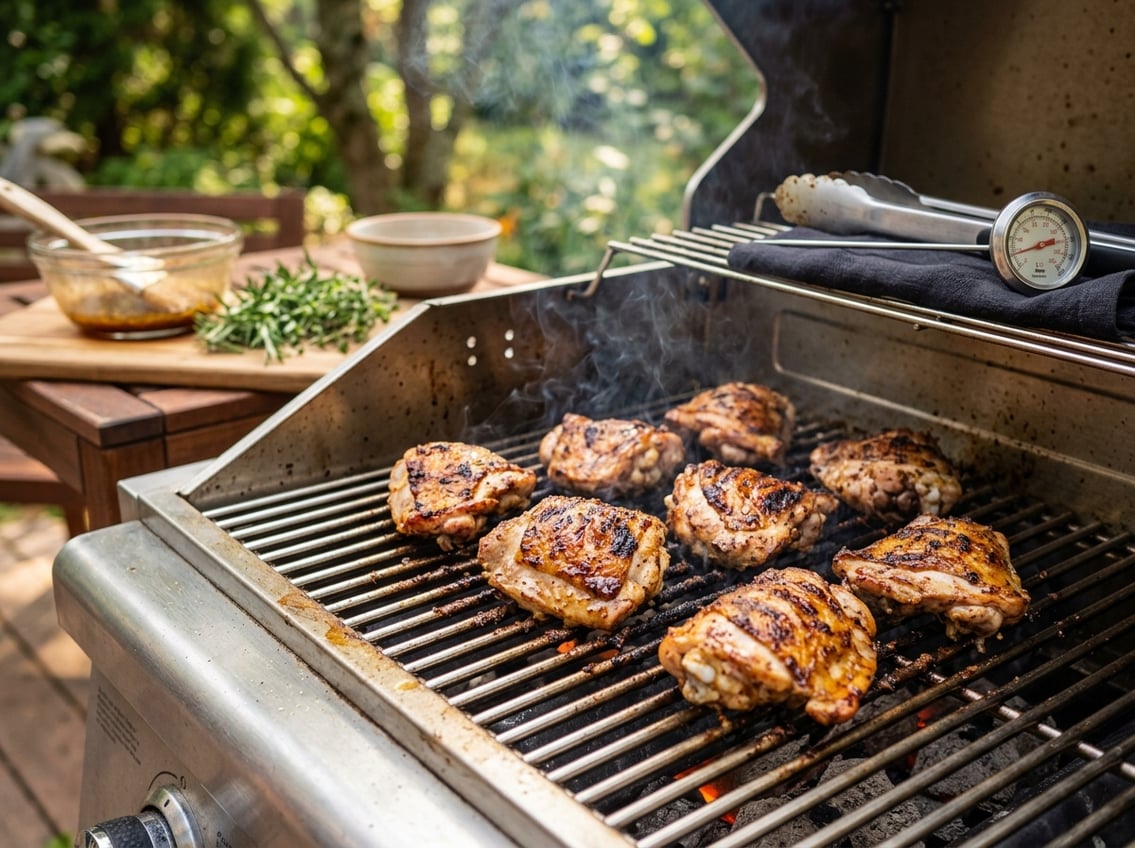
Bone-in chicken thighs usually take about 25–30 minutes total on a 450°F surface. This works out to roughly 6–8 minutes per side when you use a two-zone or uneven grilling method.
Start skin-side up for a few minutes, then flip and move to a cooler area as needed to prevent flare-ups. Boneless chicken thighs cook faster—about 10–15 minutes total at the same temperature.
Expect roughly 4–6 minutes per side, depending on thickness. Monitor each piece and rotate positions on the grill. Use an instant-read thermometer to check doneness instead of guessing by time alone.
Recommended Internal Temperatures
The USDA minimum safe temperature for poultry is 165°F. Thighs benefit from higher finishing temps for tenderness, so aim for 180–185°F for juicy, well-rendered meat.
Insert your meat thermometer into the thickest part without touching bone for bone-in thighs. For boneless thighs, probe the center.
Pull the meat when it reaches your target and let it rest 5–10 minutes so juices redistribute and the internal temperature stabilizes.
How Thickness Affects Grill Duration
Thickness drives cook time more than whether a thigh is bone-in or boneless. Thicker boneless thighs (over 1 inch) can approach bone-in times and may need indirect heat for even cooking.
Thin boneless pieces cook in under 10 minutes. Very thick bone-in pieces can take 30+ minutes.
Sear over direct medium-high heat, then move to indirect heat to finish without burning the skin. Use an instant-read or probe meat thermometer to track temperature.
If you have mixed sizes, stagger placement so thinner pieces sit over hotter zones and thicker pieces over cooler zones.
Preparation Steps for Juicy Results
Trim excess fat and season simply to let the chicken’s flavor show. Decide whether you’ll use skin-on or skinless, and plan your timing.
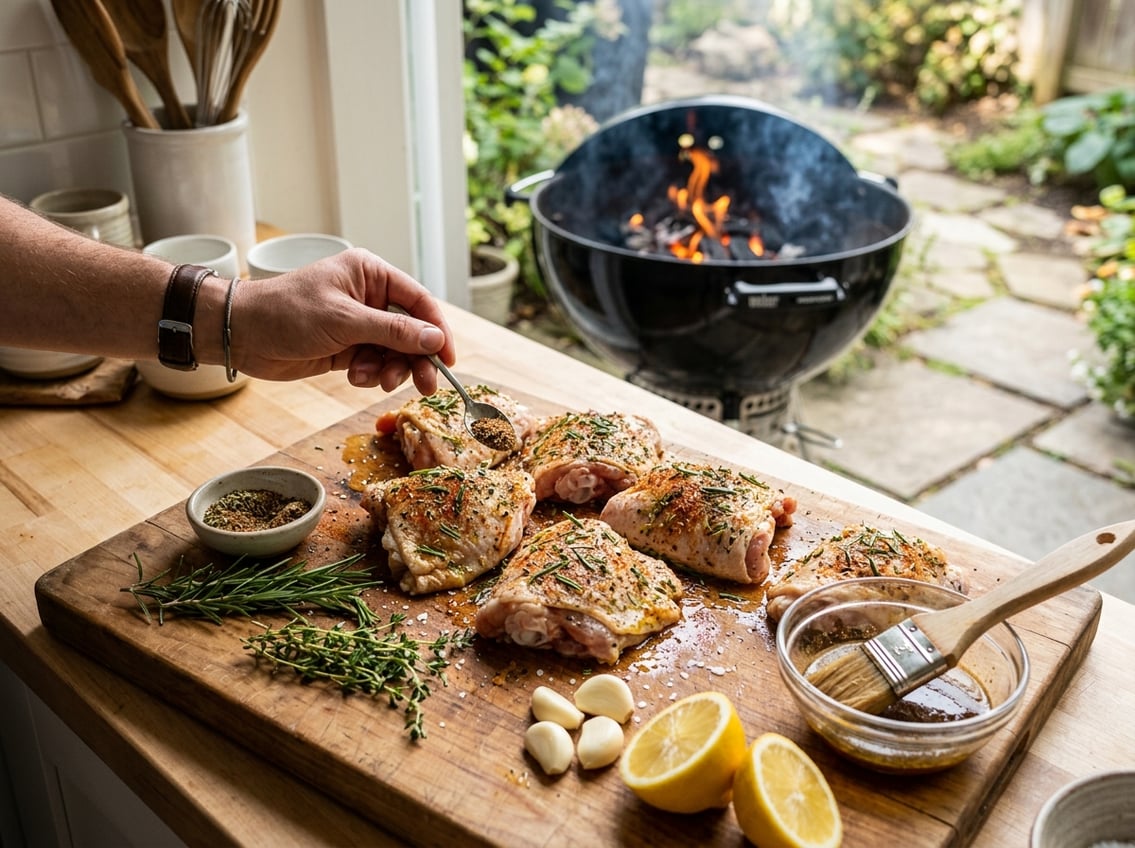
Trim and Season the Thighs
Trim visible fat and any loose skin before cooking. Removing long fat edges reduces flare-ups and helps the skin crisp.
For bone-in or skin-on thighs, leave enough skin attached to protect the meat and promote juiciness. Pat thighs dry with paper towels for better searing and browning.
Use kosher salt and freshly ground black pepper for basic seasoning. Apply evenly on both sides about 15–30 minutes before grilling.
If you use skinless chicken thighs or boneless pieces, brush lightly with oil to help spices stick and prevent sticking to the grates.
The Role of Marinades and Dry Rubs
Choose a marinade when you want added acidity and moisture. For example, use a lemon chicken marinade with lemon juice, olive oil, garlic, and a touch of honey.
Marinate boneless skinless thighs for 30 minutes to 2 hours; over-marinating acidic blends can make the texture mushy.
Use dry rubs for concentrated surface flavor and better crust on skin-on thighs. Apply a dry rub (paprika, garlic powder, salt) at least 15 minutes before grilling or up to overnight in the fridge for deeper flavor.
For skinless chicken thighs, a short rest after rubbing helps the spices adhere and reduces flare-ups from excess oil on the grill.
Grill Setup and Cooking Methods
Control heat, prevent flare-ups, and aim for even searing while leaving room to move pieces as fat renders. Preheat your grill to the right surface temperature and oil the grates.
Pick the cooking method that matches your equipment and patience.
Preheating and Oiling the Grill Grates
Preheat the grill to a surface temperature near 450°F for skin-on thighs, or slightly lower for very fatty pieces. Let the grill run for 10–15 minutes after reaching temperature so grates heat evenly.
Clean the grates with a brush, then oil them to prevent sticking and promote crisp skin. Use a folded paper towel dipped in high-smoke-point oil (vegetable or canola) held with tongs and rub the grates.
Do this just before placing chicken on the heat. Avoid spraying oil directly onto a hot grill to reduce flare-up risk.
If you have a pellet grill, preheat until the grates reach the target surface temp and treat them the same way. Pellet grills run hotter over time, so monitor surface temp rather than relying on the controller setting.
Gas Grill vs. Charcoal Grill Techniques
On a gas grill you get quick, consistent surface temps and easier two-zone control. Light burners on one side for direct searing and keep the other side off or low for indirect finishing.
This is ideal for 25–30 minute bone-in thighs or 10–15 minute boneless thighs. Charcoal gives stronger smoke flavor but needs active management.
Bank coals to one side for two-zone cooking. Add a small foil drip tray under the grilling area to reduce flare-ups, and move thighs away from flares.
With charcoal, expect more hot spots; rotate pieces more often and monitor surface temps with an infrared thermometer.
For both grills, use a meat thermometer to target 185°F for tender thighs. Avoid relying solely on cook time.
Understanding Two-Zone and Uneven Grilling
Two-zone grilling creates a hot direct-heat area and a cooler indirect-heat area on the same grate. Use direct heat for initial searing (2–6 minutes segments) and finish over indirect heat until the internal temp reaches your target.
This method controls charring while allowing the interior to cook through. The uneven grilling method moves thighs from one spot to another after each flip to avoid repeated flare-ups over the same grate area.
Start skin-side up to render fat, flip and move to a clean spot for a shorter skin-side-down sear, then repeat. Rotate positions every 4–6 minutes to keep skin golden without burning.
Both approaches help you manage flare-ups from dripping fat and produce crisp skin with fully cooked meat. Use tongs, not a fork, to avoid piercing the meat and losing juices.
Expert Tips for Preventing Pitfalls
Control hot spots, manage fat drip, and plan a brief rest so your thighs finish at 165°F with crispy skin and no char. Use two-zone heat, a thermometer, and timed flips to avoid flare-ups and dry meat.
Preventing Flare-Ups and Burnt Skin
Trim large fat deposits from bone-in thighs and pat skin dry with paper towels before seasoning to reduce drips that cause flames. Use a two-zone grill: sear thighs skin-side down over direct heat for 2–4 minutes to develop color, then move them to indirect heat to finish.
Keep a spray bottle of water or a metal pan nearby to control small flare-ups without dousing the coals. If flare-ups happen, lift the lid and move the affected pieces to the cooler zone until flames subside.
For charcoal grills, bank coals to one side. For gas, lower the burner under the thigh and increase the opposite burner. Flip only once or twice to limit flare-up triggers and prevent burnt skin while still achieving crispness.
Resting and Slicing for Maximum Juiciness
Remove thighs at 160–162°F. Tent loosely with foil and rest 5–10 minutes so carryover heating reaches 165°F and juices redistribute.
Rest time lets collagen relax and yields juicier meat. Slice against the grain when ready to serve to shorten muscle fibers and retain moisture on each bite.
For boneless pieces, cut into uniform slices only after they rest to avoid squeezing out juices. Use an instant-read thermometer and rest periods as standard steps in your timing sequence for consistent results.
Grilling Variations and Serving Suggestions
Choose a flavor direction and pick sides that match the cooking method. A bright, acidic marinade cuts through fattier thighs, while smoky rubs pair best with grilled starches and charred vegetables.
Flavor Pairings and Marinade Ideas
Use a simple lemon chicken marinade for a bright, reliable result: 1/4 cup olive oil, juice and zest of one lemon, 2 minced garlic cloves, 1 tsp salt, 1/2 tsp black pepper, and 1 tsp dried oregano.
Marinate boneless thighs 30–60 minutes. Bone-in can go 2–4 hours for deeper flavor. For a dry-rubbed option, combine smoked paprika, brown sugar, garlic powder, onion powder, salt, and a pinch of cayenne.
Apply 20–30 minutes before grilling to form a savory crust. If you want a sticky glaze, brush a barbecue sauce during the last 5 minutes of cooking to avoid burning.
For herb-forward profiles, toss finished thighs with chopped parsley, thyme, and lemon zest. Serve warm; the acid and herbs balance the thigh’s richness.
What to Serve With Grilled Chicken Thighs
Pair grilled thighs with grilled potatoes or charred corn to echo the smoky notes. Slice small red potatoes, toss them with oil, rosemary, and salt, then grill them in a foil packet for 20–25 minutes until tender.
Serve a crisp green salad with a lemon vinaigrette to complement a lemon-marinated thigh. Choose these lighter sides for a fresh balance.
If you prefer a baked option, serve the chicken with roasted root vegetables or a creamy potato gratin for a comforting contrast. Try rice pilaf or a simple coleslaw with sauce-heavy preparations.
Add an acidic element like lemon wedges or pickled onions to cut the fattiness and brighten each bite.


