
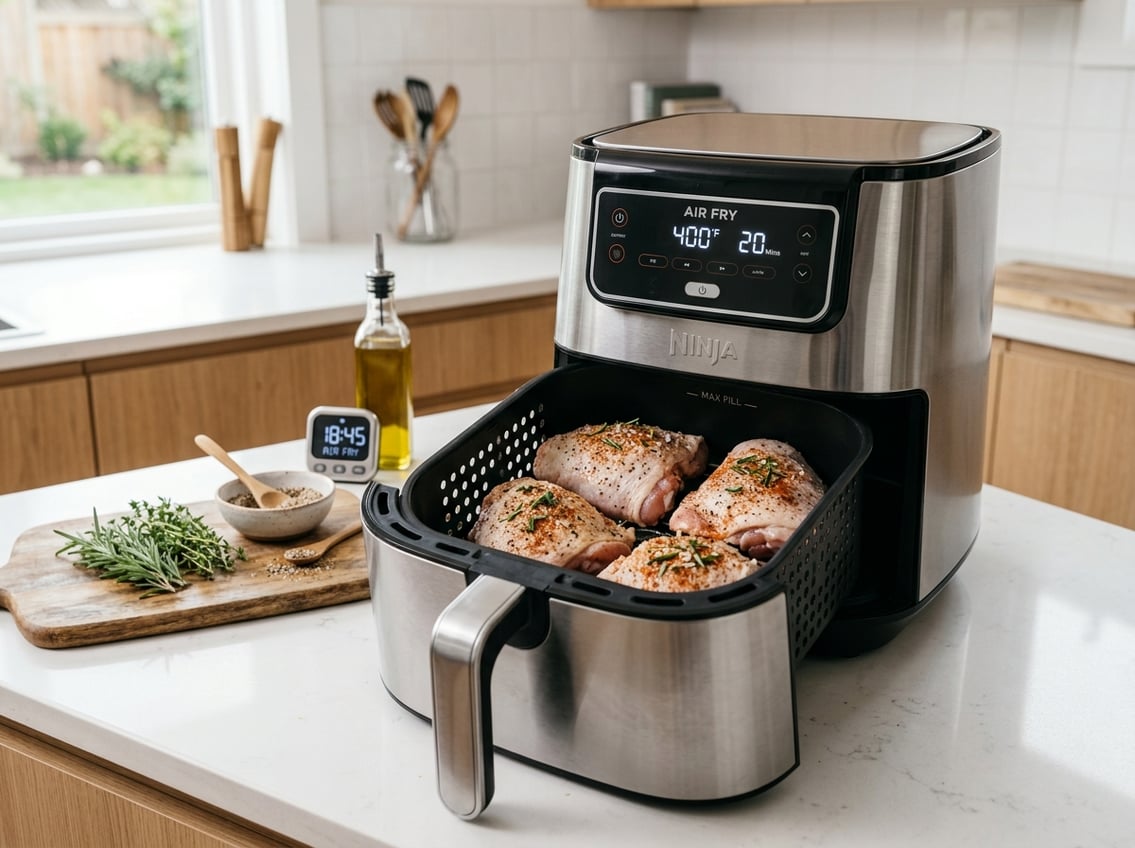
How Long Does Chicken Thighs Take in Air Fryer: Complete Guide and Best Tips
You can enjoy juicy, crispy air fryer chicken thighs in about 18–30 minutes, depending on whether they’re boneless or bone-in and how thick they are. For boneless skin-on or skinless thighs, plan on roughly 18–22 minutes at 375–380°F. For bone-in thighs, expect about 25–30 minutes at the same temperature, and always check doneness with a meat thermometer reading 165°F.

This guide explains exact times and temperatures, how bone-in versus boneless cuts affect the schedule, simple prep and seasoning tips, and the best way to check for doneness. You’ll also find serving ideas, storage and reheating advice, plus quick comparisons to oven and Instant Pot methods.
Recommended Air Fryer Cooking Times and Temperatures
Use a moderate temperature to balance a crispy exterior with juicy meat. Adjust timing by thigh type, thickness, and whether the pieces start frozen or fresh.
How Cooking Times Vary by Chicken Thigh Type
Boneless, skinless chicken thighs cook fastest. Expect about 15–20 minutes at 375°F (190°C) for average 3–4 oz pieces, flipping once halfway.
Thicker or larger boneless thighs may need an extra 2–4 minutes.
Bone-in, skin-on thighs need more time because bone slows heat transfer. Plan 20–25 minutes at 375°F (190°C) for typical 6–8 oz bone-in thighs, checking the thickest part near the bone.
Skin-on pieces benefit from higher surface heat to crisp skin, so keep the temperature steady.
If you start with frozen thighs, add roughly 6–10 minutes to any of the above times and check internal temperature often. Use an instant-read thermometer to confirm doneness.
Optimal Air Fryer Temperature Settings
375°F (190°C) works well for most chicken thigh types. It crisps skin without drying meat.
For extra-crispy skin, raise the final 3–5 minutes to 400°F (204°C), watching closely to avoid burning marinades with sugar.
Lower temperatures, like 350°F (175°C), help if thighs are heavily marinated or stuffed. They allow the interior to reach safe temperature without overbrowning.
Never set temperatures above 400°F for long periods. Small pieces can char quickly.
Aim for an internal temperature of 165°F (74°C) for safety. Many cooks prefer 170–175°F (77–80°C) for bone-in thighs to tenderize connective tissue.
Importance of Preheating Your Air Fryer
Preheat your air fryer for 3–5 minutes at the target cooking temperature to ensure even cooking.
A preheated basket sears skin immediately, reducing cook time and improving crispness.
Without preheating, you may need to add 2–4 minutes to the cook time, and results can be uneven. For small batches, a 2-minute preheat works; for full baskets, use the full 3–5 minutes.
Preheating is especially important for skin-on and bone-in thighs because it helps render fat early and prevents rubbery skin.
How to Flip Chicken Thighs for Even Results
Flip thighs once halfway through the cook time to promote even browning. Use tongs to turn pieces gently so skin stays intact.
Arrange thighs in a single layer with space between pieces to allow airflow. If your air fryer basket is crowded, cook in two smaller batches rather than overlap pieces.
Check doneness after flipping by probing the thickest part. If one side appears much darker, rotate that piece to a cooler zone.
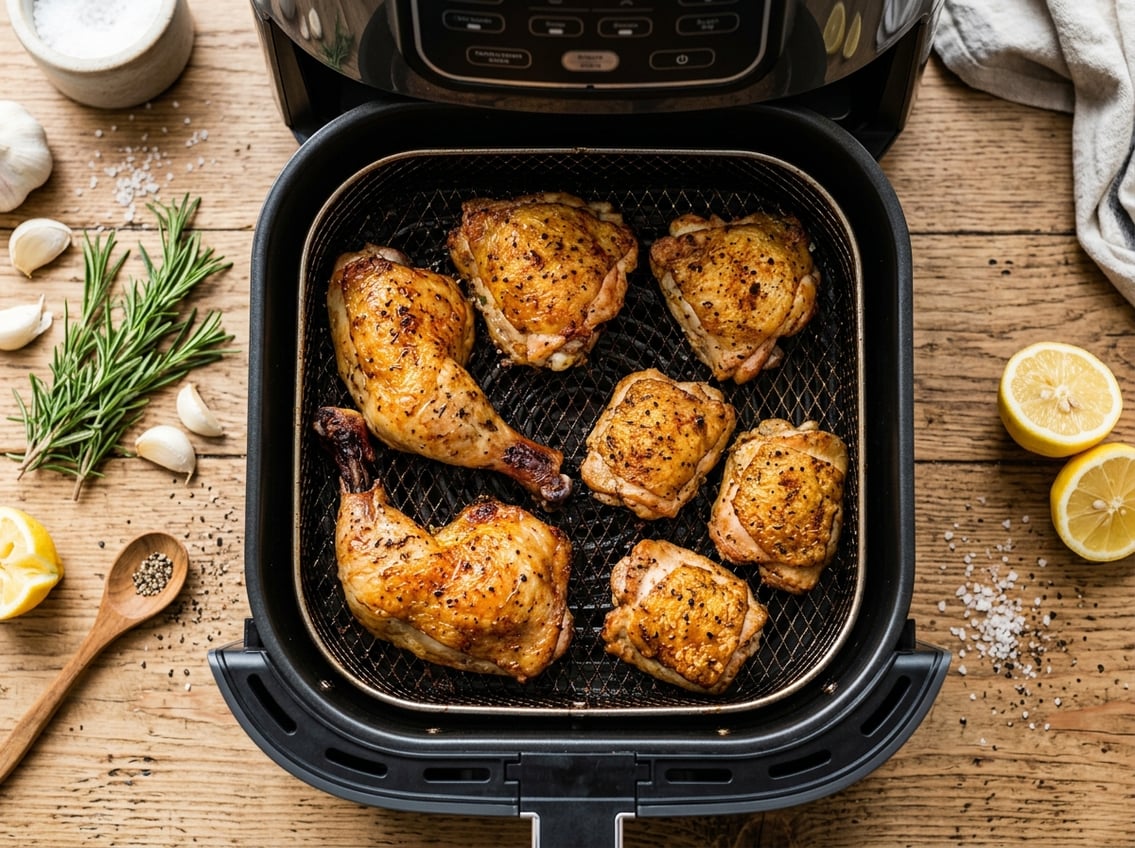
Finish cooking until the internal temperature reaches at least 165°F (74°C).
Bone-In vs. Boneless Chicken Thighs: Impact on Cooking Time
Bone-in thighs take longer to reach safe internal temperature than boneless thighs, and skin adds insulation that slows cooking but helps retain moisture and crisp.
Boneless vs. Bone-In Chicken Thighs
Boneless chicken thighs cook faster because they have a uniform thickness and no bone to slow heat. In a 400°F air fryer, boneless skinless thighs finish in about 12–18 minutes, flipping once halfway.
Thinner pieces fall near the low end, thicker pieces near the high end.
Bone-in chicken thighs need more time since the bone acts as an insulator. At 400°F, plan on roughly 20–28 minutes, flipping once, and check with an instant-read thermometer.
Target 165°F in the thickest part, away from the bone. If you prefer more tender dark meat, pull them at 170–175°F and let carryover rest raise the temp.
Skin-On vs. Skinless Preparations
Skin-on thighs take longer than skinless because the skin traps air and moisture, reducing direct heat contact. In the air fryer, skin-on boneless thighs usually take 15–20 minutes at 400°F.
Skin-on bone-in pieces often take 22–30 minutes. Use higher heat for the last few minutes to crisp skin without overcooking the interior.
Skinless boneless thighs cook fastest and absorb marinades more directly. Skinless bone-in thighs are less common but follow bone-in timing.
Remove early if the exterior dries and finish with a short higher-heat blast to avoid leathery edges.
Tips:
- Always check internal temperature (165°F minimum).
- Flip once halfway for even browning.
- Rest a few minutes for juicier results.
Preparation and Seasoning Techniques
Good preparation helps you get juicy, well-seasoned air-fried chicken thighs with crisp edges and even cooking. Focus on seasoning balance, surface dryness, a light coating of oil, and a single non-overlapping layer in the basket.
Dry Rubs and Marinades
Use a dry rub for a concentrated, crusty exterior. Mix salt, black pepper, garlic powder, and paprika as a base.
Pat thighs dry before applying the rub so the seasoning sticks and browning improves.
Choose a marinade to boost internal flavor and tenderness. Combine an acid (like lemon juice or vinegar), oil, and aromatics or soy/sauce for 30 minutes to 4 hours in the fridge.
Avoid long acidic marinades over 6 hours for thinner boneless thighs to prevent mushy texture.
Marinating Chicken Thighs for Maximum Flavor
Trim excess fat and place thighs in a zip-top bag with marinade to ensure even coverage. Press out air and massage the bag so the liquid contacts all surfaces.
For boneless skinless thighs, marinate 30 minutes to 2 hours. For bone-in or skin-on, marinate up to 4–6 hours for deeper flavor.
If you want a dry-brined effect, sprinkle the thighs with salt and refrigerate on a rack for 1–24 hours. This draws moisture out, which the meat then reabsorbs, improving juiciness and helping the skin crisp.
Rinse only if heavily salted, then pat dry.
Drying and Oiling the Chicken
Dry thighs thoroughly with paper towels before oiling. Removing surface moisture speeds browning and prevents steaming.
For best crispness on skin-on thighs, leave them uncovered in the fridge for 30–60 minutes after patting dry to further dry the skin.
Apply a thin, even coat of oil to the thighs to promote browning and prevent sticking. Use an oil sprayer or brush with about 1 tablespoon of oil for 6 thighs.
Choose neutral oils with a high smoke point, such as grapeseed, canola, or light olive oil. Avoid melted butter, which can scorch.
Arranging Thighs for Even Cooking
Place thighs in a single non-overlapping layer with at least 1/2 inch of space around each piece. Crowding traps hot air and leads to uneven cooking and soggy spots.
If you have bundles of boneless thighs, leave them bundled to fit more, but check doneness in the thickest part.
Flip bone-in thighs partway through cooking so both sides brown. For unrolled boneless thighs, you can place the nice side up and skip flipping.
Arrange skin-side-down first for skin-on pieces to develop a good sear, then finish skin-side-up to crisp.
Checking for Doneness and Using a Meat Thermometer
Use an instant-read meat thermometer and check the thickest part of each thigh without touching bone.
How to Check Internal Temperature
Insert an instant-read probe into the thickest part of the thigh, avoiding contact with bone or fat. Hold the probe steady for a few seconds until the reading stabilizes.
For bone-in thighs, probe near the center of the meat but not the bone. For boneless thighs, aim for the deepest central spot.
If the temperature reads below your target, return the pieces to the air fryer and recheck every 2–3 minutes. Flip the thighs if one side looks much browner to encourage even heat.
Clean the probe with hot, soapy water between uses.
Safe Minimum Internal Temperature Guide
The USDA safe minimum internal temperature for all poultry is 165°F (74°C). That temperature ensures harmful bacteria are destroyed and is the correct target to remove chicken thighs from the air fryer.
Insert the thermometer into the thickest point and confirm at 165°F before resting.
You may notice thighs remain pinker near bone even at 165°F; color alone is unreliable. After hitting 165°F, rest the thighs 3–5 minutes so juices redistribute.
Use a thermometer every time you cook air fryer chicken thighs for consistent safety and quality.
Serving and Pairing Suggestions
Choose sides that match the crispy exterior and juicy interior of air fryer chicken thighs. Plan a short rest so juices redistribute before you serve.
Best Side Dishes for Air-Fried Chicken Thighs
Pair with mashed potatoes for a classic, comforting plate. The creamy texture soaks up pan juices and any sauce you add.
Make simple garlic mashed potatoes: boil Yukon Golds, mash with butter and a splash of milk, then season with salt and pepper.
Roasted or sautéed vegetables complement the chicken’s crisp skin. Try oven-roasted Brussels sprouts or air-fried asparagus tossed with olive oil and lemon zest.
For a lighter option, serve a chopped salad with cucumber, tomato, and a vinaigrette to cut richness.
If you want a starch alternative, roasted sweet potatoes or rice pilaf work well. For an easy meal, shred leftover air fryer chicken thighs into tacos or atop buttered mashed potatoes for a quick bowl.
Resting the Chicken for Juiciness
Let the chicken rest 3–5 minutes after it reaches 165°F before slicing or serving. Short rests let internal juices redistribute.
Use a clean plate and tent loosely with foil if you need to hold the chicken warm for a few extra minutes.
If you’re plating with mashed potatoes, slice the thighs over the potatoes so any juices drizzle into them.
If you cooked bone-in thighs, a slightly longer rest (up to 7 minutes) helps the meat pull away from the bone and finish cooking uniformly.
Check temperature again only if the thigh seemed underdone.
Storage and Reheating Leftover Air Fryer Chicken Thighs
Store cooked air-fried chicken thighs promptly, keep them cold, and reheat so the skin stays crisp while the interior reaches 165°F (74°C).
Proper Refrigeration and Freezing
Place cooled chicken thighs into an airtight container or wrap tightly in foil or plastic wrap within two hours of cooking.
Label with the date. Store in the refrigerator at 40°F (4°C) or below for up to 3–4 days.
For longer storage, freeze in single layers on a tray until solid, then transfer to a freezer bag or vacuum-seal pouch.
Remove excess air to avoid freezer burn. Frozen air-fried chicken thighs keep best for 2–3 months.
When thawing, move frozen thighs to the refrigerator overnight.
Avoid thawing at room temperature. If you need to reheat from frozen, increase cooking time and check internal temperature frequently.
Reheating Tips for Crispy Results
Preheat the air fryer to 350–375°F (175–190°C).
Arrange the thighs skin-side up in a single layer with space between pieces for even airflow.
If thighs feel dry, lightly brush or spray each piece with 1 teaspoon of oil to help them crisp.
Reheat refrigerated thighs for 8–12 minutes, depending on size. Flip only if needed for even color.
For frozen thighs, start at 15–20 minutes and check at 12 minutes to avoid overcooking.
Check doneness with an instant-read thermometer. The thickest part should reach 165°F (74°C) without touching the bone.
Let the thighs rest for 2–3 minutes after reheating so juices redistribute before serving.
Alternative Methods
You can use pressure cooking or a conventional oven to prepare tender, fully cooked thighs. The Instant Pot cooks fast and makes the meat fall off the bone. The oven produces crispier skin if you use high heat or finish with a broil.
Instant Pot Chicken Thighs
Choose the Instant Pot for fast, reliably cooked thighs with minimal attention. For bone-in, skin-on thighs, sear each side for 2–3 minutes on Sauté if you like, then add 1 cup of liquid such as chicken broth or water.
Place thighs on a trivet and pressure cook on High for 8–10 minutes with a 5–10 minute natural release. Boneless thighs usually need 6–8 minutes.
Check the internal temperature and make sure it reads 165°F (74°C). If you want crisp skin after pressure cooking, move the thighs to a hot air fryer basket or broil skin-side up for 3–5 minutes.
Use a meat thermometer to avoid overcooking and adjust times for quantity and thigh thickness.
Converting Air Fryer Recipes for the Oven
Raise the oven temperature to 400°F or 425°F to mimic the air fryer’s high, dry heat.
Arrange thighs skin-side up on a wire rack set over a baking sheet so hot air circulates. This helps preserve crisping.
Bake bone-in, skin-on thighs for 30 to 40 minutes. Flip once if desired, and check that the thickest part reaches 165°F.
Bake boneless thighs for 20 to 25 minutes.
If your air fryer recipe calls for 16 to 18 minutes at 400°F, add about 12 to 18 minutes in the oven depending on bone presence and size.
Finish under a 450°F broil for 2 to 4 minutes to increase skin crispness if needed.


