
Do You Flip Chicken Thighs When Smoking? Best Practices and Expert Tips
Deciding whether to flip chicken thighs while smoking shapes texture, smoke depth, and the crispiness of the skin.
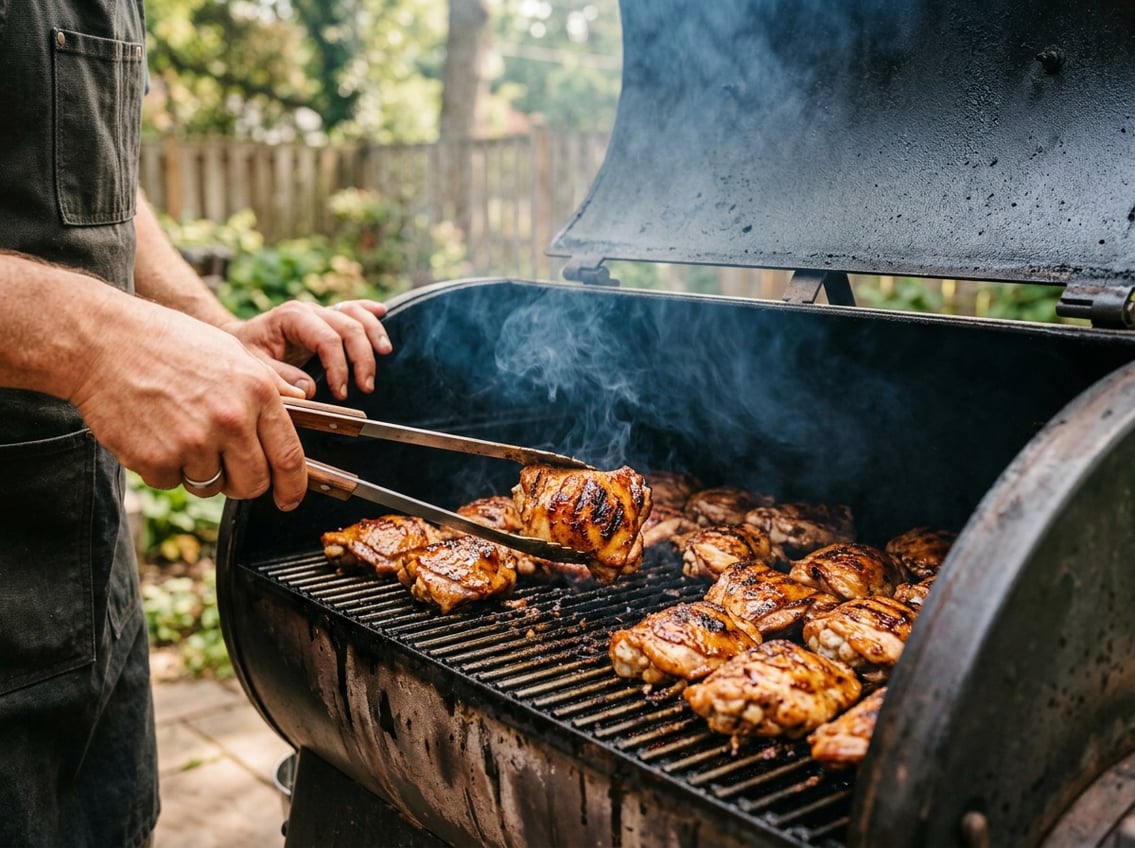
You usually smoke thighs skin-side up for most of the cook to let the fat render and the meat absorb smoke. You may flip during a high-heat finish to crisp the skin.

This post explains the flipping debate, the factors that change your approach, and a clear step-by-step smoking process.
You’ll find tips for different smoker types, timing and temperature guidance, and advice on handling, storing, and reheating smoked chicken thighs.
The Flipping Debate in Smoking Chicken Thighs
Flipping affects smoke exposure, skin texture, and heat distribution.
Your choice depends on smoker type, cut thickness, and whether you want even browning or maximum moisture retention.
Arguments for Flipping During Smoking
Flipping chicken thighs exposes more surface to circulating smoke, helping both sides absorb flavor more evenly.
If your smoker has a directional heat source, flipping prevents one side from overbrowning while the other lags.
Flipping also helps render fat and crisp skin on both faces of the thigh. Turning bone-in thighs once midway can reduce cold spots near the bone and promote uniform internal temperature.
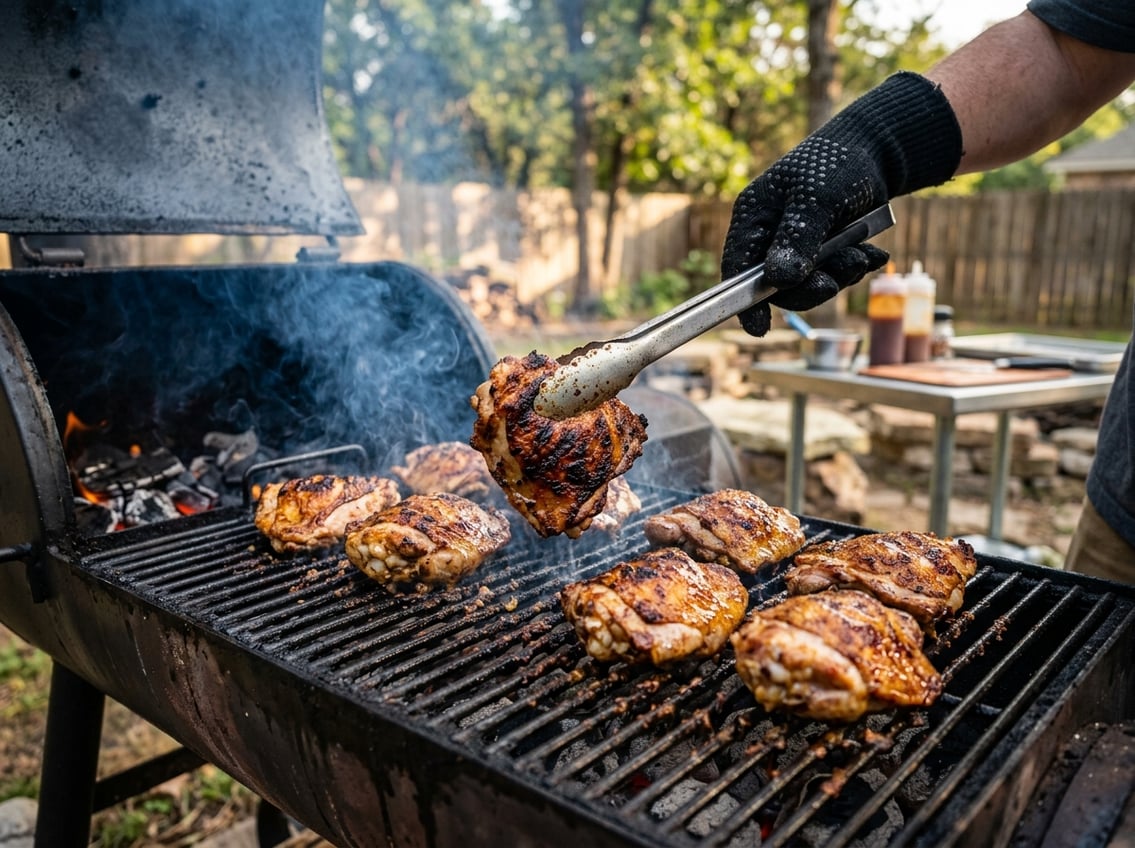
Use tongs or a spatula to avoid tearing skin and work quickly to limit heat loss.
Flipping benefits small batches and parts cooking. When you smoke several thighs on crowded racks, occasional turns keep air and smoke moving around each piece for more consistent results.
Arguments Against Flipping Chicken Thighs
Leaving thighs undisturbed maximizes smoke adhesion and reduces moisture loss from repeated lid openings.
Each flip costs time and heat, which can lengthen cook time and risk drying leaner pieces or thin edges.
Undisturbed thighs develop more consistent bark and crisper skin, especially in stable-temperature smokers like pellet or electric units.
Handling thighs constantly can raise contamination risk unless you use clean tools and avoid cross-contact with raw juices.
For whole-batch cooking on a reliable smoker, rotating the rack position instead of flipping individual thighs often achieves even results with less intervention.
If you want juiciness and deep smoke flavor, minimal flipping usually works best.
Optimal Timing If You Decide to Flip
If you choose to flip, plan a single, deliberate turn rather than frequent flipping.
Flip when internal temperature approaches 125–135°F for bone-in thighs, roughly halfway through total cook time at 225–250°F.
This timing lets the first side form bark and absorb smoke before you expose the other side.
Open the smoker, flip with tongs, then close the lid within 20–30 seconds to maintain stable temperature.
If you use a probe thermometer, insert it before smoking or between flips to avoid repeated punctures that let juices escape.
For thinner or boneless thighs, flip earlier—around 100–115°F—because they reach final temperature faster.
Adjust based on your smoker’s heat distribution and your preference for skin crispiness or smoke penetration.
Factors That Influence Flipping Decisions
Your choice to flip or not depends on heat pattern, thigh size and skin behavior, and how you want smoke to penetrate the meat.
Think about your equipment, the cut, and smoke contact, then adjust timing and handling to protect juiciness and skin.
Type of Smoker and Heat Distribution
Different smokers create different heat zones, which changes whether flipping helps.
- Offset smoker: Heat comes from the side and can be hotter near the firebox. Rotate or flip individual thighs to avoid hot spots and prevent burning on the side facing the heat. Flip once during the cook if you notice uneven browning.
- Vertical smoker: Heat rises evenly around the racks. You usually won’t need to flip; occasional rotation of racks (top to bottom) helps equalize temperature.
- Pellet smoker: Maintains consistent, indirect heat with steady airflow. Flipping is seldom necessary unless you want more even color or you stacked pieces on the grate.
Open the smoker as little as possible. Only flip when it corrects a clear problem, such as a hot spot, uneven color, or stuck skin.
Impact of Chicken Thigh Size and Skin
Thigh thickness and skin condition affect your approach.
Smaller, thinner thighs cook faster and take less smoke time; flipping increases the chance of tearing skin and losing juices.
Thicker or bone-in thighs benefit from a single flip to expose the thicker side to more direct heat for even internal temperature.
If you want crisp, intact skin, limit flipping and keep thighs skin-side up for most of the cook.
If skin is patchy or you’ve applied a wet sauce early, flipping can help even out rendering—do it once and use tongs to avoid puncturing skin.
Smoke Penetration and Flavor Absorption
Smoke absorption depends on exposure time, surface area, and airflow.
Leaving thighs undisturbed longer lets smoke form a more continuous bark and deeper flavor on the exposed side.
Flipping increases total surface exposure to smoke but interrupts smoke contact and releases heat each time you open the smoker.
If you want pronounced smoke on both sides, flip once midway rather than repeatedly.
For pellet or vertical smokers with steady airflow, you’ll get uniform smoke without flipping.
For offset smokers or when using dense woods, a flip helps prevent one-sided smokiness while avoiding excessive drying.
Monitor internal temperature and minimize lid-open time.
Step-by-Step Process to Smoke Chicken Thighs
You’ll prepare the thighs for best texture, choose salt and rub methods that penetrate, and pick a smoking temperature that balances smoke, time, and skin crisping.
Follow clear steps for trimming, drying, seasoning, and timing so your smoked chicken thighs cook consistently.
Preparing Thighs for Smoking
Trim excess fat and loose skin with kitchen shears. Remove flaps that hang past the edge so skin lays flat.
Pat each thigh completely dry with paper towels. Dry skin steams rather than crisps, so this step affects final texture.
If you plan a dry brine, salt the thighs and leave uncovered in the fridge for 8–24 hours to dry the surface and season through.
Tuck skin where needed and let thighs sit 20–30 minutes at room temperature before loading the smoker.
This evens the starting temperature and reduces chill time on the grate.
Seasoning and Brining Techniques
Choose between a wet brine, dry brine, or direct rub depending on time and flavor goals.
For a wet brine: dissolve 1/4 cup kosher salt and 1/4 cup sugar per quart of water; brine thighs 2–6 hours. Rinse and dry thoroughly afterward.
For dry brine: sprinkle 1/2–3/4 teaspoon kosher salt per thigh, refrigerate uncovered 8–24 hours. This firms the skin and seasons the meat internally.
Add baking powder (about 1 tsp per pound) to your rub to raise surface pH and promote browning.
Apply a simple rub of kosher salt, black pepper, garlic powder, smoked paprika, and a touch of brown sugar.
Press the rub into the skin and cavities; let sit 20–30 minutes before smoking so the rub adheres.
Ideal Smoking Temperatures and Times
Select your smoker temp based on texture and time.
At 225°F, bone-in thighs take roughly 2–2.5 hours. This maximizes smoke flavor but usually needs a high-heat finish for crispy skin.
At 250°F, plan about 1.75–2.25 hours. This offers good smoke absorption and better skin rendering without a separate finish in many cases.
At 275°F, cook time drops to about 1–1.5 hours for bone-in thighs and often produces well-rendered skin without an extra step.
Always target an internal temperature of 175–180°F for tender, gelatinized thighs.
Use an instant-read probe in the thickest part, avoiding the bone, and rest the thighs 5–10 minutes before serving.
Handling Different Smokers for Chicken Thighs
Choose a smoker and plan for its heat flow, how you’ll manage the skin finish, and whether you’ll flip during any high-heat finishing step.
Adjust placement, probe locations, and finishing methods to match your smoker’s design and temperature behavior.
Offset vs. Vertical Smokers
Offset smokers place the firebox to one side, so heat and smoke travel horizontally across the meat before exiting the chimney.
In an offset, position bone-in, skin-on thighs closer to the cooler side if they’re directly in the smoke path.
Rotate racks front-to-back every 30–45 minutes to avoid hot-side overcooking.
Keep thighs skin-side up for the main cook to let rendered fat baste the meat. Flip only during a direct-contact finish such as a sear on a hot grate or pan.
Vertical smokers circulate heat vertically; temperatures are more uniform top-to-bottom but can be hotter near the bottom.
Arrange thighs on higher racks for gentler heat, and move tougher pieces down if you want faster skin rendering.
You generally do not need to flip during the low-and-slow phase in a vertical smoker. Monitor internal temp and perform a high-heat finish if skin remains soft.
Benefits of Pellet Smokers
Pellet smokers control heat with a hopper-fed auger and electronic thermostat, giving you consistent temps and steady smoke output.
That stability reduces the need to flip chicken thighs during the cook. Keep skin-side up to preserve smoke flavor and let fat render evenly.
Use the pellet smoker’s direct-heat or sear mode, if available, to crisp skin at the end without moving pieces frequently.
Pellet smokers also simplify two-stage cooking: smoke at 225–250°F, then raise to 400–425°F for 8–15 minutes to finish skin.
Place a probe in a representative thigh to avoid probe-placement error.
Managing Hot Spots and Even Cooking
Identify hot spots by placing a few probe thermometers or foil-wrapped sensor packets across the grate before loading chicken.
In offset and vertical smokers, move thighs away from areas that register 10–20°F higher than the average to prevent uneven doneness.
In pellet smokers, hot spots are rarer, but check near the flame path and at grate edges.
Stagger thighs to allow airflow, rotate rack positions every 30–60 minutes, and switch upper/lower racks midway through longer cooks.
If skin needs crisping, finish thighs on a preheated grill griddle or cast-iron skillet. Flip so skin contacts the hot surface directly for 2–4 minutes, then return skin-side up briefly to rest.
Always base flips and moves on internal temperature, not time, to ensure safe, tender thighs.
Tips for Achieving Juicy, Flavorful Smoked Chicken Thighs
Focus on creating dry, seasoned skin; control internal temperature; and use the right wood and smoke duration to add flavor without bitterness.
Small adjustments like dry time, finishing heat, and occasional spritzing make the biggest difference.
Improving Skin Texture and Crispiness
Pat thighs very dry with paper towels before seasoning.
Moisture on the skin prevents browning and yields rubbery texture, so let the thighs air-dry uncovered in the refrigerator for 2–4 hours if you can.
Apply a thin layer of oil to help the rub adhere and promote even crisping.
Use a salt-forward dry rub and work some under the skin where possible for direct seasoning to the meat.
Finish with high heat for 10–20 minutes at 375–400°F to render fat and crisp skin.
If your smoker can’t reach that, transfer to a preheated grill or broiler briefly. Monitor closely to avoid burning.
Preserving Moisture While Smoking
Brine or use a light dry-brine (salt + sugar) for 30 minutes to overnight to increase moisture retention and flavor depth.
Rinse only if you used a wet brine, then pat dry thoroughly.
Smoke at moderate temperatures (225–275°F) so collagen breaks down without overcooking.
Target an internal temperature of 175°F for thighs; this yields tender, juicy dark meat while ensuring safe doneness.
Use a water pan or occasional spritz with apple juice or chicken broth every 30–45 minutes to maintain humidity and prevent surface drying.
Rest thighs loosely tented 8–10 minutes after smoking so juices redistribute before cutting.
Adding Smoke Flavor Without Overhandling
Choose milder woods—apple, cherry, or maple—for chicken to avoid overpowering the natural flavor of the thighs.
Hickory works in small amounts; avoid straight mesquite on poultry.
Create thin, blue smoke rather than heavy white smoke. Adjust fuel and airflow to keep smoke clean.
Aim for 60–90 minutes of active smoke exposure at the start, then reduce wood input as the skin sets.
Limit handling during the smoke.
Place thighs skin-side up and leave them; flipping is rarely needed and can disrupt bark formation and heat circulation.
Use an instant-read thermometer through the thickest part without touching bone to check progress.
Guidelines for Storing and Reheating Smoked Chicken Thighs
Store smoked chicken thighs in the refrigerator within two hours of smoking. Use airtight containers to keep the meat moist and prevent odor transfer.
Reheat the chicken gently to keep it moist and maintain the skin’s texture. Avoid using high or direct heat, which can dry out the meat.
How to Store Leftover Smoked Chicken
Let smoked chicken thighs cool at room temperature for no more than one to two hours. Refrigerate them right away.
Place the thighs in a shallow airtight container or wrap them tightly in foil or plastic wrap. Store them on the middle shelf of the fridge, where the temperature stays most stable.
Label the container with the date. Use refrigerated smoked chicken within three to four days.
For longer storage, freeze the thighs in a freezer-safe bag or vacuum seal them. Remove as much air as possible to prevent freezer burn.
Frozen smoked chicken keeps its best quality for two to three months. When ready to thaw, move the frozen thighs to the fridge for 24 hours.
Avoid thawing at room temperature or in warm water to reduce the risk of bacteria.
Best Reheating Methods for Retaining Quality
Oven: Preheat to 300–325°F (150–160°C). Place thighs on a rimmed sheet pan, add a splash of chicken stock or a pat of butter, cover loosely with foil, and heat for 15–20 minutes until the internal temperature reaches 165°F.
This method preserves juiciness and reheats the chicken evenly.
Skillet: Warm a nonstick skillet over medium-low heat. Add a teaspoon of oil or butter, cover, and heat thighs skin-side down briefly to crisp.
Flip the thighs and finish covered for a few minutes until they reach 165°F. This crisps the skin and keeps the meat moist.
Sous-vide or steam bath: Place vacuum-sealed or zipper bagged thighs in a 140–150°F (60–65°C) water bath for 30–45 minutes to gently reheat without overcooking.
After reheating, sear the skin quickly in a hot pan for added crispness.
Microwave: Use only if necessary. Cover the chicken and use short 30–60 second bursts at medium power, flipping halfway, then check the temperature.
Finish in a hot oven or skillet to restore texture.


