
Best Ways to Cook Chicken Thighs for Soup: Expert Tips and Proven Methods
You want chicken thighs that stay juicy and make a rich, flavorful broth for soup. The best approach balances gentle simmering to extract collagen and flavor with a quick sear or roast beforehand for deeper, savory notes.
This gives you tender meat and a broth with real body. You’ll learn how to choose and prep thighs, when to boil versus simmer, how pan-searing or roasting adds depth, and simple variations and storage tips to keep your soup tasting great.

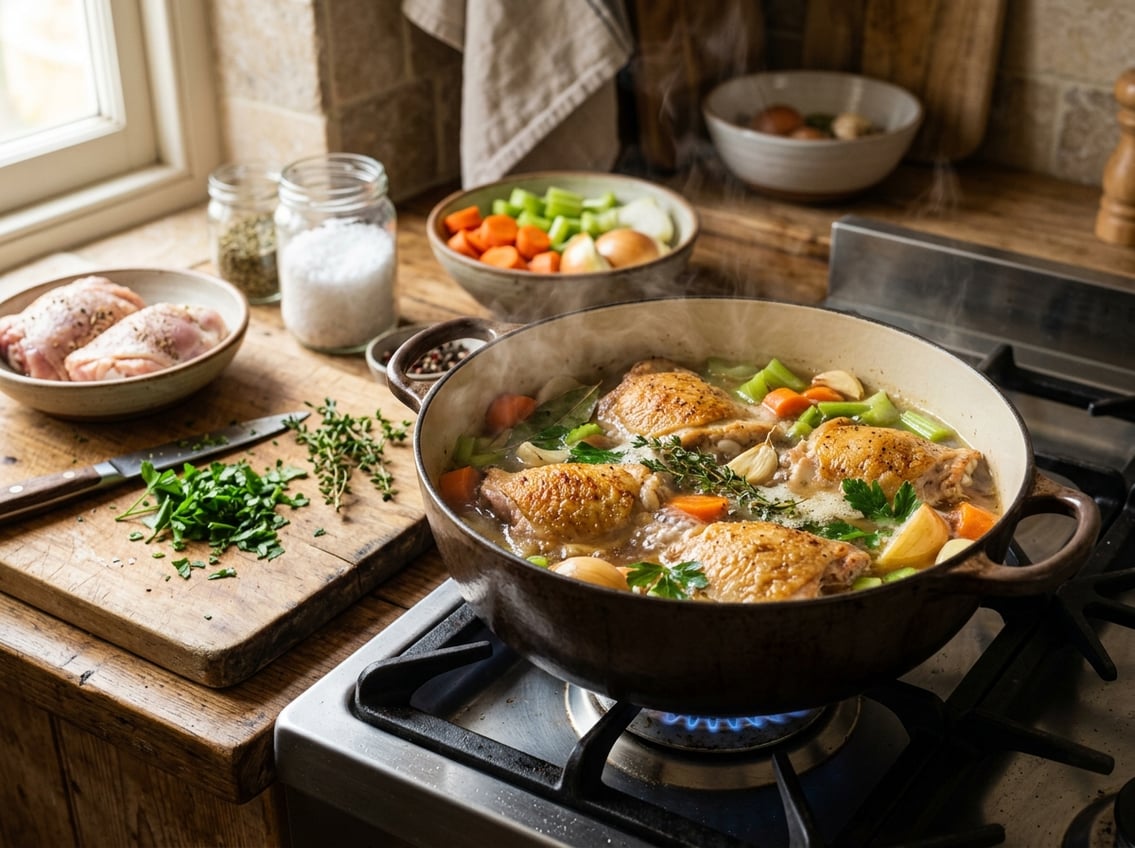
For most homemade chicken soup, start with skin-on, bone-in thighs, sear them briefly, then simmer gently until the meat is tender and the broth is flavorful.
Why Chicken Thighs Make the Perfect Soup Base
Chicken thighs deliver concentrated flavor, steady moisture, and flexible options for broth-building and shredding. You get richer stock from bones and collagen, and tender meat that resists drying during long simmers.
Flavor and Richness Compared to Other Cuts
Thighs are dark meat with higher fat and connective tissue than breasts, so they release more savory compounds into the broth. That extra fat carries flavor-soluble aromatics like garlic and thyme and gives the finished soup a rounder mouthfeel.
If you want a deeper-tasting broth, use skin-on, bone-in thighs and brown them first. Browning creates fond and adds caramelized notes.
Simmering the browned pieces extracts gelatin and minerals that make the broth feel full-bodied. For lighter stocks, remove skin or use boneless thighs but expect less collagen.
Compared with breasts, thighs produce a noticeably richer, more satisfying chicken soup without requiring extra fat or long stewing times.
Moisture Retention and Texture Benefits
Thigh meat contains more intramuscular fat and connective tissue, which keeps the meat moist through gentle simmering. You can simmer 30–45 minutes and still shred the meat easily.
Collagen in the thighs breaks down into gelatin as it cooks, slightly thickening the liquid and giving the soup body. That gelatin also helps the meat feel silky on the palate rather than fibrous.
If you prefer chunks rather than shredded chicken, thighs hold shape well. For noodle or vegetable soups where you reheat multiple times, thighs maintain tender texture better than white meat.
Bone-In vs. Boneless Thighs
Bone-in, skin-on thighs give you the best broth-building components: marrow, collagen, and extra fat from the skin. Use them when your priority is a rich, gelatinous stock for homemade chicken soup.
Roast or brown first for deeper flavor. Boneless, skinless thighs speed prep and make shredding and portioning easy.
Choose boneless when you need quick assembly or a cleaner, lower-fat broth. You can still simmer boneless thighs for flavor, but supplement with chicken bones or a small amount of stock for depth.
Try a hybrid approach: simmer bone-in thighs to make stock, then add boneless pieces or shred removed meat back into the soup. This gives you concentrated broth and convenient, tender meat for serving.
Selecting and Preparing Chicken Thighs
Choose thighs that give you the most flavor and the cooking control you need. Decide between bone-in or boneless, skin-on or skinless, and trim and season to suit the soup’s texture and taste.
Choosing Bone-In or Boneless
Bone-in thighs add more collagen and marrow to the broth, which improves mouthfeel and body during long simmering. If you plan a slow-simmered soup or stock, pick bone-in, skin-on thighs.
The bones release gelatin as the internal temperature rises well past 165°F and the connective tissue breaks down, making the broth richer. Boneless thighs work best when you want tender, ready-to-eat pieces quickly.
They cook through faster and are easier to portion. Remove them from the pot once they reach 165–175°F depending on your desired texture to avoid overcooking.
Use bone-in for maximum flavor and body. Choose boneless for convenience and cleaner presentation.
Skin-On vs. Skinless
Skin-on thighs contribute fat and layered flavor to the soup as the skin renders. If you want a silkier, richer broth, leave the skin on during simmering and skim excess fat from the surface before serving.
Skinless thighs reduce surface fat and make the soup lighter and clearer. They also integrate more easily with vegetables and aromatics without producing a film on top.
Use skinless when you prefer a clean broth or if you’ll braise the meat then return shredded pieces to the soup. Consider browning skin-on thighs first in a pan to build savory depth, then simmer.
For skinless, salt and sear briefly to add flavor before adding liquid.
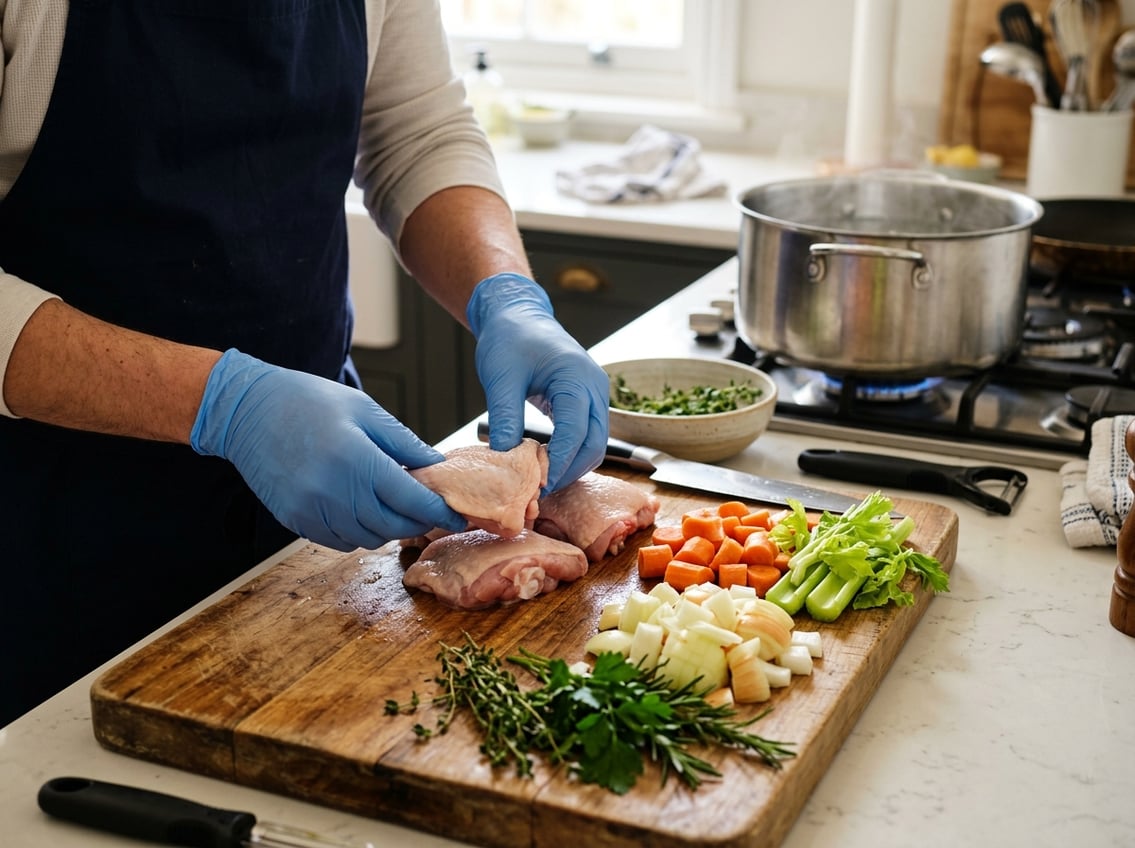
Trimming and Seasoning for Maximum Flavor
Trim excess fat and loose skin to prevent greasy patches while still leaving enough fat to flavor the broth. Remove any visible cartilage or gristle that won’t soften with simmering to keep the soup texture pleasant.
Season the thighs simply but intentionally: kosher salt, cracked black pepper, and a light dusting of garlic powder or paprika. If you brown the thighs first, pat them dry and season just before searing to form a flavorful crust.
If you plan on shredding meat into the soup, cook thighs until the meat easily pulls from the bone at around 175–185°F for bone-in, or 165–175°F for boneless. Rest briefly before shredding.
Reserve pan fond or browned bits and deglaze with a splash of stock for extra depth in the soup.
Boiling and Simmering Techniques for Tender Chicken
Use gentle heat, enough liquid to cover the thighs, and monitor internal temperature. A steady, low simmer gives tender, moist meat and a clear, flavorful broth.
Correct Simmering and Boiling Methods
Place the chicken thighs in a pot and pour in cold water or stock until the pieces are covered by about 1 inch. Bring the liquid up to a gentle boil, then immediately reduce heat so bubbles barely break the surface.
For poached chicken thighs, keep the surface at 180–200°F (82–93°C); small, occasional bubbles are fine. For bone-in thighs, simmer 25–30 minutes; boneless thighs usually take 12–18 minutes.
Use aromatics like onion, garlic, bay leaf, and peppercorns in the liquid for a broth you can reuse in soup. Avoid hard boiling.
Vigorous boiling shakes the meat, forces out juices, and causes stringy texture. Maintain gentle movement in the pot for best moisture retention and clear stock.
Temperature Control and Cooking Times
Start with cold liquid and heat gradually to help proteins set uniformly. Target these practical times: boneless thighs 12–18 minutes, bone-in thighs 25–30 minutes, frozen thighs add about 50% more time.
These ranges assume a gentle simmer, not a fast boil. Measure doneness with a probe thermometer.
Insert into the thickest part without touching bone; remove when the internal temperature reaches 165°F (74°C). If you prefer slightly more tender connective tissue breakdown for soups, cook bone-in thighs to 175–185°F (79–85°C) for a few extra minutes.
After turning off heat, leave the lid on and let thighs rest in hot liquid for 5–10 minutes. This carry-over cooking evens the temperature and helps retain juices.
Achieving Safe and Juicy Results
Safety depends on reaching 165°F (74°C) throughout the thickest part of the thigh. Use a calibrated thermometer rather than visual cues.
Check multiple pieces in a crowded pot because the center pieces can lag behind. To keep meat juicy, do not overcook.
Remove thighs when they hit the target temperature and transfer them briefly to a cutting board or bowl to rest. If you plan to shred meat for soup, cool slightly then shred.
Warm shredded meat absorbs broth better and stays moist. For poached-style, gently simmer in seasoned liquid and strain the broth for clarity before adding back shredded chicken to the soup.
This method preserves moisture retention and yields tender, flavorful poached chicken thighs ideal for soups.
Pan-Searing and Roasting for Enhanced Depth
Pan-searing builds a browned crust and concentrated fond, while a brief roast finishes the thighs gently and brings internal temperature to a safe, juicy point. This combination gives you crisp skin, a clear cooking target for doneness, and flavorful browned bits to enrich the soup broth.
Crispy Skin Techniques
Start with bone-in, skin-on thighs and pat them completely dry with paper towels. Salt the skin at least 30 minutes ahead or right before cooking to draw out surface moisture and season the crust.
Use a heavy skillet over medium-high heat and add a neutral oil with a high smoke point. Place thighs skin-side down and press gently so the skin contacts the pan.
Do not move them until the skin releases and turns deep golden brown, about 6–10 minutes depending on size. Render fat slowly if you have time by lowering the heat slightly after initial browning.
Aim for a skin color that’s deeply caramelized. Transfer thighs to a rack while you finish cooking to keep skin crisp.
Oven Finishing vs. Stovetop
Decide by thigh thickness and how you plan to use the meat in the soup. For 1–1.5 inch-thick thighs, sear skin-side down to brown, then finish in a preheated 400°F (200°C) oven until the internal temperature reaches 165°F (74°C).
If you want even, edge-to-edge doneness with minimal risk of overcooking, roast first at 275–300°F until 155–160°F, then quick-sear skin-side down to crisp and brown. That reverse-sear approach preserves juices and yields a uniformly cooked piece.
When time is short, finish on the stovetop in the same pan by flipping and covering briefly on low heat until the thermometer reads 165°F. Use an instant-read probe at the thickest part to confirm safe internal temperature.
Deglazing for Rich Broth
After searing, leave the fond in the pan. Pour a small amount of hot liquid—stock, wine, or water—over the pan while it’s hot to loosen the fond.
Scrape with a wooden spoon to incorporate it. Use ½ to 1 cup of liquid per batch of thighs; adjust based on how much fond formed.
Reduce the deglazing liquid briefly to concentrate flavor, then add it to your soup pot as the base for simmering the thighs and vegetables. If you roasted thighs in the oven, collect pan juices from the roasting tray and deglaze the tray on the stovetop before adding to the soup.
Strain if you want a clear broth, or add directly for extra body and depth.
Incorporating Chicken Thighs Into Your Soup
Plan how you want the chicken to appear in the bowl and how it will affect texture and broth. Decide whether you want bite-sized pieces, shredded meat that blends with noodles, or larger chunks for a heartier mouthfeel.
Shredding or Chopping Cooked Meat
Shred warm chicken thighs with two forks for tender, stringy pieces that meld into broth and coat noodles evenly. Remove bones and skin first if you simmered bone-in thighs; save bones for stock.
For boneless thighs, pull apart along the grain for clean shreds. Chop if you want defined bites or a firmer texture.
Use a sharp knife on chilled meat to make uniform 1/2- to 3/4-inch pieces. Add chopped chicken late in cooking to prevent drying.
Shredded chicken can reheat in the hot broth for 3–5 minutes. Shredded chicken works best in chicken noodle soup and creamy chicken soup.
Chopped pieces suit stews or chunky soups.
Thickening and Enriching the Broth
Boost body and mouthfeel depending on your soup type. For clearer broths, simmer thighs slowly and skim fat, then finish with an emulsion of cold butter whisked in to add silkiness without clouding the stock.
For creamy chicken soup, make a roux (equal parts butter and flour) cooked briefly, then whisk in some hot broth before returning to the pot. Alternatively, stir in a splash of cream or whole-milk yogurt at the end.
If you used bone-in thighs, the gelatin released during simmering will naturally thicken the broth after cooling. Adjust salt at the end, as concentrated reductions can taste oversalted if you add starches or cream.
Vegetable and Noodle Additions
Match vegetables with similar cooking times to keep texture consistent. Simmer root vegetables like carrots and parsnips, along with diced celery, for 15–25 minutes.
Add peas and spinach during the final 3–5 minutes. Choose noodle size for balance with shredded chicken.
Egg noodles or wide ribbon pasta pair well with shredded chicken and cook in 6–10 minutes. If you prefer rice, use parboiled rice or cook it separately to prevent mushy grains.
Add vegetables early for creamy chicken soup and finish with noodles or grains at the end. Stir in fresh herbs and delicate greens off heat to maintain bright flavor.
Homemade Soup Variations and Storage Tips
Explore options from clear, broth-forward bowls to richer, cream-based versions. Build stock step by step and keep leftovers safe and flavorful.
Swap ingredients, time shredded chicken additions, and control storage temperature for best results.
Classic and Creamy Chicken Soup Ideas
Start classic broth-based soup with bone-in chicken thighs to extract gelatin and depth. Brown the thighs briefly for color.
Simmer them for 30–40 minutes with onion, carrot, celery, bay leaf, and a few peppercorns. Remove bones, shred the meat, and return it near the end to keep the texture tender.
For creamy soup, gently thicken with a slurry of cornstarch and cold water or whisk in a mixture of butter and flour off heat for a silkier finish. Add a cup of cream or coconut milk at the end for richness, and finish with lemon juice or vinegar to brighten the flavor.
Use parsley and thyme for classic notes or cilantro and lime for a fresher profile.
Suggested add-ins:
- Noodles or rice (cook separately or add late to prevent overcooking).
- Vegetables cut to similar sizes so they finish together.
- Spices such as turmeric for color or smoked paprika for warmth.
Making Chicken Soup from Scratch
Use saved bones or whole bone-in thighs to make homemade chicken thigh soup stock. Roast bones at 425°F (220°C) for 20–30 minutes for deeper flavor.
Simmer them for 3–4 hours with cold water, onion, carrot, celery, and 1–2 bay leaves. Skim foam in the first 30 minutes for a clearer broth.
Strain through a fine sieve and refrigerate. Once cold, remove the solidified fat for a cleaner broth.
Poach boneless or bone-in thighs in the strained stock for 20–35 minutes until the internal temperature reaches 165°F (74°C). Shred the meat with two forks while warm and add it back just before serving to keep the chicken tender.
Storing and Reheating Soup
Divide soup into shallow containers to cool it quickly. Refrigerate within two hours.
Store homemade chicken soup in airtight containers for 3–4 days. Freeze soup for up to 3 months.
Label containers with the date and contents. This helps you rotate your stock.
Reheat soup on the stovetop over medium-low heat until it steams. Avoid boiling to preserve texture.
If the soup is frozen, thaw it overnight in the refrigerator before reheating. You can also use the defrost setting on a microwave and finish reheating on the stove.
For soups thickened with starch or cream, whisk well while reheating. Add a splash of broth or water if the soup tightens or separates.


