
Do You Flip Chicken Thighs in the Oven? Expert Tips and Juicy Results
You can get perfect oven-baked chicken thighs either way, but flipping matters when you want even browning and crisp skin on both sides.
Flip halfway through if you’re using bone-in, skin-on thighs or a lower oven temperature. Skip flipping when you roast at high heat on a rack or use boneless thighs for simplicity.

Flipping changes how heat and fat affect juiciness, and it influences browning and texture. The right technique helps you get juicy, safe, and crisp chicken thighs.
The Science Behind Flipping Chicken Thighs
Flipping affects heat, texture, and moisture distribution. It determines which surfaces brown, how steam escapes, and where juices move during cooking.
Heat Distribution and Even Cooking
Ovens create uneven zones of heat. The side facing the element or fan browns and cooks faster.
Flipping chicken thighs once halfway through exposes both sides to hotter and cooler zones. This reduces the risk of undercooked spots near the bone.
If you roast skin-side up the whole time, the underside may lag by 10–20°F in internal temperature. Turning at the midpoint evens that out and helps the thickest part reach 165°F more uniformly.
Use a probe thermometer in the meatiest spot to confirm doneness.
Crispiness and Texture Considerations
Crisp skin develops where hot, dry air contacts the surface longest. Leaving thighs skin-side up concentrates browning there, creating the crispiest top but leaving the bottom softer.
Flipping lets both surfaces get direct radiant heat and produces more balanced crisping. If you want a very crispy top, skip flipping and finish under a broiler for 2–4 minutes.
If you flip, pat the skin dry and brush with a thin layer of oil before placing back in the oven. That promotes browning without burning and preserves texture.
Juiciness and Moisture Retention
Moisture moves from hotter to cooler areas and toward the surface. Cooking skin-side down first for 10–15 minutes then flipping can protect the meat from direct heat early on, helping the thigh stay juicier near the bone.
Frequent turning can release more juices into the pan. One careful flip midway gives even heat without excessive juice loss.
Rest the thighs for 5–10 minutes after removing them to let juices redistribute.
Deciding Whether to Flip: Factors to Consider
Flipping affects evenness of cooking, skin crispness, and risk of burning. Consider meat type, oven behavior, and whether skin is present.
Bone-In vs. Boneless Chicken Thighs
Bone-in chicken thighs cook more slowly around the bone and often benefit from flipping once to even out internal temperature. If you roast at 375–400°F, flip near the halfway point so the side away from the heat finishes browning and the thickest part reaches 165°F.
Use a probe thermometer in the meatiest spot, avoiding the bone, to check progress. Boneless chicken thighs heat through faster and more uniformly.
You can skip flipping boneless thighs if pieces sit on a rack and you use convection. Flipping is optional when you want extra crispness on both sides.
For sheet-pan cooking without a rack, a single flip at about two-thirds of the time helps prevent the underside from steaming and becoming soggy.
Oven Type and Placement
Convection ovens circulate hot air and reduce temperature differences between top and bottom. You often don’t need to flip bone-in or boneless thighs in convection ovens.
Place thighs on the middle rack and keep spacing so air moves freely. In a conventional oven, heat radiates more from the top or bottom depending on element use.
If thighs sit close to the top element, the top can overbrown before the underside cooks. Flip once to equalize.
Using a roasting rack elevates thighs and lessens the need to flip in either oven type.
Skin-On or Skinless Choices
Skin-on thighs gain the most from flipping if you want uniformly crisp skin. Start skin-up to render fat and brown, then flip halfway to crisp the underside and finish cooking.
If the skin browns too fast, tent with foil and flip later to avoid burning while the interior reaches 165°F. Skinless thighs don’t require flipping for texture, but flipping can improve browning and prevent the bottom from sticking or steaming.
If you cook skinless on a hot oiled sheet, flip once when the first side has a deep golden color to promote even color and avoid soggy undersides.
Best Techniques for Flipping Chicken Thighs in the Oven
Flip once for even browning and use the right moment, tools, and surface to avoid tearing the skin or losing juices. Timing, a firm grip, and a nonstick contact point make a difference.
Timing and Frequency During Baking
Flip chicken thighs once, about halfway through the total bake time for bone-in pieces (typically 20–25 minutes into a 40–50 minute roast at 375°F). For boneless thighs that cook faster, flip around the midpoint of a 20–30 minute bake.
Look for a golden-brown first side and juices pooling at the edges as a cue to flip. If the meat resists when you try to lift it, wait a couple of minutes; the skin will release as proteins set and the crust forms.
Use an instant-read thermometer to confirm doneness. Target 165°F internal temperature and consider removing at about 160°F for carryover cooking.
Tools and Methods for Flipping
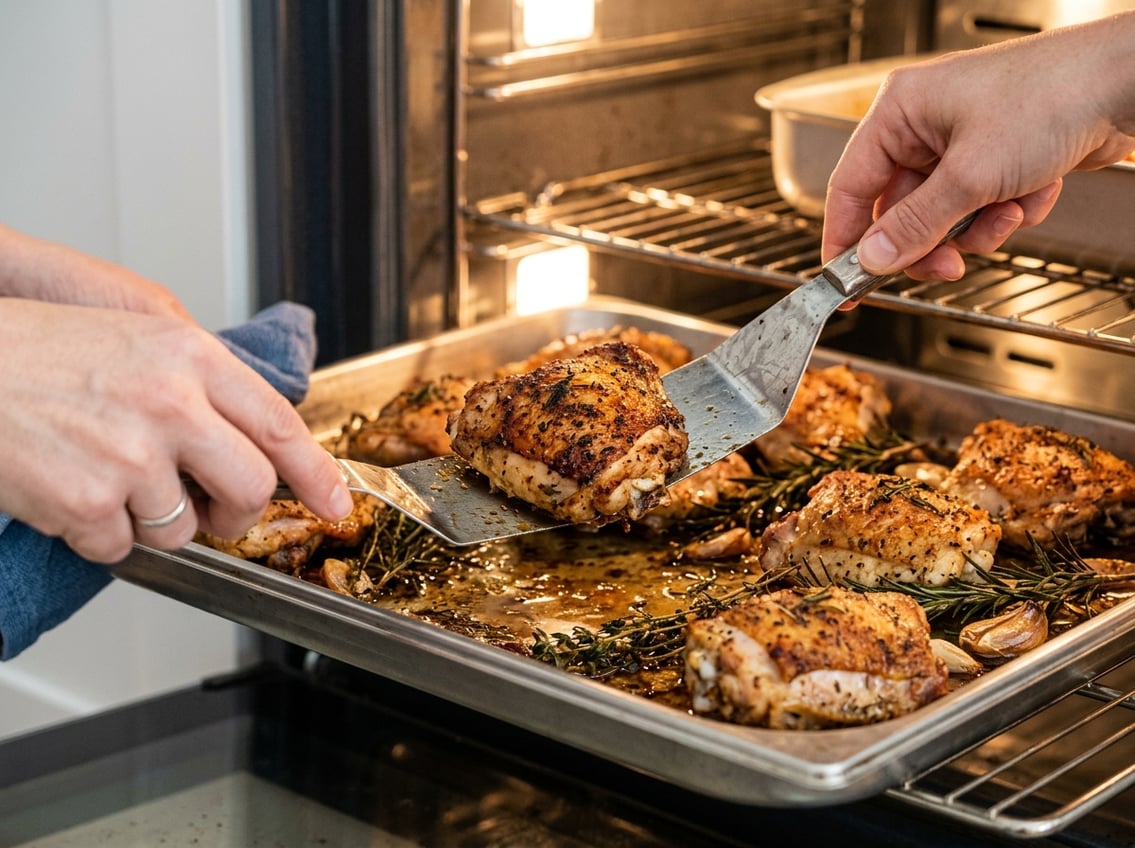
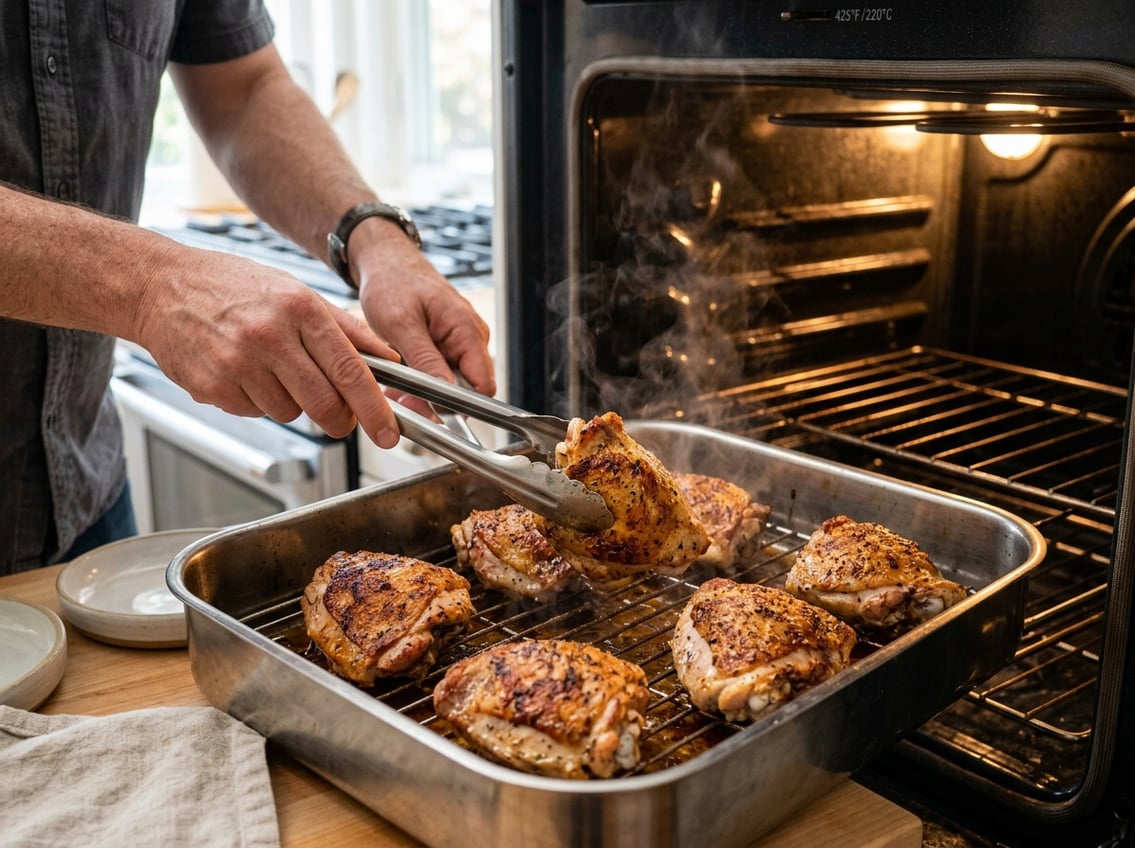
Use long-handled tongs with scalloped edges to grip the thigh without piercing it. A thin metal spatula works well for sliding under breaded or delicate pieces.
Grip near the thickest part of the thigh and flip in one smooth motion to protect the skin and coating. Avoid forks or instruments that puncture meat; each hole releases juices and dries the thigh.
For multiple pieces, flip two or three at a time to keep movements quick and steady. If you prefer less handling, place thighs on a wire rack set over a sheet pan so you can rotate the pan instead of flipping each thigh.
Preventing Sticking and Tearing
Dry the skin thoroughly with paper towels before seasoning to reduce steam and sticking. Lightly oil the pan or brush thighs with oil to create a release layer between skin and metal.
Use a well-heated pan or preheat the sheet pan in the oven for a few minutes before adding the thighs. This initial sear helps the skin crisp and naturally release from the pan surface.
If breading sticks, slide a thin spatula under the edge first, then support with tongs as you lift. Avoid overcrowding the pan; give each thigh at least 1 inch of space for air circulation and even browning.
Optimizing Baking for the Juiciest Chicken Thighs
Control oven temperature and timing, dry the skin well, and use a thermometer to avoid overcooking. Season and baste so the meat stays moist while the skin crisps.
Choosing the Right Temperature and Duration
Baking at 400–425°F (200–220°C) gives a good balance: the skin crisps while the interior reaches safe temperature without long exposure to heat.
For bone-in, skin-on thighs plan on 35–45 minutes. Boneless skinless usually finish in 20–30 minutes.
Use an instant-read thermometer and pull thighs at 160–163°F (71–72°C), then rest 5–10 minutes; carryover heat will bring them to 165°F (74°C) and keep juices locked in.
Place thighs skin-side up on a wire rack set over a rimmed baking sheet for even air circulation and crisper skin.
If you start in a cold pan on the stovetop to render fat, transfer to a preheated 425°F oven to finish. This reduces overcooking while achieving crispness.
Seasoning, Marinades, and Basting Tips
Pat skin dry with paper towels before seasoning. Salt at least 30 minutes ahead or overnight in the refrigerator to season deeply and draw out surface moisture for better browning.
For marinades, use an acidic element (vinegar, lemon) plus oil and aromatics. Don’t marinate more than 4–6 hours for skin-on thighs or the texture can change.
Apply a thin oil or butter layer before baking to promote even browning. Baste sparingly: a single glaze in the last 10 minutes prevents soggy skin.
If you want a glossy finish, brush a honey- or soy-based glaze at the final 5–10 minutes and broil 1–2 minutes while watching closely.
Troubleshooting Common Issues When Baking Chicken Thighs
Two small adjustments — managing oven temperature and monitoring internal temperature — fix most problems with texture and browning. Use a thermometer and adjust timing or placement in the oven.
Avoiding Dry or Undercooked Meat
If thighs come out dry, check internal temperature first. Insert an instant-read thermometer into the thickest part; pull at 160°F (71°C) and allow 5–10 minutes of carryover to reach 165°F (74°C).
Brining or salting at least 30 minutes before baking helps retain moisture. A simple brine (1/4 cup salt per quart water) for 30–60 minutes or a 12–24 hour refrigerator brine for bone-in pieces reduces dryness.
Adjust oven temperature to control cooking speed. Bake boneless thighs at 375°F (190°C) and bone-in at 375–400°F (190–205°C).
If the exterior browns too fast, tent loosely with foil and continue until the thermometer reads safe temperature. Avoid over-handling the meat; every flip or poke releases juices.
Use tongs or a spatula and flip at most once if needed.
Getting Even Browning Without Flipping
You don’t always need to flip chicken thighs to brown both sides. Use a wire rack set over a sheet pan so hot air circulates and the bottom won’t steam.
This method promotes even browning on skin and underside without turning. Start skin-side down only if you want rendered fat and initial contact browning; otherwise start skin-side up for immediate crisping.
If you choose not to flip, finish the top under a broiler for 2–4 minutes to deepen color. Watch closely to avoid burning.
Placement in the oven matters. Put thighs on the middle rack for balanced heat; move to the top rack for faster browning or the lower rack to slow it.
If the pan is crowded, give pieces 1–2 inches between them so air flows and both surfaces brown evenly.
Alternative Approaches: When Flipping May Not Be Needed
You can avoid flipping when the oven setup or the recipe design ensures even heat, crisp skin, and safe internal temperature without turning the thighs.
Use elevated racks, hot dry air, or braising and slow methods to control browning and moisture.
Baking with Racks or Convection Ovens
Using a wire rack lifts thighs above the pan so hot air circulates under and around the meat. This prevents a soggy bottom and promotes even browning without a flip.
Place the rack on a rimmed sheet pan to catch drips and make cleanup easy. A convection oven forces air movement, reducing hot spots and shortening cook time by about 10–20%.
Steady airflow browns skin on both sides more uniformly, so you don’t need to flip. Use a thermometer probe and remove when the thickest point reaches 165°F (74°C).
Tips:
- Preheat to at least 425°F (220°C) for crisp skin.
- Pat skin dry and lightly oil for better browning.
- Space thighs 1–2 inches apart for airflow.
Recipes and Techniques for No-Flip Chicken Thighs
Some methods avoid flipping by using moisture control or indirect heat.
For example, you can oven-roast skin-on thighs on a rack or use sheet-pan dinners where vegetables cushion the chicken.
You can also slow-roast thighs and finish them at high heat for 10 to 15 minutes.
If you braise first by searing and then simmering in liquid, you do not flip the chicken during the oven phase.
The liquid and steam cook the chicken evenly.
For skin-on pieces, start at high heat (425–450°F) and roast for 25 to 35 minutes, depending on size.
Finish with a short blast under the broiler if you want extra crispness.
Always check doneness with an instant-read thermometer instead of relying on color.


