
What’s the Best Way to Fry Chicken Thighs: Methods, Tips, and Flavor Boosts
If you want fried chicken thighs that stay juicy inside and crisp outside, use bone-in, skin-on thighs, a hot oil with a high smoke point, and a reliable thermometer to hit the right temperature.
That combination gives you the simplest, most dependable path to crispy, flavorful results every time.

You’ll learn how to choose the right thighs, what oil and tools matter, how to season, and step-by-step frying techniques that control timing and temperature for consistent outcomes.
Follow practical tips for crisping, resting, storing, and reheating so your fried chicken thighs perform well at the table and later.
Choosing the Right Chicken Thighs

Pick thighs that match the texture and cook time you want. Bone-in, skin-on gives more flavor and stays juicier.
Boneless or skinless cooks faster and suits a crisp breading. Consider size consistency for even cooking and choose fresh or properly thawed pieces to avoid oil splatter and uneven doneness.
Bone-In vs. Boneless
Bone-in thighs hold more moisture during frying, so you get juicier chicken thighs with deeper flavor from the marrow and connective tissue.
Expect longer cook times—typically 12–18 minutes in a 350°F deep fry or 25–40 minutes total when pan-frying—so plan for slightly lower heat to render fat without burning the exterior.
Boneless thighs cook faster (often 8–12 minutes total) and are easier to eat for sandwiches or salads.
They brown quickly and are less forgiving; monitor temperature closely and use a meat thermometer to hit 165°F.
Choose boneless if you need uniform pieces for quick frying or for recipes that require cutting before serving.
Skin-On vs. Skinless
Skin-on thighs give you the best chance at crispy chicken thighs because the skin renders fat and crisps into a golden crust.
For pan-frying, start skin-side down and don’t move the pieces until the skin releases. For deep-frying, skin helps protect the meat from drying out.
Pat the skin dry and season under the skin for deeper flavor.
Skinless thighs reduce splatter and shorten cooking time, but they won’t develop the same crispy exterior.
If you choose skinless, use a breading or light coating (flour, egg wash, panko) and slightly lower oil temperature to prevent the surface from burning before the interior reaches 165°F.
Skinless boneless thighs work well when you want leaner, faster-cooking fried chicken.
Freshness and Sizing Tips
Buy thighs that are uniform in size to ensure even frying.
Mix similarly sized pieces or trim larger ones for consistency.
Fresh, cold but not frozen thighs cook more predictably.
If using frozen thighs, thaw fully in the refrigerator and pat dry to reduce dangerous oil reactions and uneven cooking.
Inspect color and smell—fresh thighs should be pink without off odors.
For maximum juiciness, consider brining for 30 minutes to a few hours; that’s especially helpful with boneless or skinless cuts.
Use a thermometer and rest the meat briefly after frying to retain juices and hit safe doneness.
Essential Tools and Equipment
Choose a cooking vessel that holds steady heat and tools that let you monitor temperature and control oil safely.
Focus on one reliable pan or fryer, an accurate thermometer, and a solid splatter shield to protect you and keep the kitchen clean.
Heavy Skillets and Deep Fryers
Use a heavy, oven-safe skillet (cast iron or heavy-gauge stainless) for pan-fried chicken thighs to keep oil temperature stable and produce evenly browned skin.
A 10–12 inch cast-iron skillet fits three to four bone-in thighs without crowding; leave 1–2 inches between pieces so the crust crisps instead of steaming.
If you prefer a deep fryer, pick a model with a basket and adjustable thermostat that holds at least 2–3 quarts of oil for consistent 350°F frying.
Choose an oil with a high smoke point (peanut, canola, or refined sunflower).
Measure oil depth: about 1 to 1.5 inches for skillet shallow-frying, or follow fryer fill lines for deep frying.
Use long-handled tongs and a spider/skimmer to handle thighs safely and minimize oil disturbance.
Thermometers and Splatter Shields
Use an instant-read thermometer to check the thickest part of a thigh away from bone.
Aim for 175°F for bone-in thighs to ensure safety and tenderness.
For continuous monitoring, use a clip-on probe that attaches to pot rims so you can keep oil at 325–350°F for even cooking.
A fitted splatter shield or high wire mesh screen reduces oil mess and burns while allowing steam to escape.
For deeper safety, wear an apron and use oven mitts when turning thighs.
If you use a deep fryer, rely on the fryer lid and basket to lower splatter risk.
For pan-frying, always keep the splatter shield close and lift with tongs or a spatula to check doneness.
Best Oils for Frying Chicken
Choose an oil with a neutral flavor and a high smoke point so your thighs brown quickly without tasting oily.
Pay attention to cost, smoke behavior, and whether you have allergies or dietary preferences.
Peanut Oil, Canola Oil, and Alternatives
Peanut oil offers a very high smoke point (around 445°F / 230°C) and a neutral, slightly nutty finish that won’t overpower seasoned coatings.
It recovers temperature well between batches, so your thighs stay crisp.
Avoid peanut if you or guests have nut allergies.
Canola oil is a budget-friendly, neutral option with a smoke point near 400°F (204°C).
It gives reliable crisping for thighs and is widely available.
Use measured amounts and maintain temperature, since canola’s lower smoke point vs. peanut means you must monitor heat more closely.
Corn oil performs similarly to canola, with a smoke point around 450°F (232°C) and a mild flavor that complements Southern-style breading.
It’s a good middle ground if you want affordability and high-heat stability.
If you prefer alternatives, grapeseed and refined avocado oil also work—both have neutral taste and high smoke points—but they cost more.
Understanding Smoke Points
Smoke point is the temperature where oil visibly smokes and begins to break down.
Frying above it creates off-flavors and harmful compounds.
For frying chicken thighs, keep oil between 325–350°F (163–177°C).
Choose an oil with a smoke point at least 30–50°F higher than that target.
Refined oils (peanut, corn, canola, refined avocado) handle repeated batch frying better because impurities are removed, raising the smoke point.
Unrefined oils and extra-virgin olive oil have lower smoke points and stronger flavors, so avoid them for deep or long frying.
Always use a thermometer and replenish oil volume or rest the burner to maintain a steady frying temperature.
Flavor Foundations: Seasonings, Marinades, and Breading
You want thigh meat that stays juicy, tastes of more than salt, and gets a crust that holds up to frying.
Focus on a salty, tenderizing marinade, a balanced spice blend centered on black pepper, and a flour-based breading that creates texture without becoming gummy.
Buttermilk Marinade Advantages
A buttermilk marinade tenderizes and seasons at once.
The lactic acid in buttermilk gently breaks down muscle fibers, so your thighs lose less moisture during frying and stay tender.
Use 1 to 2 cups of buttermilk per 2 pounds of thighs.
Salt is essential in the marinade.
Aim for roughly 2% salt by weight of the meat (about 1 tablespoon kosher salt per pound).
This acts like a light brine and improves both flavor and juiciness.
Boost flavor with aromatics: add a minced clove of garlic, a teaspoon of hot sauce or Worcestershire for depth, and a teaspoon of sugar if you like a touch of caramelization.
Marinate 4–12 hours refrigerated.
Twenty-four hours can be okay for bone-in thighs but avoid much longer.
If you want extra crispness, add 1–2 tablespoons of vodka or another neutral spirit per cup of buttermilk.
It reduces gluten in the later breading and helps the crust dehydrate faster, creating a lighter, crisper exterior.
Seasoning with Black Pepper and Spices
Black pepper gives fried chicken a sharp, bright bite that complements the fat in thighs.
Use freshly cracked black pepper—about 1/2 to 1 teaspoon per pound—so the pepper’s aroma remains pronounced after frying.
Build a simple, effective spice mix: 2 teaspoons paprika, 1 teaspoon garlic powder, 1 teaspoon onion powder, 1/2–1 teaspoon kosher salt per pound (adjust if salt is in your marinade), and the black pepper.
For heat, add 1/4–1/2 teaspoon cayenne or a pinch of chili flakes.
Season both the marinade and the flour.
Layering seasoning ensures the interior and crust each carry flavor.
If you prefer herb notes, add 1 teaspoon dried thyme or oregano to the mix, but keep blends restrained so the pepper and crisping agents can shine.
Perfecting the Flour Breading
Start with all-purpose flour as your base and add 10–20% cornstarch for extra crunch.
For every cup of flour, mix in 2 tablespoons cornstarch, plus 1 teaspoon baking powder to lighten the crust.
Season the flour heavily; don’t rely solely on the marinade.
Use the spice mix from above and taste a pinch raw to check balance.
If you used a salty marinade, reduce flour salt by 20–30% to avoid over-salting.
Use a three-stage dredge for best adhesion.
Shake off excess marinade, dredge in seasoned flour, dip briefly back into the marinade or an egg wash to create sticky pockets, then press into the flour again.
For faster crunch development, work a small amount of the marinade into the dry flour before breading so little clumps form on the surface.
These brown into extra-crispy bits during frying.
Rest the breaded thighs on a rack for 15–30 minutes before frying to let the crust set.
This reduces shedding in the oil and helps the crust fry evenly without becoming greasy.
Step-By-Step Frying Techniques
Master temperature, timing, and spacing to get skin that shatters and meat that stays juicy.
Choose a method that suits your equipment and how much hands-on time you want.
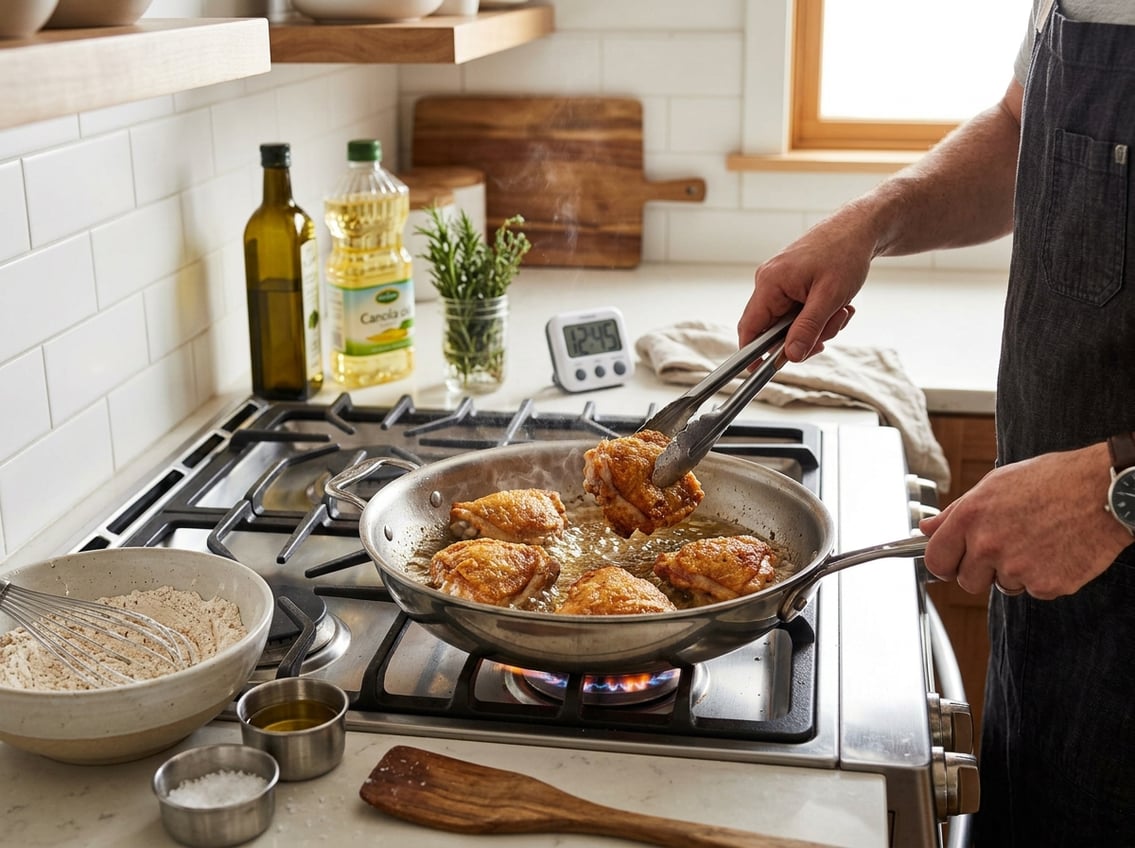
Pan Frying for Crispy Skin
Pan fry thighs in a heavy skillet (cast iron preferred) with about 1/8–1/4 inch oil for best skin contact.
Pat thighs dry, season, and optionally dust with a light flour or cornstarch coating to promote browning.
Heat oil until shimmering and just below smoking (about 325–350°F); test with a small scrap of coating—it should sizzle on contact.
Place skin-side down and press briefly so skin makes full contact.
Cook skin-side 8–12 minutes without moving to render fat and crisp; reduce heat if browning too fast.
Flip and cook 6–10 minutes more, or until internal temperature reaches 175°F for thighs.
Drain on a rack to keep crust crunchy.
For pan fried chicken breast, reduce times and pull at 160°F to avoid dryness.
Deep Frying for Even Crunch
Use a Dutch oven or deep fryer with at least 3 inches of oil and a reliable thermometer.
Preheat oil to 325–350°F; larger oil volumes stabilize temperature better when you add thighs.
If pieces are breaded, preheat slightly higher (350°F) so coating sets quickly.
Fry in small batches to avoid temperature collapse.
Cook bone-in thighs 12–18 minutes, depending on size, turning once if shallow-deep frying, until internal temp reads 175°F.
Remove to a wire rack and let rest 5 minutes; carryover heat finishes the meat.
For extra-crispy results, you can double-fry: pull when close to done, raise oil to 375°F, and fry 1–2 minutes to finish the crust.
Oven-Finished and Combination Methods
Start on the stovetop to render skin and brown, then finish in a 400°F oven to ensure even doneness without overbrowning.
Sear skin-side down in a hot skillet 6–8 minutes until deeply golden.
Transfer skillet to oven and roast 12–20 minutes until thighs reach 175°F.
Alternatively, shallow-fry to color both sides (6–8 minutes per side at ~325–350°F) and finish in a 375°F oven for 8–12 minutes.
Use a wire rack over a sheet pan to maintain crispness while roasting.
This approach reduces oil absorption and gives consistent results for both boneless and bone-in thighs.
Timing and Temperature Guidelines
You need clear times and temperatures so your thighs come out crispy on the outside and juicy inside.
Follow specific heat settings and minutes for the cooking method you choose, and always verify doneness with a thermometer.
Pan Frying Duration
Start bone-in, skin-on thighs on medium heat and cook skin-side down for 20–30 minutes until the skin turns deep golden and much of the fat renders.
Add 1–2 tablespoons of neutral oil to a heavy skillet, preferably cast iron, and leave the pieces undisturbed while the skin browns.
Flip the thighs and cook the flesh side for 12–20 minutes, lowering the heat if the skin browns too quickly.
Boneless thighs cook faster, taking about 8–10 minutes per side.
Rest the cooked thighs for 5 minutes on a wire rack to keep the juices inside.
Deep Frying Timelines
Heat oil to 350°F (175°C) before adding chicken.
Fry bone-in thighs for 12–18 minutes per piece, and boneless thighs for 6–10 minutes.
Fry in small batches to maintain oil temperature.
Turn pieces halfway if they aren’t fully submerged to ensure even browning.
Use a candy or deep-fry thermometer and remove thighs when the exterior is golden and the internal temperature reaches the safe target.
Drain chicken on a wire rack over a sheet pan to prevent sogginess.
Internal Temperature for Safety
Cook chicken thighs to an internal temperature of 165°F (74°C), measuring in the thickest part without touching bone.
Insert an instant-read thermometer horizontally into the meat for an accurate reading.
If you want juicier thighs, remove them at 160°F and rest for 3–5 minutes so carryover heat brings them to 165°F.
Check multiple pieces when batch frying since size and starting temperature affect final doneness.
Expert Tips for Crispy and Juicy Results
Control oil temperature and give pieces space in the pan.
Let cooked thighs rest so the crust firms and juices redistribute.
Use a thermometer and a wire rack to keep the crust crisp while holding chicken at a safe serving temperature.
Resting and Draining for Crispiness
After frying, transfer thighs immediately to a wire rack set over a sheet pan.
Do not stack them on paper towels.
The rack allows air to circulate around the skin so steam escapes and the breading stays crisp.
Hold thighs in a 200–225°F (95–110°C) oven if you need to keep them warm.
That temperature maintains juiciness while drying surface moisture.
Check the internal temperature; dark meat benefits from 175–185°F to break down collagen.
Drain excess oil by briefly blotting only the underside with a paper towel.
Avoid pressing the crust.
For extra crunch, let the thighs rest on the rack for 3–5 minutes before serving so the crust fully sets.
Avoiding Common Mistakes
Avoid overcrowding the pan.
Crowding drops oil temperature quickly and results in greasy, limp crust instead of crispy fried chicken.
Fry in batches that leave at least 1–2 inches between pieces in the oil.
Use a heavy pot such as a Dutch oven or cast iron and fill with at least 3 inches of oil for thermal stability.
Monitor oil with a probe thermometer and aim for 325–350°F during frying.
Preheat slightly higher so the temperature settles in that range once the chicken goes in.
Use an instant-read thermometer to check doneness.
Remove breasts at 160°F and thighs at 175–185°F for juicy, tender meat.
Group similar pieces together when cooking so breasts and thighs finish at their ideal doneness.
Storing and Reheating Fried Chicken Thighs
Keep cooked thighs cool, dry, and separated to preserve the crisp coating and keep the meat safe.
Refrigerate within two hours, use airtight packing, and reheat with dry heat to restore crunch without drying the meat.
How to Store Fried Chicken
Let thighs cool on a wire rack for up to one hour so steam escapes and breading firms.
Once cooled, place pieces in a single layer in an airtight container or shallow pan.
Use parchment or paper towels between layers to absorb moisture and prevent sogginess.
Label the container with the date and store in the refrigerator at 40°F (4°C) or below.
Use within 3–4 days for best quality and safety.
For longer storage, flash-freeze pieces on a tray, then transfer to freezer bags.
Frozen fried chicken keeps well for up to 2 months.
Avoid stacking hot chicken or sealing it while still warm.
That traps steam, softens the crust, and increases bacterial risk.
Best Ways to Reheat for Crunch
Preheat an oven or air fryer.
Dry, high heat crisps the coating without overcooking the interior.
For an oven, set to 375–400°F (190–205°C), place thighs on a wire rack over a rimmed sheet, and heat 10–15 minutes until internal temperature reaches 165°F (74°C).
Flip once for even browning.
For an air fryer, arrange in a single layer, set to 350–375°F (175–190°C), and reheat 5–8 minutes.
Check doneness with an instant-read thermometer and avoid overcrowding.
If you use a skillet, add a tablespoon of neutral oil and cover briefly to warm through, then uncover to re-crisp for 2–4 minutes.
Let pieces sit at room temperature for 10–20 minutes before reheating to help heat penetrate without burning the crust.
Serving Suggestions and Pairings
These serving ideas highlight contrasts in texture and flavor to balance the fried thighs on the plate.
Focus on a starchy, a creamy, and an acidic element to create satisfying bites.
Classic Comfort Food Sides
Pair fried chicken thighs with mashed potatoes or mac and cheese to match the crispy exterior with creamy richness.
Mashed potatoes should be buttery and smooth; add roasted garlic or chives for a mild aromatic lift.
Mac and cheese works well when baked with a crunchy breadcrumb topping to echo the chicken’s crust.
Add a vinegar-forward coleslaw or simple dill pickles to cut through fat and refresh the palate between bites.
For vegetables, roasted green beans or glazed carrots provide color and gentle sweetness without competing with the main flavors.
Serve hot plates immediately so the contrasts of crisp skin, creamy starch, and bright acid stay distinct.
Creative Serving Ideas
Try a Southern-inspired platter. Serve fried thighs with spicy honey drizzle and jalapeño-cheddar cornbread.
The honey gives a sweet-spicy finish. The cornbread offers a coarse crumb and subtle corn sweetness.
For a weeknight variation, build sandwiches with pickles and shredded lettuce. Add a tangy mayo-based sauce on a toasted brioche bun.
Serve thighs with kimchi and scallion rice for global flavors. You can also pair them with a cucumber-tomato salad dressed in lemon and cilantro for a fresher profile.
Plate thighs over herb-flecked quinoa or creamy polenta for sides that elevate presentation. Top with a spoonful of pan jus or a light pan gravy.


