
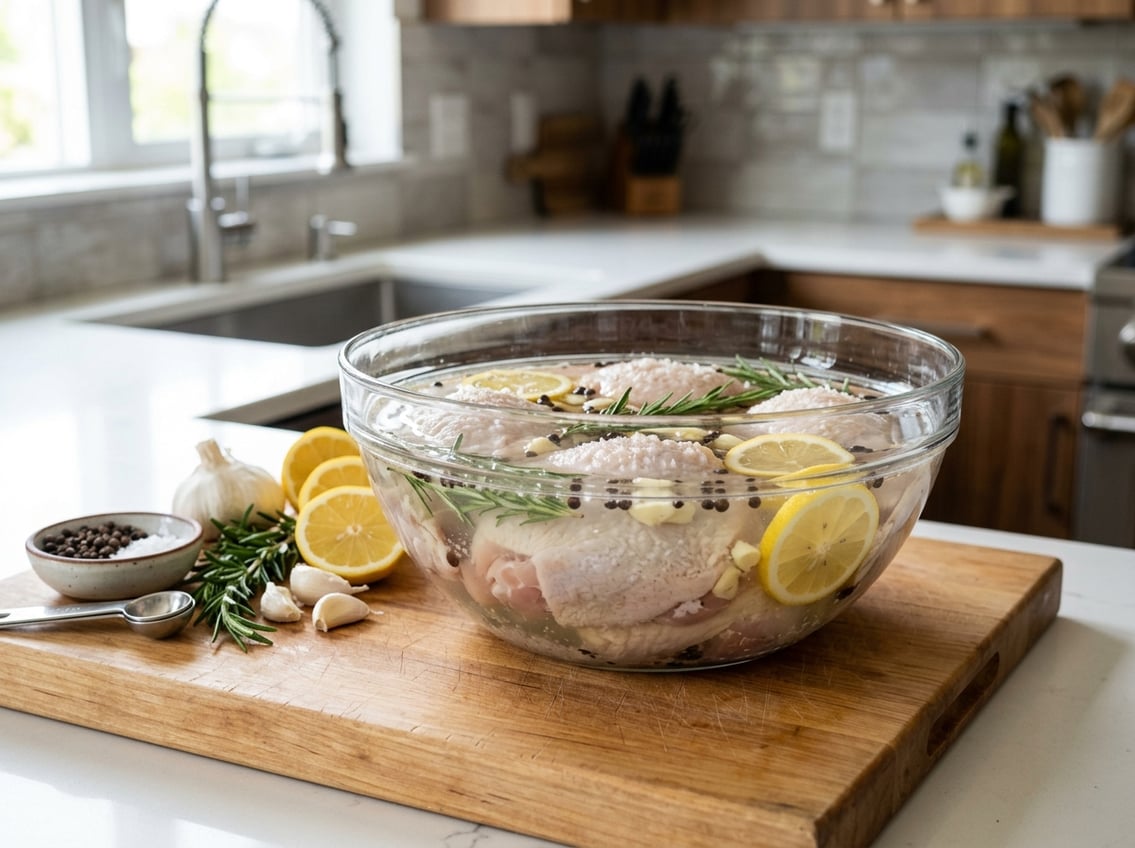
Is It Good to Brine Chicken Thighs? The Benefits, Best Methods, and Pro Tips
Brining chicken thighs gives you juicier, more evenly seasoned meat with very little extra effort.
If you want tender, flavorful thighs that hold moisture through grilling, roasting, or frying, brining helps achieve that.

Salt and a simple brine change texture and flavor, and the right ingredients matter.
You’ll learn how to brine safely and effectively, with guidance on timing, technique, and easy flavor variations.
Why Brining Enhances Chicken Thighs
Brining adds moisture and salt-driven flavor to thighs and changes muscle proteins to improve texture.
You’ll notice differences in juiciness, seasoning depth, and how the meat reacts to high-heat cooking.
Science of Moisture and Flavor Retention
A wet brine (salt dissolved in water) raises the salt concentration inside the muscle fibers through osmosis and protein denaturation.
Salt draws water into the meat and partially dissolves muscle proteins, reorganizing them to trap extra liquid during cooking.
That trapped liquid reduces the amount of juice lost during grilling or pan-cooking, so thighs stay tender.
Salt also carries dissolved flavor compounds into the tissue.
If you add sugar, herbs, garlic, or citrus to the brine, those molecules penetrate deeper than surface marinades.
A dry brine (salt rubbed on the skin and left to rest) draws out, then allows the meat to reabsorb, its own juices mixed with salt and aromatics.
Comparing Brined vs. Unbrined Chicken Thighs
Brined thighs usually turn out juicier and more evenly seasoned than unbrined ones.
When you grill unbrined thighs at high heat, they lose more moisture and can taste blander toward the center because seasoning often stays on the surface.
Brining distributes salt from exterior to interior, so each bite tastes seasoned.
Texture changes as well: brined meat feels more tender and cohesive because salt-altered proteins hold water and break down less during cooking.
If you use a dry rub after brining, the exterior can still crisp while the interior remains moist.
Unbrined thighs may develop a good crust but risk a drier interior, especially with longer cook times or very hot grills.
When Brining Makes a Difference
Brine when you use high-heat cooking (direct grilling, broiling) or longer cook times where moisture loss is likely.
Thick, bone-in thighs benefit most from 2–24 hours of brining.
Smaller boneless pieces need only 30 minutes to a few hours.
Use a wet brine if you want to add herbs, sugar, or citrus flavors that penetrate.
Choose a dry brine for easier handling and crisper skin.
If you use a very flavorful marinade that includes salt, or you cook gently (sous-vide, low-and-slow), brining is less important.
Reduce brine time and salt concentration if you or your diners prefer less salt.
Common Myths About Brining Chicken
Myth: Brining always makes chicken taste salty.
Reality: Proper ratios (about 1 cup kosher salt per gallon of water for a wet brine) and correct timing avoid oversalting.
Shorter brines or dry brines with less salt work for sensitive palates.
Myth: Thighs don’t need brining because they’re fatty.
Reality: Fat helps flavor, but brining improves moisture retention and internal seasoning, especially under high heat.
Myth: Brining is only for wet brines.
Reality: Dry brines deliver many of the same protein and moisture benefits while improving skin crispness.
Always pat dry after a long wet brine, or reduce added salt in subsequent rubs to prevent excess saltiness.
Key Ingredients for an Effective Brine
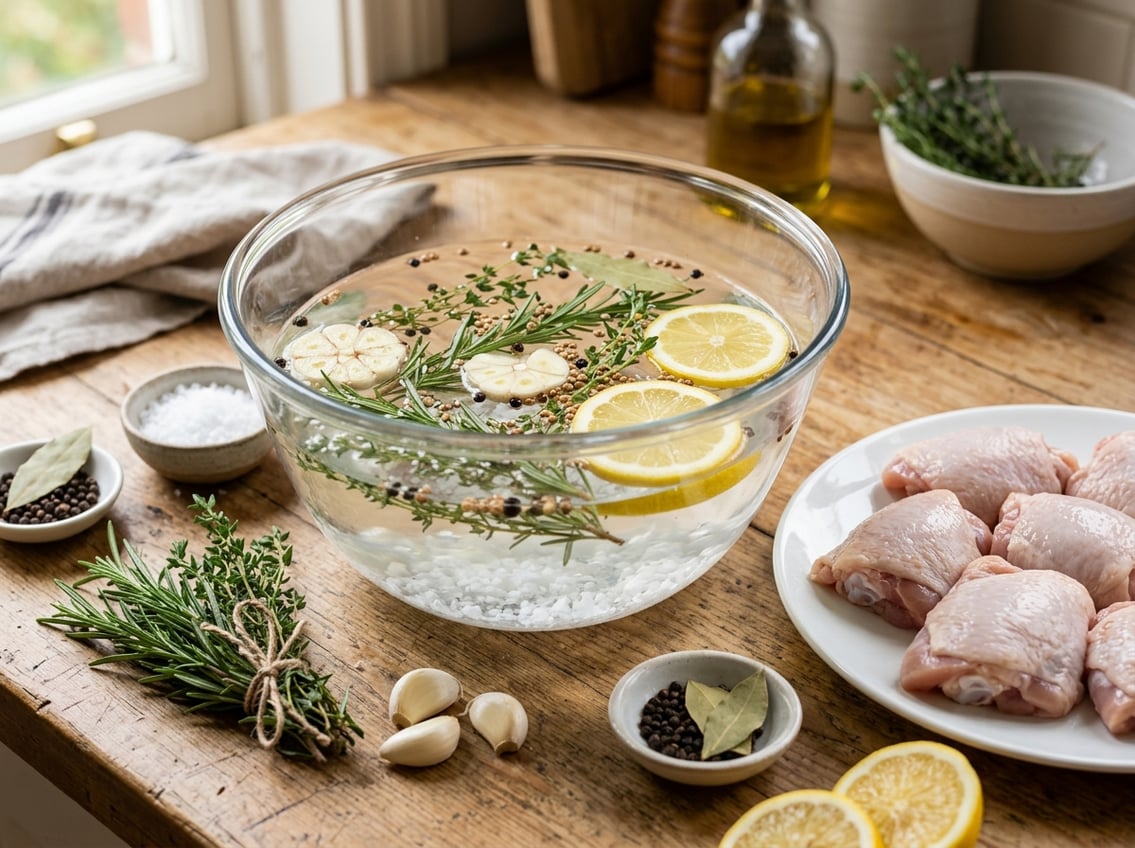
A good brine balances salt, a touch of sugar, and aromatics so your thighs stay moist and pick up clear, complementary flavors.
Use a reliable salt ratio, decide whether to sweeten or spice, and choose a liquid that chills quickly for safe brining.
Kosher Salt and Salt Alternatives
Kosher salt anchors any brine because its large, flaky crystals dissolve predictably and distribute evenly in water.
Measure kosher salt by weight when possible; a common target is about 1 tablespoon (18–20 g) per 1 cup (240 ml) of water for a medium-strength brine.
If you use table salt, reduce the amount by roughly half because table salt packs more densely.
Salt alternatives like sea salt or pickling salt work but vary in crystal size and iodine content.
If you swap salts, convert by weight rather than volume.
Aim for enough salt to season and improve moisture retention, but not so much that the thighs taste overly salty.
Balancing Sugar and Salt
Sugar softens the brine’s edge and encourages browning during cooking.
Brown sugar adds a mild molasses note that pairs well with dark meat; use about 1/4 to 1/3 cup per quart (liter) of brine for a subtle sweetness.
Granulated sugar works if you want a neutral caramelization effect.
Sugar is optional.
Omit it for savory or spicy profiles, or reduce it if you’re watching carbs.
If you plan to use a spicy brine with red pepper flakes or hot sauce, keep the sugar low so heat remains prominent.
Stir until both salt and sugar fully dissolve, then chill the solution before adding chicken to prevent bacterial growth.
Flavor Enhancers: Aromatics and Spices
Aromatics and whole spices give brined thighs a defined flavor without masking the chicken.
Use garlic cloves (crushed), bay leaves (1–2 per quart), and whole black peppercorns (1–2 teaspoons) as a core aromatic trio.
Add red pepper flakes sparingly—1/4 to 1/2 teaspoon per quart—to create a spicy brine.
Fresh herbs, citrus zest, or a few smashed garlic cloves add brighter notes.
Toast whole spices briefly to release oils before steeping for a stronger, cleaner flavor.
Keep additions proportionate so aromatics complement rather than overpower the meat.
Choosing the Right Liquid
Water is the base for most brines, but you can substitute part of it with stock, beer, or diluted apple juice for additional flavor.
If you use stock, choose a low-sodium version and reduce added salt accordingly.
For a richer profile, replace up to half the water with cold chicken stock or beer.
For sweetness and color, use a small amount of apple juice or cider.
Always bring brine liquids to a simmer to dissolve salt and sugar, then cool completely before adding chicken.
Chill the brine in an ice bath or refrigerate until below 40°F (4°C) to keep the thighs safe during brining.
How to Brine Chicken Thighs Step-by-Step
A simple salt-and-water mix, correct salt weight, and timing make the biggest difference.
You’ll dissolve salt properly, fully submerge thighs, and handle them safely before cooking.
How to Prepare and Dissolve the Brine
Measure salt by type: use about 6 tablespoons Diamond Crystal, 4½ tablespoons Morton’s kosher, or 3 tablespoons table salt per 4 cups (1 quart) of cold water.
Stir salt into cold water until it looks clear and no granules remain.
If you prefer a balanced flavor, add 1 tablespoon sugar per quart.
Optional aromatics include garlic granules, peppercorns, or a sprig of thyme.
Use a nonreactive container (glass, stainless, or food-grade plastic).
Make enough liquid to fully cover the thighs; scale the recipe to fit the weight.
Chill the brine before adding raw chicken to prevent bacterial growth.
Submerging and Brining Chicken Thighs
Place thighs in the container, then push them under the brine so each piece is fully covered.
Use a zip-top bag or a weight (small plate) if the container is shallow.
For boneless skinless thighs, brine 30–60 minutes.
For bone-in skin-on, brine 45 minutes to 2 hours.
Avoid brining beyond 4 hours to prevent overly salty or mealy texture.
Keep the brining container in the refrigerator for any brine longer than 30 minutes.
Turn thighs once midway if they bunch.
Label the container with start time so you don’t over-brine.
Discard used brine after use.
Finishing Steps: Rinse and Dry Before Cooking
Remove thighs from brine and pat dry thoroughly with paper towels.
Do not rinse under running water; rinsing spreads bacteria in the sink area without reducing salt in the meat.
If you used a heavily flavored brine, blot to remove excess surface seasoning to prevent burning.
Let thighs air-dry in the fridge on a wire rack for 30–60 minutes for crisper skin when roasting or grilling.
Skip adding any extra salt in your recipe; the brine has already seasoned the meat.
Cook to an internal temperature of 165°F (74°C) measured at the thickest part.
Optimal Brining Time and Techniques
Brining adds salt and moisture into the meat while changing texture.
The timing and method determine salt level, tenderness, and how well flavors penetrate.
Use shorter wet brines for quick seasoning and slightly longer dry brines for skin texture or longer refrigerated rests.
Recommended Brining Time for Juicy Results
For most chicken thighs, aim for 30 minutes to 1 hour in a standard wet brine (about 4 cups water to 4½ tbsp Morton’s kosher salt or equivalent).
That timeframe increases internal moisture and tenderizes without making the meat overly salty.
If you have less than 30 minutes, a 15–30 minute wet brine gives a mild seasoning boost but less texture change.
For a dry brine, 1.5–2 hours in the refrigerator usually yields well-seasoned, juicy chicken thighs and helps dry the skin for crisping.
Adjust salt concentration down if you plan to brine toward the upper end (2–4 hours) to avoid oversalting.
Always pat thighs dry before cooking; excess surface moisture prevents proper browning.
Brining Time for Wet and Dry Methods
Wet brine: 30–60 minutes for boneless or bone-in thighs up to 1.5–2 pounds total.
Use cold water and dissolve salt fully.
If brining over 45–60 minutes, refrigerate while brining.
Dry brine: 1.5–2 hours is a practical sweet spot for thighs.
Apply a measured amount of kosher salt (about ¾–1 tsp per pound, adjusted by salt type), leave uncovered in the fridge to firm skin and concentrate flavor.
Wet brine adds more immediate moisture.
Dry brine improves skin crispness and requires less space.
Pick wet brine for maximum juiciness.
Pick dry brine for texture and simpler cleanup.
Avoiding Over-Brining: Signs and Solutions
Over-brined chicken tastes too salty and can develop a mushy, overly-soft texture.
If thighs taste overtly salty or have a deli-like texture after cooking, you likely exceeded ideal brining time or used too much salt.
Reduce brine time (cut wet brine to 30–60 minutes; dry brine to 1–2 hours).
Lower salt concentration in future brines and avoid leaving thighs at room temperature in brine longer than advised.
If you discover over-salting before cooking, rinse briefly and soak in cold water 10–20 minutes, then pat dry and adjust cooking accompaniments (serve with low-salt sides or sauces).
For slightly oversalted cooked thighs, serve with unsalted starches, acid (lemon/yogurt), or dilute in a sauce to balance salt.
Optimal Brining Time for Different Cooking Methods
Grilling and pan-searing: 30–60 minutes wet brine or 1–2 hours dry brine.
Shorter brine times preserve skin texture and allow rapid high-heat cooking without excess surface salt.
Roasting or braising: extend a wet brine to 1–2 hours for richer flavor penetration, but avoid going much longer for thighs.
Dry brine works well if you want to roast with crispy skin—use at least 2 hours and up to overnight for larger pieces, reducing salt proportionally.
Air fryer: 30–60 minutes wet brine or 1–2 hours dry brine; always pat very dry for best crisping.
For grilled chicken thighs, keep brine time moderate to prevent flare-ups from excess surface salt and to preserve char without overpowering saltiness.
Popular Flavor Variations and Recipe Ideas
These brine ideas focus on clear, specific flavor builds and practical uses so you can pick a direction and get consistent results.
Each option lists key ingredients and a quick tip for timing or finishing.
Classic and Sweet Brines
A classic sweet brine balances kosher salt with brown sugar to season and promote caramelized exterior color. Use 1/4 to 1/2 cup kosher salt per quart of water and 2–4 tablespoons brown sugar.
Dissolve the mixture over heat, chill it, then submerge thighs for 4–12 hours depending on thickness. Add aromatics such as smashed garlic cloves and bay leaves for subtle savory depth without competing with sweetness.
Pat thighs very dry before roasting at 425°F (220°C) or pan-searing. The sugar speeds browning, so monitor closely to avoid burning.
Spicy and Herb-Infused Brines
Combine salt with heat and fresh herbs for bold flavor. Start with the same salt baseline, add 1–2 tablespoons brown sugar for contrast if desired, and stir in 1–2 teaspoons red pepper flakes or a chopped fresh chili.
Tuck in a handful of fresh herbs like rosemary, thyme, or parsley, plus smashed garlic and a strip of citrus peel. Brine thighs for 3–8 hours; longer times can mute fresh-herb brightness.
After brining, rinse lightly if you used a lot of heat, then finish on a hot skillet or under a broiler to crisp the skin and concentrate the aromatics.
Brines for Grilled Chicken Thighs
For grilling, use a brine that enhances smoke absorption and keeps moisture through high heat. Use a moderate salt level and include 1–2 tablespoons brown sugar to aid charring.
Add woodsy herbs like thyme and rosemary, whole peppercorns, and a small amount of red pepper flakes. Chill the brine completely and brine thighs 6–12 hours.
Remove, dry thoroughly, and oil the skin to prevent sticking. Grill over medium indirect heat first to cook through, then move to direct high heat to crisp skin and get grill marks.
Add a spritz of citrus or a finishing herb butter off the heat to lift the grilled flavors.
Best Practices and Food Safety Tips
Handle brine and brined poultry carefully to prevent bacterial spread and keep the chicken refrigerated. Focus on safe disposal, when not to reuse brine, and how long to store brined thighs before cooking.
Discarding Used Brine and Avoiding Cross-Contamination
Used brine contains raw poultry juices and can spread pathogens if reused or splashed. Always pour the liquid down the drain and do not reuse it directly on other foods or surfaces.
After discarding, wash the container, lids, and any utensils in hot, soapy water. Sanitize surfaces with a bleach solution (1 tablespoon bleach per gallon of water) or a commercial sanitizer.
When moving chicken from brine to cooking, transfer it on clean trays. Never rinse the poultry.
Pat dry with disposable paper towels or a clean cloth reserved only for raw poultry. Immediately launder any towels or aprons that touched the raw brine or chicken.
Can You Reuse Brine?
Reusing brine carries risk because it concentrates bacteria and dissolved proteins from the first batch. If you want to reuse brine for the same raw protein type, first bring it to a rolling boil for at least 5 minutes to kill microbes, then cool it completely before reusing.
Boiling changes salt concentration and flavor, so you may need to adjust salt or dilute with water. For consistent safety and flavor, most home cooks should discard used brine.
Safe Storage and Timely Cooking After Brining
Keep chicken in the refrigerator at 40°F (4°C) or below while brining. For wet brine, brine boneless thighs for 30 minutes to 2 hours and bone-in thighs for up to 4 hours, depending on salt level.
Longer brining times increase salt uptake and can create a firm texture. For dry brines, refrigerate the chicken uncovered or loosely covered for 2 to 24 hours, depending on thickness.
After you remove thighs from the brine, pat them dry. Cook immediately or store in the refrigerator for up to 3 days.
If you want to freeze brined thighs, wrap them tightly and freeze for up to 2 months. Thaw in the refrigerator before cooking.
Use a meat thermometer and cook thighs to an internal temperature of 165°F (74°C).


