
Why Do Chicken Thighs Take Longer to Cook? Science & Solutions
Chicken thighs take longer to cook than breasts because they contain more fat, connective tissue, and, if bone-in, an insulating bone that slows heat penetration.
Expect chicken thighs to need more cooking time than breasts, especially bone-in or skin-on pieces, because collagen and connective tissue require higher heat and longer exposure to break down into tender, juicy meat.

Knowing this up front helps you choose the right method and temperature for the result you want.
This guide explains how dark meat composition, bone presence, skin, and different cooking methods change timing and texture, along with safe target temperatures and practical tips to keep your thighs moist and flavorful.
Key Differences Between Chicken Thighs and Breasts
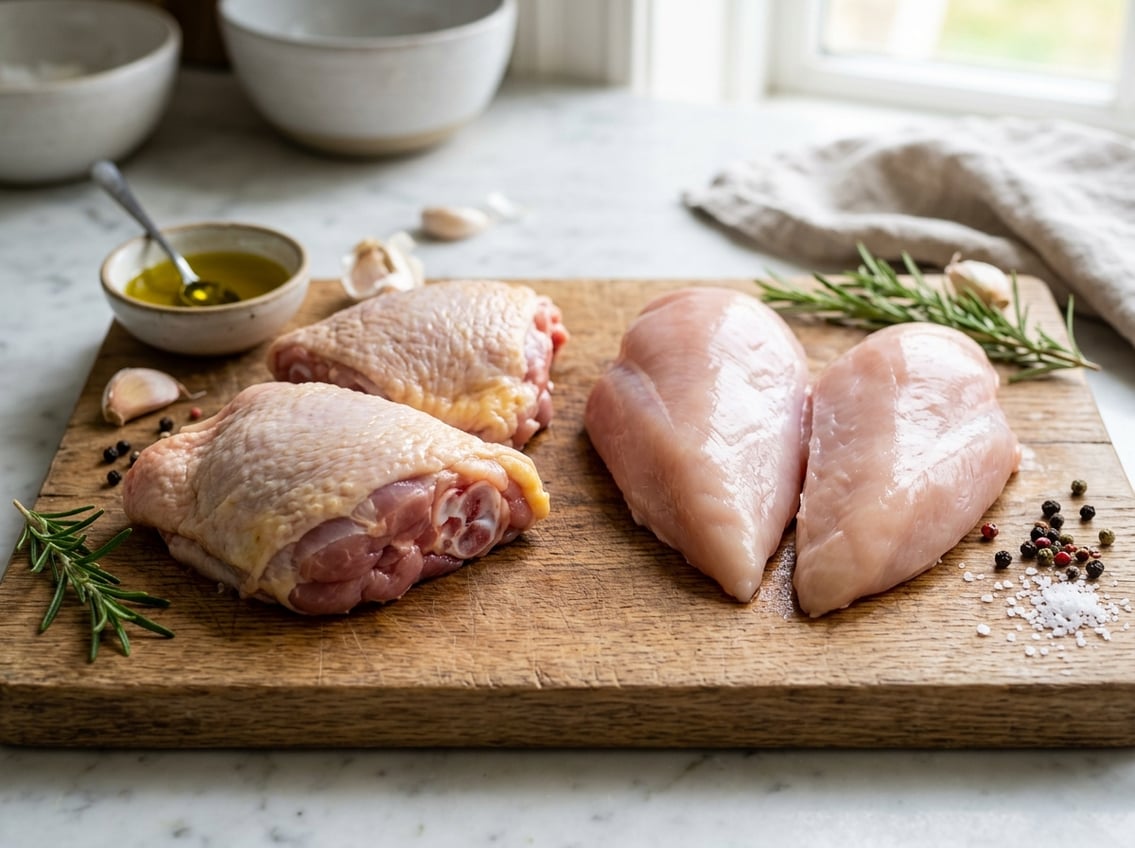
Thighs and breasts differ in muscle type, fat distribution, and how they respond to heat.
These differences affect how you should time, temperature, and technique for boneless chicken and bone-in cuts.
Dark Meat Versus White Meat
Chicken thighs are dark meat, while breasts are white meat.
Thighs come from muscles used more during the bird’s life, so they contain more myoglobin and connective tissue.
That makes thighs richer in flavor and gives them a denser texture compared with the milder, finer-grained breast.
The darker color and connective tissue mean thighs tolerate longer cooking without drying, while breasts can go from juicy to dry quickly if overcooked.
Moisture and Fat Content
Thighs have higher intramuscular fat and slightly more water-holding capacity than breasts.
That extra fat keeps meat tender during longer cooking and adds flavor during roasting, braising, or grilling.
Breasts are leaner, so you must protect them from high heat or extended time.
Brining, marinades, or covering help reduce moisture loss for chicken breasts.
For the same internal temperature, thighs will often feel juicier because of fat and connective tissue breaking down into gelatin.
Effect on Cooking Times
Chicken thigh cooking time is usually longer than for breasts when using the same method and thickness.
A boneless chicken breast often reaches 165°F faster than a similarly sized boneless chicken thigh.
Bone-in thighs add more mass and require additional minutes for heat to penetrate around the bone.
Use a meat thermometer in the thickest part, avoiding the bone, to judge doneness.
Aim for 165°F (74°C) as the safe target, but expect thighs to need more time in ovens, on grills, or in pans.
Adjust technique—lower heat for breasts, higher or longer for thighs—to match each cut’s behavior.
Connective Tissue and Collagen Breakdown
Chicken thighs contain more connective tissue and fat than breasts.
That connective tissue is mostly collagen, and it needs time and heat to convert into gelatin and tenderize the meat.
What Makes Thighs Tougher
Thighs come from muscles that get more use, so they contain higher amounts of connective tissue—collagen fibers, tendons, and intramuscular connective tissue.
Collagen binds muscle fibers and resists short, high-heat cooking, which is why thighs feel firmer than white meat at 165°F.
Collagen initially tightens as temperature rises, which can make meat seem tougher if you only reach the USDA minimum.
Only with sustained heat does collagen denature and unwind.
That process requires both time and temperature to break the cross-links that keep the tissue rigid.
Tenderizing Through Cooking
To turn collagen into gelatin, you need prolonged exposure to moderate temperatures.
Aim for methods that hold the meat between roughly 165–195°F (74–90°C) long enough for collagen to solubilize.
Braising, slow roasting, indirect grilling, or sous-vide provide that steady environment.
Use a thermometer and avoid relying on appearance alone.
Techniques:
- Braise in liquid to transfer heat and prevent drying.
- Roast at low oven temps (around 275–325°F) to lengthen the time collagen spends unwinding.
- Sous-vide at controlled temps for several hours, then sear for color.
These approaches render connective tissue into gelatin, yielding tender chicken thighs without dry muscle fibers.
Impact on Texture and Flavor
As collagen converts to gelatin, the meat’s mouthfeel changes from resilient to silky and moist.
Gelatin coats muscle fibers, improving perceived juiciness and allowing the thigh to shred or fall from the bone when properly cooked.
Slow cooking renders intramuscular fat and releases soluble flavor compounds into the cooking liquid or juices.
That increases richness and depth compared with quickly cooked white meat.
If you target the right temperature window and use moist heat where appropriate, you’ll produce consistently tender chicken thighs.
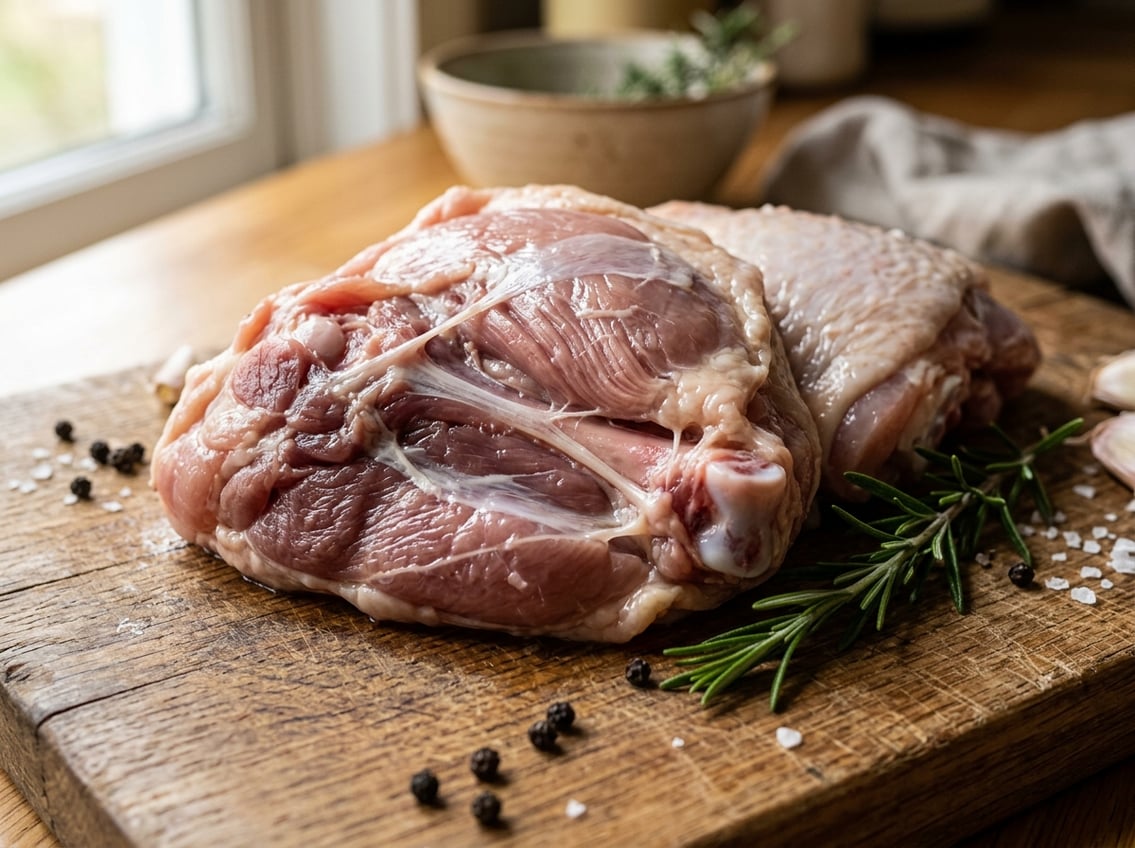
Bone-In vs. Boneless and Skin-On vs. Skinless Thighs
Bone-in thighs usually need more time and stabilizing heat.
Skin adds insulation and fat that changes browning, moisture, and the final texture.
Bone-In Chicken Thighs and Heat Transfer
Bone-in chicken thighs heat more slowly because the bone conducts and redistributes heat differently than meat.
The bone acts as a heat sink, so the tissue closest to it reaches safe temperature later than outer flesh.
Expect bone-in cuts to take roughly 10–20 minutes longer than comparable boneless thighs in most oven or grill methods.
Thickness matters: a thick bone-in thigh requires longer conduction time than a thin boneless thigh.
Monitor internal temperature near the bone (165°F/74°C) rather than relying on surface cues.
Allow resting time; carryover heat completes cooking near the bone while juices redistribute.
Benefits of Skin-On and Skinless Cuts
Skin-on chicken thighs give you two main advantages: crisp, browned skin when exposed to high heat, and extra fat that bastes the meat, helping it stay moist during longer cooks.
The skin also adds a small insulating layer, which can increase cooking time slightly compared with skinless pieces.
Skinless or boneless chicken thighs cook faster and more evenly, which suits stir-fries, quick sautés, and sandwiches.
They absorb marinades and heat through more uniformly, reducing the risk of undercooked pockets near the bone.
If you need faster cook times, choose boneless, skinless thighs and check temperature at the thickest point.
Role of Cooking Methods and Times
Different methods change how heat reaches the thigh’s interior and how collagen and fat render.
Temperature, direct vs indirect heat, and whether the piece is bone-in or boneless determine both safety and texture.
Baking Chicken Thighs
Baking uses steady, surrounding heat that penetrates slowly.
For bone-in, skin-on thighs, roast at 400–425°F (200–220°C) and expect about 35–45 minutes.
Boneless thighs often finish in 20–30 minutes.
Use a probe thermometer in the thickest part without touching bone to confirm 165°F for safety; many cooks aim for 175–185°F to soften collagen.
Arrange thighs on a wire rack over a sheet pan so air circulates and skin crisps.
Pat the skin dry and use a light oil to promote browning.
If you brine or marinate, factor in an extra 5–10 minutes for surface moisture to evaporate and heat to penetrate.
Grilling Chicken Thighs
Grilling exposes thighs to high direct heat that sears and renders fat quickly.
For bone-in thighs, use two-zone grilling: sear skin-side over direct heat 3–5 minutes, then move to indirect heat to finish to 175–190°F.
Boneless thighs cook faster—about 6–10 minutes total depending on thickness—and benefit from flipping every 2–4 minutes.
Control flare-ups by rendering fat over indirect heat and keeping the lid closed to stabilize temperature.
Brush sauces at the end to avoid burning sugars.
Always measure internal temperature at the thickest point.
Pan-Frying Techniques
Pan-frying gives you intense contact heat and precise control for skin-on or boneless thighs.
Start skin-side down in a hot heavy skillet (cast iron preferred) to render fat and crisp skin, 6–10 minutes for larger bone-in pieces.
After browning, reduce heat and finish covered or finish in a 375°F oven until the thickest part reaches your target temperature.
For boneless thighs, flatten or butterfly thicker pieces for even cooking and sear 3–5 minutes per side.
Avoid overcrowding the pan; cook in batches so pieces brown instead of steam.
Deglaze the pan after cooking to make a quick pan sauce from the fond.
Safe Cooking Temperatures and Thermometer Use
You need to hit a safe internal temperature and use a reliable thermometer correctly.
Allow resting time so carryover cooking finishes the job and gives accurate readings.
Importance of Internal Temperature
Cook chicken thighs to a safe internal temperature to eliminate pathogens while preserving texture.
The USDA minimum for poultry is 165°F (74°C); that temperature kills Salmonella and Campylobacter when the meat reaches it.
Dark meat thighs often taste better when cooked higher—175–195°F—because collagen breaks down into gelatin, making the meat more tender.
If you choose a lower target than 165°F for texture, you must hold the meat at that lower temperature for the scientifically required time to achieve equivalent pathogen reduction.
Always check the thickest part of the thigh, avoiding bone and excess fat.
Factor in 5–10 minutes of resting time after removal from heat; internal temperature can rise a few degrees during that period, and resting also redistributes juices.
How to Use a Meat Thermometer
Use an instant-read or probe thermometer designed for meat; accuracy ±1–2°F is ideal.
Insert the probe into the thickest part of the thigh, at least ¼ inch away from bone, and wait for the reading to stabilize.
For bone-in thighs, angle the probe so it does not touch bone, which reads hotter and gives a false high temperature.
If using a leave-in probe during roasting, monitor both the target temperature and the oven temperature.
When the thermometer reads 165°F (74°C) for immediate safety, remove the thighs and rest them 5–10 minutes.
For more tender results, continue cooking to 175–195°F, then rest; the probe should register the final temp after resting to confirm doneness.
Tips for Ensuring Tender and Juicy Thighs
Control salt, acid, fat, and time when you prep and after cooking.
Small technique changes—how you marinate and how long you rest—have the biggest effect on tenderness and juiciness.
Marinating Chicken Thighs
Use a balance of salt, acid, and oil for 30 minutes to 12 hours depending on cut and goal.
For bone-in thighs, a 2–6 hour soak with 1–2% salt by weight (roughly 1–1.5 teaspoons per pound) seasons through without drawing excessive moisture.
Add 1–2 tablespoons of acid (lemon juice, vinegar, or yogurt) if you want flavor penetration; limit strong acids to 2–4 hours to avoid mushy texture.
Include oil or a fatty component (olive oil, yogurt, or buttermilk) to carry fat-soluble flavors and help the skin brown.
Add aromatics and spices—garlic, smoked paprika, or soy—for surface flavor; these don’t need long contact.
Pat thighs dry before cooking to ensure crisp skin; reserve marinade for basting only if you boil it first.
Practical checklist:
- Salt 30 min–6 hr (adjust by thickness)
- Acid 30 min–4 hr (shorter for stronger acids)
- Oil/fat anytime up to 12 hr
- Dry thoroughly before searing or roasting
How Resting Time Improves Results
Resting allows juices to redistribute and lets the collagen-based gelatin settle back into the fibers. This process improves juiciness and tenderness.
After cooking, move the thighs to a warm plate. Rest boneless pieces uncovered for 5–10 minutes and bone-in pieces for 10–15 minutes.
Longer resting times, up to 20 minutes, help larger pieces reach a steady internal temperature without overcooking. Use a loose tent of foil only if you need to hold the meat briefly.
Avoid tight wrapping because it steams and softens the skin. During rest, carryover cooking raises internal temperature by 3–8°F.
Pull the thighs from heat slightly below your target temperature. For tender dark meat, aim for a final temperature of 185–195°F.
Slice against the grain after resting to shorten muscle fibers. This makes each bite more tender.


