
What Is the Best Way to Fry Chicken Thighs: Expert Guide to Crispy Perfection
You want crispy skin and juicy meat without the guesswork. The best way to fry chicken thighs balances high, dry heat for crisp skin with finishing at a controlled temperature so the meat stays moist. Sear or fry skin-side down, then reduce heat or transfer to the oven to finish to 165°F.

This post explains how to choose the right thighs and oil. It compares pan-frying and deep-frying and gives a simple method for flavor and texture.
Follow the tips on seasoning, temperature control, and finishing to get restaurant-quality results at home.
Choosing the Right Chicken Thighs for Frying
Pick thighs that match your cooking method and timing. Bone-in, skin-on pieces give you crisp skin and slower, juicier cooking.
Boneless or skinless thighs cook faster and change the texture.
Bone-In vs. Boneless Options
Bone-in chicken thighs hold moisture and handle higher frying temperatures without drying. The bone conducts heat and keeps the thigh juicy during a longer process.
Plan for about 20–25 minutes total frying time for bone-in pieces. Use a meat thermometer to confirm 165°F (74°C) near the bone.
Boneless chicken thighs cook faster, usually 8–12 minutes, and offer more uniform thickness for even browning. They’re easier to bread and flip.
If you choose boneless, pound thicker pieces lightly for even cook time.
Choose bone-in for deeper flavor and a forgiving cook window. Choose boneless for speed, convenience, or consistent slices for sandwiches and small recipes.
Skin-On vs. Skinless
Skin-on chicken thighs give the most reliable crispy exterior because the rendered fat crisps the skin during frying. Leave the skin intact for pan-frying or shallow frying.
Start skin-side down and don’t move the pieces until the skin releases and turns deep golden brown. Skin-on also adds flavor to pan sauces and drippings.
Skinless chicken thighs reduce fat and crispness but absorb breading and marinades more readily. Use skinless when you want less oil, a lighter texture, or when making boneless cutlets.
Expect a slightly different mouthfeel—less crackle, more tender meat. Adjust timing downward to avoid overcooking.
Try skin-on for the initial sear, then remove skin after rendering, or use a light dredge on skinless pieces to mimic crispness.
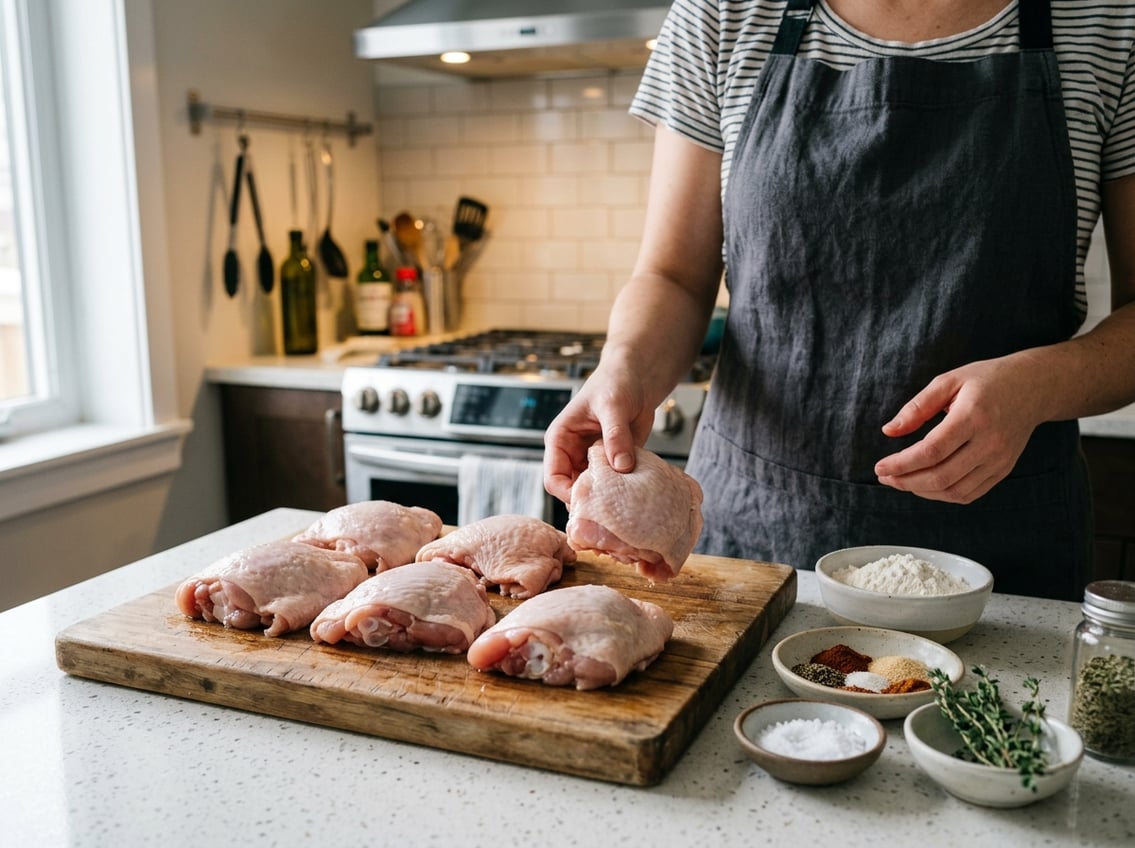
Trimming and Preparing Thighs
Trim excess fat and loose skin for less oil spatter and better breading adhesion. Use kitchen shears to remove visible flaps and extra fat near the bone.
Leave a thin fat layer under the skin for flavor and moisture when frying skin-on thighs. Pat thighs thoroughly dry with paper towels before seasoning or marinating.
A dry surface prevents a soggy crust and reduces oil splatter. If marinating in buttermilk or brine, refrigerate 30 minutes to 4 hours.
For quick seasoning, salt 15–30 minutes beforehand to let the meat relax and retain juices.
Press thicker areas to uniform thickness or score lightly opposite the bone for even cooking. If using a flour dredge, set coated pieces on a wire rack 20–30 minutes to help the coating adhere before frying.
Selecting the Best Oil for Frying
Pick an oil with a high smoke point, neutral taste, and reasonable cost. This helps your thighs crisp evenly without off-flavors or burnt oil.
Match the oil’s properties to your method and any allergy or flavor preferences in your home.
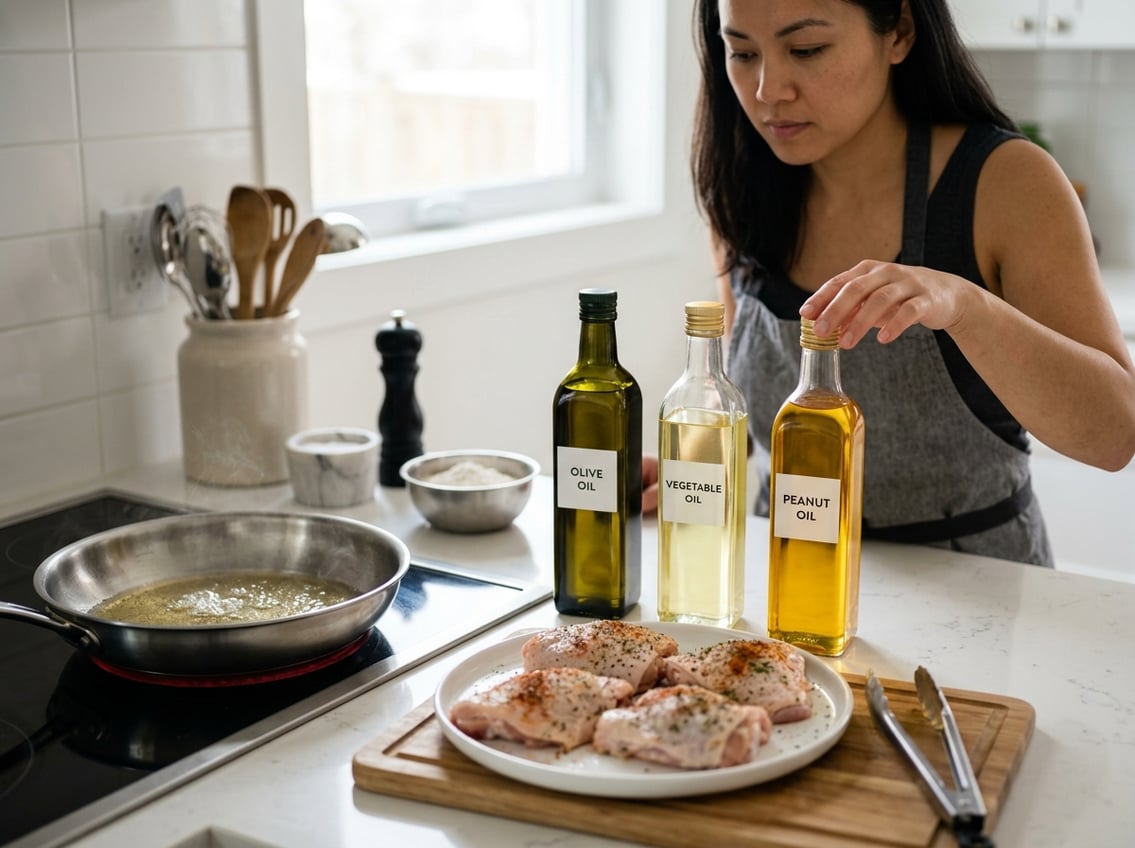
Comparing High Smoke Point Oils
Choose oils with smoke points at or above 400°F for frying chicken thighs. Peanut oil, refined avocado oil, and many vegetable or corn oil blends work well at typical frying temps (350–375°F).
Peanut oil resists breakdown and gives excellent heat stability. Refined avocado oil offers a very high smoke point and a better nutritional fat profile, but it costs more.
Canola and corn oil are affordable, have neutral flavor, and handle repeated heating well. Safflower oil (high-oleic) also performs well and stays neutral.
Avoid unrefined or extra-virgin oils that smoke at lower temperatures.
Flavor Considerations
Neutral oils let your breading and seasoning shine. Canola, vegetable blends, and corn oil are flavorless and won’t compete with herbs, spices, or marinades.
Peanut oil adds a faint nutty note that can complement Southern or Asian-style profiles. Avoid it if anyone has peanut allergies.
Avocado and safflower oils remain neutral for most recipes. They add subtle mouthfeel rather than overt flavor.
If you want a crisp, straightforward fried crust, pick a neutral, high-smoke oil. Choose peanut oil for a touch of background flavor if there are no allergies.
Oil Costs and Availability
Balance performance with budget and how much oil you’ll use. Corn oil, canola, and generic vegetable oil are the most economical for deep frying multiple thighs or larger batches.
They’re widely available in supermarket sizes suitable for frying. Peanut and avocado oil cost more per bottle.
Peanut oil lasts longer between changes but is less common in small grocery chains. High-oleic safflower and specialty refined oils may be pricier and sold in smaller quantities.
If you plan to reuse oil, strain and store it. Affordable oils like corn and canola make reuse more economical.
Choose based on local availability and whether you need allergy-safe options.
Essential Steps for Crispy Skin and Juicy Thighs
Control moisture, salt, and heat to get crackly skin and tender meat. Use dry-surface prep, focused seasoning, an optional buttermilk soak, light flour coating for crunch, and an instant-read thermometer to hit safe doneness without overcooking.
Drying and Seasoning Techniques
Pat each thigh completely dry with paper towels, pressing around the bone and under the skin where possible. Extra-dry skin renders fat faster and produces crispier skin when you sear.
Salt the meat at least 30 minutes before cooking or up to overnight in the refrigerator. Use kosher salt for even coverage.
Season boldly but simply: kosher salt, freshly cracked black pepper, and a light dusting of smoked paprika for color and a mild smoky note. Add dried thyme for herbal lift if you like.
Apply seasoning to skin and to the flesh side for balanced flavor.
If you plan to pan-fry skin-on, start in a cold, dry skillet skin-side down to allow fat to render slowly. Press lightly and leave mostly undisturbed until the skin releases and turns deep golden.
The Role of Marinades
Use a buttermilk marinade for flavor and tenderness. Buttermilk’s mild acidity breaks down muscle fibers and helps the meat stay juicy during high-heat cooking.
Marinate 2–8 hours in the fridge for bone-in thighs. Add garlic powder, a teaspoon of smoked paprika, and a pinch of dried thyme to the buttermilk for more layered flavor.
Rinse and dry well after marinating if you plan to bread. Excess wetness prevents flour from adhering and will soften the coating.
Pat thoroughly and let the thighs rest uncovered in the fridge 15–30 minutes to firm the surface.
If you prefer quick seasoning, skip the soak and dry-brine with salt and spices for at least 30 minutes. This gives you crisp skin faster while still improving internal juiciness.
Breading and Flour Coating
Use a seasoned flour mix for reliable crunch: 1 cup all-purpose flour, 1–2 teaspoons kosher salt, 1 teaspoon black pepper, 1 teaspoon smoked paprika, and ½ teaspoon dried thyme. Toss the flour with the thighs to coat evenly.
For thicker crust, use a wet-dry-wet method: dredge in flour, dip briefly in buttermilk or beaten egg, then finish in seasoned flour again. Shake off excess—too much coating burns and masks the thigh’s flavor.
Fry in oil heated to 350–375°F (175–190°C). Maintain temperature by avoiding overcrowding; cook in batches if needed.
For bone-in thighs, finish in a 375°F oven for 8–12 minutes after searing to ensure the center reaches temperature without burning the crust.
Drain on a wire rack, not paper towels, so steam doesn’t soften the crust. Rest 5 minutes before serving to let juices redistribute.
Using the Instant-Read Thermometer
Insert the instant-read thermometer into the thickest part of the thigh, avoiding contact with bone. Aim for 165°F (74°C) at the bone edge for safe cooking.
Check temperature near the end of searing or after the oven finish. For juicier thighs, remove at 160–162°F and let rest; residual heat raises the internal temp to 165°F during the rest period.
Calibrate and clean your thermometer regularly for accurate readings. Rely on temperature first, color and juices second.
Pan-Fried vs. Deep-Fried Methods
Pan-frying uses less oil and highlights the thigh’s natural flavor. Deep-frying gives a thicker, crunchier crust and faster cook times.
Oven-baked options reduce oil while still producing a crisp exterior when you use high heat and a wire rack.
Pan-Fried Chicken Thighs Technique
Pan-frying works best with skin-on, bone-in thighs or well-brined boneless thighs for juiciness. Pat the skin dry, season or lightly flour, then heat 2–4 tablespoons of neutral oil over medium to medium-high heat until it shimmers.
Place thighs skin-side down and press lightly so the skin makes full contact. Cook 8–12 minutes without moving to render fat and get even browning.
Flip once and reduce heat to finish cooking through. Internal temperature should reach 165°F (74°C).
Drain on a rack to keep the crust crisp. Use a cast-iron or heavy skillet for steady heat and consistent sear.
Deep Frying for Extra Crunch
Deep-frying gives the crispiest coating, ideal for classic fried chicken crunch. Use a heavy pot or electric fryer and enough oil to fully submerge thighs.
Heat oil to 350–375°F (177–191°C) and fry in batches to avoid temperature drops.
Use a wet batter or dry breading for different textures. Batter yields a thicker, crackly crust; breading gives a crisp, textured surface.
Fry bone-in thighs 12–15 minutes; boneless pieces cook faster. Rest on a wire rack to prevent sogginess and check 165°F (74°C) at the thickest point.
Oven-Baked Crispy Alternatives
Baking yields a lower-fat crispy result when you want a lighter option. Preheat to 425–450°F (218–232°C).
Pat thighs dry, season, then brush with a thin layer of oil or use a light breadcrumb or panko coating mixed with a little oil.
Place thighs on a wire rack set over a sheet pan so hot air circulates and skin crisps evenly. Bake 25–35 minutes depending on size, flipping once if needed, until skin is golden and internal temperature reads 165°F (74°C).
For extra crunch, finish under the broiler 1–2 minutes while watching closely.
Step-by-Step Guide to Frying Chicken Thighs
This section shows practical steps you can follow. Learn how long to marinate, how to coat for maximum crunch, the oil temperature ranges and pan choices to hold them, and how to rest and drain so the crust stays crisp.
Marinating and Resting
Marinate bone-in, skin-on thighs in buttermilk or a seasoned brine for 30 minutes to 4 hours. Buttermilk tenderizes and helps spice adhere.
A simple brine (water, salt, sugar, optional garlic or thyme) firms texture and seasons through. Pat thighs dry with paper towels before dredging.
Excess surface moisture prevents a crisp crust and causes oil to spit.
If you skip a wet marinade, at least season the meat under the skin and on the surface 15–30 minutes before frying. Let coated or seasoned thighs rest on a rack in the fridge for 30 minutes if possible.
This helps the coating set and reduces sticking in the pan.
Dredging and Coating
Use a shallow bowl or tray for flour dredging. Mix all-purpose flour with 1–2 teaspoons salt per cup, 1 teaspoon black pepper, 1 teaspoon paprika, and ½ teaspoon garlic powder; add cayenne for heat.
For a thicker crust, double-dredge: flour, then buttermilk (or egg wash), then seasoned flour. Shake off excess flour to avoid clumps that burn.
Press the flour gently into the skin so it adheres without becoming gummy. Arrange coated thighs on a wire rack for 20–30 minutes before frying to set the crust.
If you use a wet batter, choose a thinner coat. Fry slightly longer at lower heat to cook through without overbrowning.
Optimal Frying Temperatures and Equipment
Use a heavy-bottomed or cast iron skillet for even heat retention. Add 1/4–1/2 inch oil for shallow frying, or fill a Dutch oven to 1.5–2 inches for deep frying.
Choose a neutral oil with a high smoke point such as canola, vegetable, or peanut oil. Heat oil to 325–350°F (163–177°C) for bone-in thighs and use a probe thermometer to monitor.
Start at the lower end to cook through without burning the crust. Raise to around 350°F toward the end to deepen color.
Fry in batches so oil temperature recovers quickly. Use a splatter screen and long tongs to turn pieces safely.
If skin sticks initially, wait another minute. It will release when properly crisped.
Draining and Resting for Best Texture
Transfer cooked thighs to a wire rack set over a baking sheet to drain. Place paper towels underneath to catch excess oil, but avoid placing chicken directly on paper.
Rest the thighs 5–10 minutes before serving to let juices redistribute. If any pieces are thick and not done to 165°F (74°C), finish them in a 375°F (190°C) oven for 10–15 minutes to ensure doneness.
Keep finished pieces warm in a low oven (200–220°F) on a rack if serving multiple batches. This preserves crispness and prevents soggy bottoms.
Finishing Touches, Serving Pairings, and Storage
Finish fried chicken thighs with a quick salt sprinkle. Let them rest on a wire rack to keep the crust crisp and juices locked.
Choose sides that balance texture and acidity. Store leftovers promptly in shallow containers to preserve texture and safety.
Classic Sides and Meals
Pair fried chicken thighs with classic, contrasting sides for a satisfying plate. Serve mashed potatoes seasoned with butter and cream to soak up pan juices.
Spoon pan drippings or gravy over the potatoes for richness. Add coleslaw tossed in a light vinegar dressing to cut the fat and introduce a crunchy, acidic counterpoint.
Mac and cheese makes the meal indulgent. Choose a baked version with a crisp breadcrumb top for textural harmony with the chicken’s crust.
For a lighter option, include a simple green salad or roasted vegetables seasoned with salt and lemon. Plate one to three sides per serving so textures and flavors stay balanced.
Handling Leftovers and Reheating
Cool leftover fried chicken within two hours, then refrigerate to prevent bacterial growth. Reheat from chilled in a 375°F (190°C) oven on a wire rack over a baking sheet for 12–18 minutes, flipping once, to revive crispness without drying the meat.
Avoid microwaving whole pieces, as it softens the crust and makes skin soggy. If necessary, microwave briefly to warm through, then finish in a hot skillet or under the broiler for 1–2 minutes to re-crisp.
For best results, reheat only what you plan to eat within one sitting.
Best Practices for Storing Fried Chicken
Place leftover fried chicken in airtight, shallow containers so pieces cool evenly and condensation stays minimal.
Keep the chicken refrigerated at 40°F (4°C) or below. Use it within 3–4 days for best safety and quality.
Label containers with the date if you prepare multiple batches.
For longer storage, freeze pieces on a tray until they become firm. Move them to a freezer bag and remove excess air.
Frozen chicken pieces stay good for 2–3 months.
Thaw chicken overnight in the refrigerator before reheating.
Store breaded pieces separately from wet sides like coleslaw to keep the coating crisp.


