
What to Do if a Chicken Leg Is Broken: Steps for Care and Recovery
A broken leg in a chicken is urgent but often treatable. Act quickly to assess pain, stop bleeding or open wounds, and immobilize the limb to prevent further damage.
If you stabilize the bird, keep it quiet and warm, and seek veterinary care or apply a proper splint, you can greatly increase the chance of recovery.

You can learn how to spot a fracture, take safe first-aid steps, and know when an avian vet is necessary. Practical splinting and pain-management options can help your bird heal and return to the flock.
Recognizing Signs of a Broken Leg in Chickens
Look for an uneven gait, reluctance to bear weight on one leg, and any visible swelling, discoloration, or abnormal angle in the limb. Changes in posture, appetite, vocalization, or activity also suggest pain or distress.
Observing Chicken Limping and Lameness
If your chicken favors one leg, watch closely for limping that does not improve after short rest. A broken leg usually causes the bird to avoid putting weight on the limb or to place the foot at an odd angle when standing.
Walk the bird slowly in a safe space and watch for short-stepped walking, hopping on the good leg, or dragging the injured limb. Sudden onset lameness after a fall or predator encounter increases the likelihood of a fracture.
If the bird refuses to roost, climb, or jump and the limp persists more than a day, arrange veterinary evaluation.
Identifying Visible Deformity or Swelling
Inspect the leg closely in good light. Look for swelling, bruising, open wounds, or an obvious bend or rotation in the bones or joints.
Palpate gently along the bone for abnormal movement, tenderness, or a gap in the bone. Stop if the bird reacts sharply.
Open fractures may show bone protruding through skin or active bleeding. This is an emergency that requires immediate veterinary care.
Compare both legs for symmetry. Even small differences in joint alignment, persistent toe-dragging, or a cold, pale foot can indicate impaired circulation and need prompt attention.
Noticing Behavioral Changes and Signs of Distress
A chicken in pain often sits more, isolates from the flock, or stops scratching and foraging. You may notice reduced appetite, fewer eggs, or increased vocalizations such as sharp cries when you touch the injured area.
Watch for posture changes such as a hunched stance, fluffed feathers, or refusal to move except to escape. Pain can also cause rapid breathing or increased rest periods.
Record when symptoms began and any likely cause, such as a fall or predator interaction. These details help you and your veterinarian decide on the best treatment.
Taking Immediate Action and First Aid
Act calmly, reduce movement, and check the leg, skin, and behavior for signs of pain or severe damage. Provide a quiet, warm place and plan transport to a vet if the injury looks severe or the bird is in obvious distress.
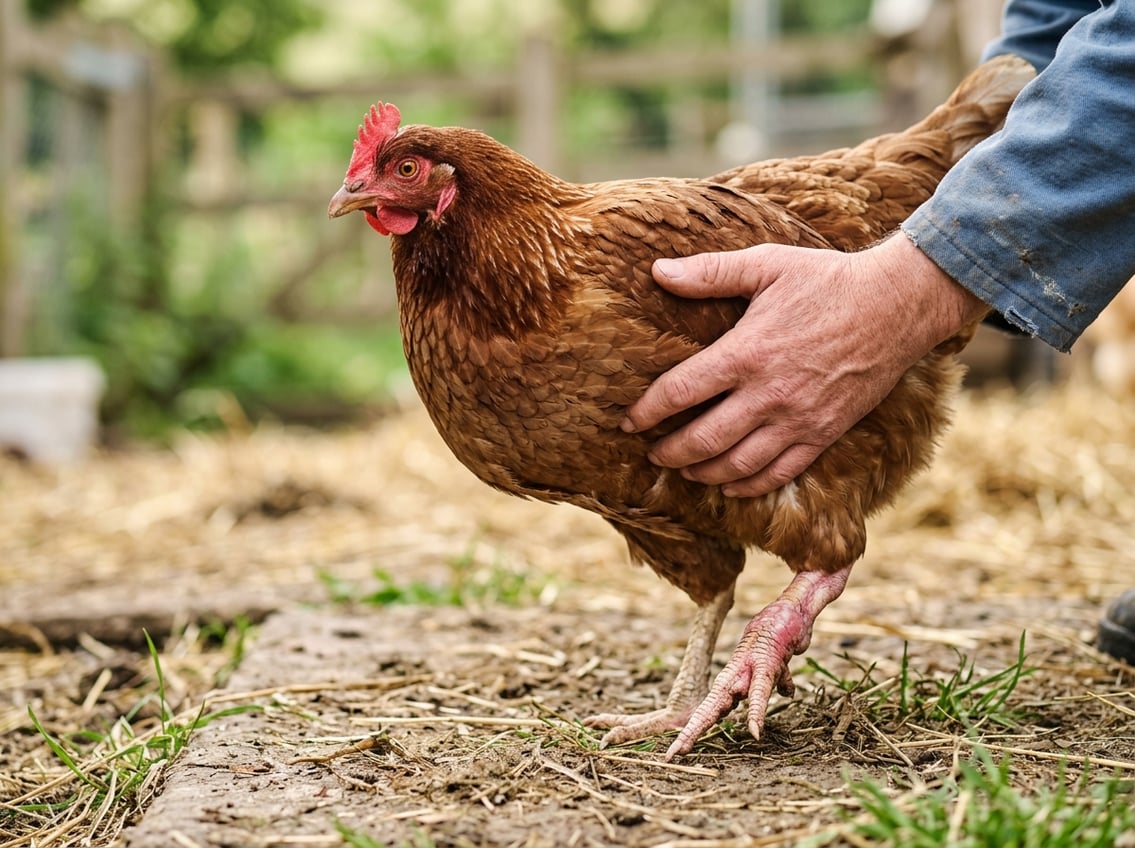
Handling the Injured Chicken Safely
Move slowly and speak softly to avoid increasing the chicken’s stress. Slide one hand under the breast and the other supporting the legs.
Tuck the head gently under your arm if needed to keep the bird still. Avoid tight grabs around the injured leg or pulling on feathers.
If the chicken struggles, wrap it in a towel to limit flapping and protect both of you. Keep the bird horizontal and level to prevent twisting the limb.
Watch for signs of pain such as loud squawking, rapid breathing, or reluctance to put weight on the leg. Stop any handling that worsens those signs.
Isolating the Chicken for Protection
Place the injured chicken in a small, quiet enclosure away from flock mates to prevent pecking and jostling. Line the bottom with soft, non-slip bedding like towels or straw to cushion the leg and prevent sliding.
Keep food and water at ground level within easy reach. If the chicken won’t move to eat or drink, offer small amounts by hand or use a syringe for water.
Maintain a stable temperature and low light to reduce stress and conserve energy for healing.
Assessing for Open Wounds or Complicated Fractures
Look closely for breaks through the skin, bleeding, or bone fragments. These indicate an open fracture that needs urgent veterinary care.
Clean minor dirt with saline. Do not try to push protruding bone back in or apply tight bandages.
Check for deformity, severe swelling, abnormal angles, or inability to move the joint. These signs suggest a complicated fracture or dislocation.
If the bird refuses to use the leg and shows vocal distress, prompt professional assessment is needed.
When to Consult an Avian Veterinarian
If a chicken shows severe pain, an open wound, or cannot bear weight, seek professional care promptly. A veterinarian can determine whether splinting, surgery, antibiotics, or euthanasia is the most appropriate option.
Situations Requiring Emergency Vet Attention
Call an avian veterinarian immediately if the bone pierces the skin, the leg hangs at an odd angle, or the bird bleeds heavily. Open fractures risk infection and require antibiotics and wound care that only a vet can provide.
If the chicken is in shock—pale comb, rapid breathing, weak or unresponsive—transport it quietly and warmed to your vet right away. Sudden collapse, severe swelling with progressive discoloration, or an injury after a fall or attack also require emergency care.
Early radiographs and proper alignment by an avian veterinarian reduce the risk of malunion, chronic lameness, and long-term pain.
What to Expect During Veterinary Assessment
Your avian vet will begin with a focused history such as time and cause of injury, prior lameness, and housing conditions. They will perform a physical exam, checking the limb, skin, hydration, and pain level.
Radiographs help locate the fracture type and displacement. The vet may use sedation or anesthesia for accurate imaging and handling.
The vet will discuss options such as splinting and cage rest, external coaptation, external fixator, or internal fixation, plus pain control and antibiotics.
You will receive instructions on aftercare, medication schedules, and follow-up. The vet may estimate prognosis and healing time and explain costs and risks.
Home Stabilization and Splinting Techniques
Stabilize the bird quickly, control bleeding or open wounds, and keep the leg immobile while you prepare materials. Use clean, firm supports and check circulation often after applying any splint.
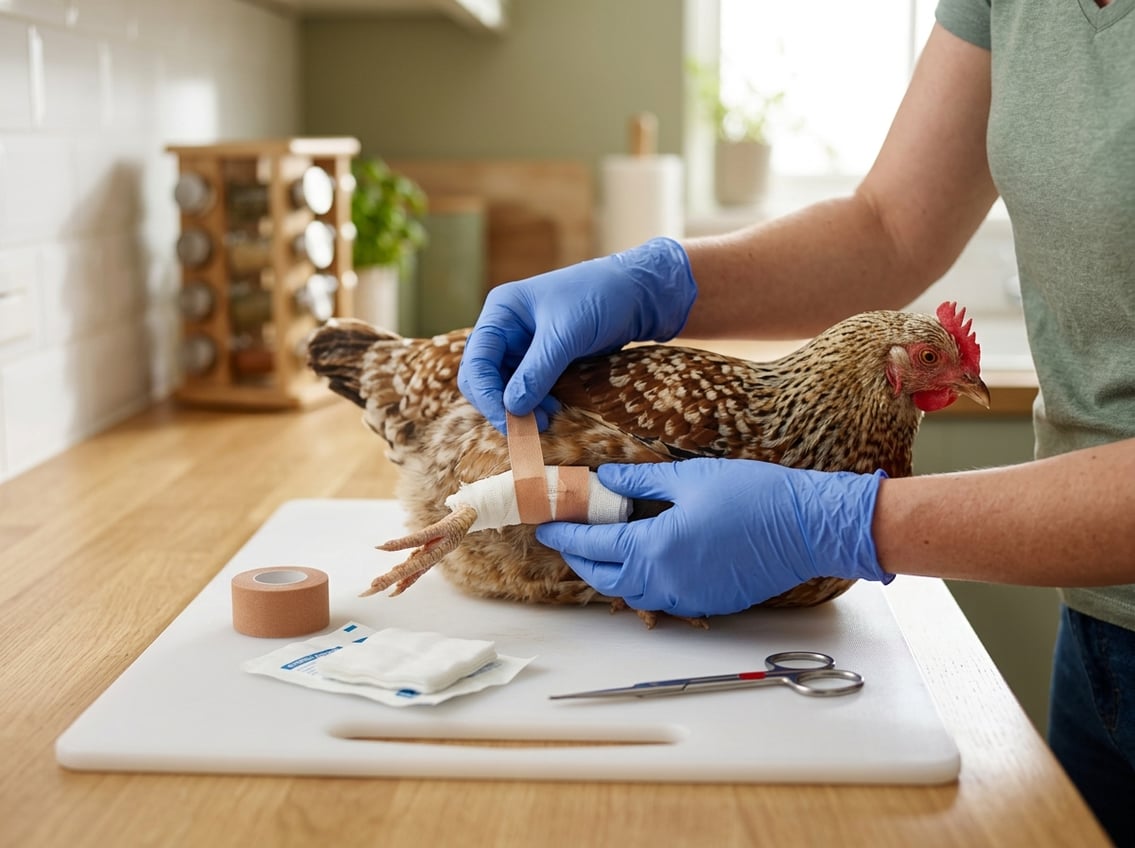
Preparing and Applying a Simple Splint
Gather two flat sticks or tongue depressors, soft padding, self-adherent wrap or medical tape, scissors, and antiseptic. Work in a quiet, well-lit area and have an assistant gently hold the chicken upright.
Clean any wounds with antiseptic and apply a thin layer of sterile gauze over broken skin. Position padding along the leg so the splint won’t press directly on skin or wounds.
Place the two rigid supports on the inner and outer side so they extend at least one joint above and below the suspected break. Align the limb in a natural, weight-bearing orientation; do not force straight if you meet strong resistance.
Wrap padding lightly, then secure the splints with self-adherent wrap in overlapping turns. Leave toes and the foot exposed for circulation checks.
Test capillary refill by pressing a toenail until pale, releasing, and ensuring color returns within two to three seconds. Loosen and rewrap if circulation is slow or if the bird seems distressed.
Using a Schroeder-Thomas Splint for Complex Fractures
A Schroeder-Thomas splint offers traction and better alignment for mid-shaft femur or tibiotarsus fractures when veterinary care is delayed. You’ll need a padded metal or sturdy PVC frame, a crossbar, straps or tape, and padding.
Apply only if you can safely restrain the bird and understand traction basics. Place padding under the limb, fit the frame along the leg, and attach straps above and below the fracture.
Gradually apply mild longitudinal traction with the crossbar to align limb length. Stop if you feel sharp resistance or the bird shows severe pain.
Secure the frame so the leg is stable but not hyperextended. Check skin under straps daily for pressure sores and recheck toe perfusion every four to six hours.
A Schroeder-Thomas is a temporary measure. Seek a poultry or avian vet for radiographs and definitive care as soon as possible.
Guidelines for Bandaging and Monitoring
Bandage loosely enough to allow movement of the joints not being immobilized. Use breathable materials and change dressings daily or sooner if wet or soiled.
Keep the splinted bird in a small, clean recovery pen with soft bedding to prevent further injury.
Monitor these signs every four to eight hours: toe color and temperature, swelling above or below the splint, appetite and droppings, and any foul odor from the wound.
If toes become cold, bluish, or numb, or if the bird shows worsening pain, remove or loosen the bandage immediately and get veterinary help.
Document daily progress with simple notes or photos to track swelling and alignment.
Expect to maintain a splint for two to six weeks depending on fracture location and bird size. Consult a vet before removing any long-term immobilization.
Managing Pain and Preventing Complications
Act quickly to reduce pain, limit movement, and keep the wound clean. Stabilize the bird, arrange veterinary care, and monitor for signs of infection or worsening pain.
Providing Pain Relief and Comfort
Isolate the injured chicken in a quiet, warm carrier with soft bedding to prevent further stress or movement. Offer water and easy-to-eat feed at head height so the bird can drink and eat without standing.
Contact an avian veterinarian for specific pain medication dosing. Do not give human medications without explicit veterinary instruction.
If you cannot reach a vet immediately, apply short-term comfort by supporting the leg with a temporary padded splint to reduce motion and lower pain, ensuring it’s not so tight that circulation is cut off.
Check toes and comb for warmth and color every few hours. Minimize handling after initial treatment.
Record breathing rate, appetite, and mobility. Worsening signs such as panting, refusal to eat, pale comb, or rapid swelling require urgent veterinary attention.
Preventing Infection After Injury
If the skin is broken, stop bleeding with gentle pressure using clean gauze and rinse the area with sterile saline or clean water to remove debris. Apply a topical antiseptic safe for birds, such as diluted povidone-iodine, sparingly while avoiding deep wound packing.
Keep the bird in a clean, dry environment and change bedding daily until healing begins. Use a sterile dressing over open wounds and secure a splint or bandage so it stays dry.
Replace wet or soiled dressings immediately. Watch for redness, foul odor, discharge, increased heat, or systemic signs like lethargy or decreased appetite, as these indicate infection.
An avian veterinarian may prescribe systemic antibiotics or perform wound care and radiographs to assess for bone involvement. Follow the vet’s full course of antibiotics and return for rechecks to prevent complications.
Supporting Recovery and Long-Term Care
Create a calm, accessible space and follow a staged rehab plan. Change coop features to reduce recurrence risk.
Prioritize pain control, regular checks by an avian veterinarian, and slow increases in activity.
Setting Up a Safe Recovery Environment
Isolate the injured bird in a small, quiet pen where it cannot jump or be pecked. Use a two to four foot square enclosure lined with soft bedding and low walls to keep the chicken contained but visible.
Place food and fresh water at ground level within arm’s reach. Use shallow bowls to avoid stretching or stepping.
Provide a flat, wide perch no higher than two to three inches only if the chicken can safely hop up. Otherwise, remove perches until weight-bearing improves.
Keep ambient temperature steady and draft-free to reduce stress. Check the splint or bandage twice daily for swelling, foul odor, heat, or loss of circulation.
Contact an avian veterinarian immediately if you see pale toes, cold skin, or continued severe limping.
Promoting Gradual Rehabilitation and Mobility
Begin guided mobility once the vet confirms the fracture is stable and pain is controlled.
Start with supervised 10–15 minute floor sessions twice daily so the bird can stand and take a few steps. Increase duration gradually as weight-bearing improves.
Offer high-value treats a short distance away to encourage stepping without forcing movement.
Use low ramps (10–15°) and non-slip surfaces to rebuild strength while protecting the healing bone. Remove any obstacles that might tempt sudden jumps.
Visit the avian veterinarian every 7–14 days or as advised for X-rays and splint adjustments.
If the bird continues to limp beyond the expected healing time, ask the vet to reassess for malalignment, joint involvement, or infection.
Preventing Further Injury in the Flock
Lower perch heights and add non-slip flooring to reduce risks. Space perches so birds cannot crowd or push each other.
Repair sharp edges and secure fencing to prevent falls. Stop predator scares that cause sudden flight.
Keep the recovering bird separated until it walks normally and can defend itself. Reintroduce it during calm periods and monitor for bullying or persistent pecking.
Intervene immediately if the injured chicken shows signs of stress or renewed injury. Maintain routine health checks and ask your avian veterinarian about vitamin D, calcium, and protein adjustments to support bone health.
Record incidents and fixes to reduce repeating the same hazards in the future.


