
How Long to Cook Something at 200 Instead of 180? Adjusting Cooking Times for Higher Temperatures
If you lower the oven temperature from 200°C to 180°C, you’ll need to bump up the cooking time to get the same results. A handy rule: add about 10-15% more time when you’re cooking at 180°C instead of 200°C.
So if a recipe calls for 30 minutes at 200°C, you’ll probably want to cook it closer to 34 or 35 minutes at 180°C.

This tweak helps your food cook through without burning or drying out. The exact change depends on the dish, but this quick calculation can really save you from undercooked meals.
If you’re looking for more precise tips or want to know why these changes matter, let’s dig into some examples for different types of dishes.
Adjusting Cooking Time from 180°C to 200°C

When you crank your oven up from 180°C to 200°C, you should cut the cooking time to avoid overcooking or burning. The amount you shave off depends on what you’re making and its size.
You’ll also want to pay attention to how the extra heat affects texture and moisture, so your food doesn’t dry out or get tough.
Recommended Time Reductions
A common approach is to reduce the time by about 10-15% when you go from 180°C to 200°C. If your recipe says 30 minutes at 180°C, try about 26 minutes at 200°C.
Here’s a quick table for reference:
| Original Time | Adjusted Time at 200°C (approx.) |
|---|---|
| 30 minutes | 26 minutes |
| 40 minutes | 34-36 minutes |
| 60 minutes | 51-54 minutes |
Check your food early to avoid overcooking. This adjustment lines up with advice from plenty of baking and roasting guides.
How Temperature Impacts Cooking Results
Raising the temperature speeds up cooking because heat transfers faster. The outside of your food will brown or crisp up quicker, which can be great if you want a nice crust.
But the inside? You’ll need to watch it. Higher temps make moisture evaporate faster, and that can dry things out or make them tough.
Keep an eye out and test for doneness sooner than you usually would. Delicate foods or those with lots of sugar can burn fast at higher heat, so even a small time change matters.
Safeguarding Food Texture When Increasing Temperature
Want to keep your food moist and tender at higher heat? Try these:
- Move the rack lower in the oven to slow browning.
- Cover edges with foil if they’re getting too dark.
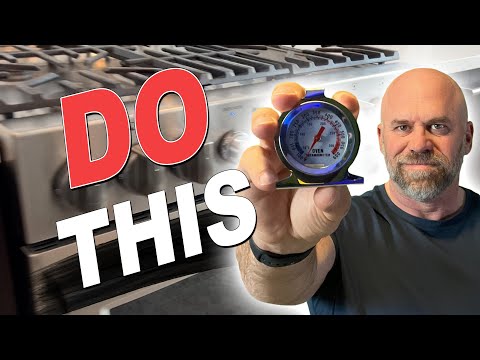
- Use a meat thermometer for roasts and poultry.
- Add a small pan of water to the oven, or brush food with oil or butter.
Adjusting time and using these tricks can really help protect your food’s texture. Timing and temperature work hand in hand—changing just one can throw things off.
There’s a good write-up on how to adjust cooking times for different temperatures if you want to go deeper.
Practical Tips for Oven Cooking Adjustments
When you bump the oven up from 180°C to 200°C, food cooks faster. You’ll need to watch things closely to avoid overcooking and figure out just how much time to cut.
Different foods might need different time tweaks depending on their texture and how much moisture they have.
Monitoring Doneness During Faster Cooking
Cooking hotter means your food browns and cooks faster on the outside. To avoid burning, check your dish a few minutes earlier than you normally would.
Set a timer for about 75-85% of the original cooking time. That gives you a buffer.
Test baked goods by sticking a toothpick or knife in the center. For meats, grab a meat thermometer and check the internal temp.
Watch for color, texture, and aroma—they’re solid clues your food’s ready. Near the end, peek in every 5 minutes or so.
If things look uneven, just rotate the pan. Sometimes that’s all it takes for a more even finish.
Common Foods and Specific Adjustments
A lot of recipes call for 180°C for about 30 minutes. If you bump the oven up to 200°C, shave off about 10-15% of the cooking time.
So, you’d cook for maybe 27 minutes instead of 30, but honestly, it’s smart to check a little early just in case. Overcooked food is just the worst.
Cookies and thin cuts of meat react really quickly when you change the temperature. Drop the time by almost 20%, or maybe even check sooner if you’re nervous.
Denser stuff, like casseroles or big roasts, doesn’t need as much of a change. Still, keep an eye on the temperature—they can surprise you.
Here’s a quick guide:
| Food Type | Original Time at 180°C | Approx. Time at 200°C |
|---|---|---|
| Cookies | 12-15 minutes | 10-12 minutes |
| Chicken breasts | 25-30 minutes | 22-25 minutes |
| Casseroles or roasts | 60-90 minutes | 55-75 minutes |
Start checking early. Use a thermometer or even just a toothpick—whatever works for you.
If you want to dive deeper, there’s a more detailed breakdown at Stonesoup’s guide.


